
This post may contain affiliate links. Please read our disclosure policy. As an Amazon Associate, I earn from qualifying purchases.

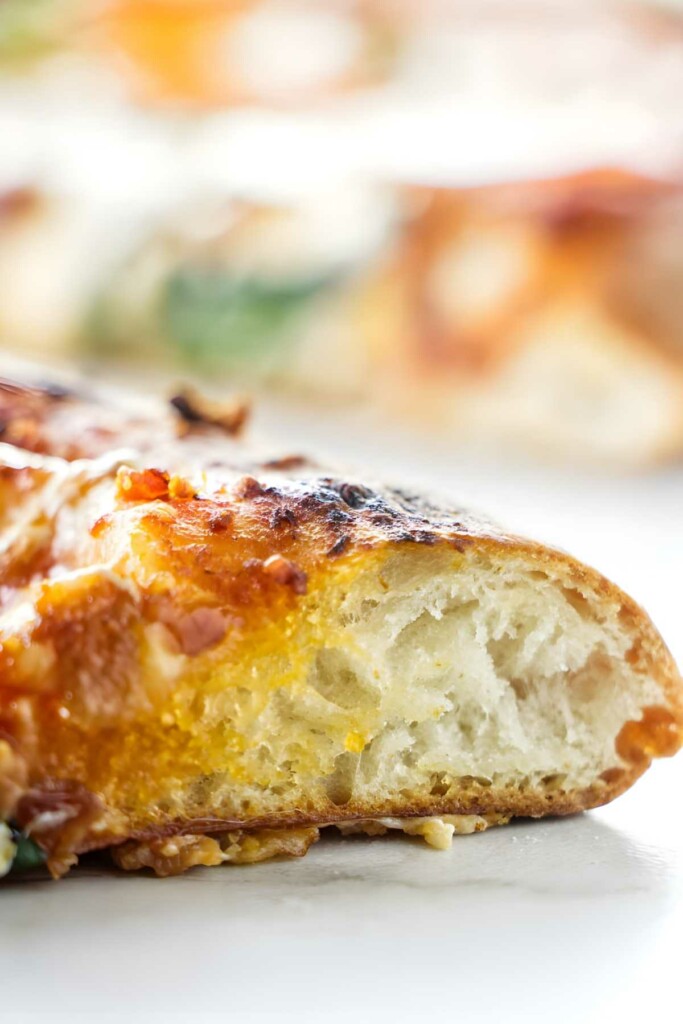
Quick pizza dough doesn’t have to mean bland or boring. This one comes together fast, holds its shape like a champ, and bakes up with that proper chewy texture and crisp edges you actually want.
No gimmicks, no mystery ingredients, just dependable dough that’s easy to work with and freezer-friendly, too. Roll it out on a whim or stash a few portions in the freezer for later. Either way, this crust delivers without the wait.
Here is Why This Quick Pizza Dough Recipe Works
Fast rise, real results: Thanks to Quick-Rise yeast (or RapidRise yeast), the dough is ready to shape in about 15 minutes, not 90.
Freezer-friendly: Make a batch, freeze some, and future-you will be glad you did.
Use whatever flour you’ve got: Bread, all-purpose, or pizza flour all work, each one brings a slightly different texture, but you’ll get a great crust either way.
Legit pizza texture: Chewy, crisp-edged, and sturdy enough to hold toppings without turning into a floppy mess.
What kind of flour should I use for this pizza dough?
It depends on what kind of crust you’re after, but the good news is, most common flours work just fine. Here’s a quick breakdown:
All-purpose flour: Gives you a slightly chewy crust with more crispiness. Great if you want something classic and easy.
Bread flour: Higher protein = more gluten = more chew. It creates a slightly puffier, more elastic crust.
’00’ pizza flour: Super finely milled with high gluten content, but it behaves differently than bread flour. You’ll get that crisp-meets-chewy texture, and the dough is easy to stretch.
No need to overthink it, use what you’ve got. The dough is forgiving, and each flour brings something a little different to the table.

Recipe Tips
Use warm water: Aim for around 110°F to speed up the activity of the yeast and get a fast rise.
Use a kitchen scale if you’ve got one: Measuring by weight is far more accurate, especially with flour, which can vary a lot by volume.
Start with less flour: It’s easier to fix sticky dough than to rescue a dry brick. Add more only as needed.
Oil your hands: Sticky dough clings to dry hands. A little olive oil makes shaping way easier (and adds a bit of flavor, too).
Warm it up: Cold kitchens slow everything down. Let the dough rise somewhere warm to speed things up and improve texture.
Let the dough rest: Even a 10-minute bench rest helps the gluten relax, so the dough stretches without snapping back.
Skip the rolling pin for bubbly crust: Use your hands to stretch the dough if you want those nice air pockets
Use parchment : Keeps the crust from sticking and makes clean up easier.
Pro tip: If you’re using a baking steel or stone, let it preheat for at least 30 minutes for the best bottom crust.
Don’t overload the toppings: Too much sauce or cheese = soggy crust and sad pizza night.
Answers to Common Dough Dilemmas
Baking homemade pizza is straightforward, but a few small tweaks can help you get that golden, bubbly finish:
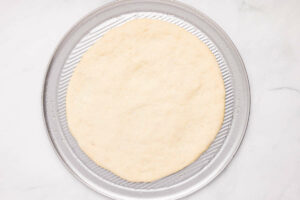
Shape the dough into 10–12″ rounds and place on parchment or press into a greased sheet pan
If you’re using a pizza peel and stone, dust the peel with cornmeal and shape the dough right on top
Add pizza sauce and toppings of choice. (My White Garlic Sauce for Pizza is also a good choice.
Bake at 450°F for 12 to 15 minutes, or until the crust is golden and the cheese is melted and bubbly
This dough works with just about any pizza. Here are some ideas:
– Mushroom pizza with garlic sauce
– Chicken spinach pizza
– Chicken-mushroom pizza
– Mexican chicken pizza
– Buffalo chicken pizza
– Sausage and onion pizza
Storing Leftovers
- Refrigerate: Extra dough can hang out in the fridge for up to 3 days. Lightly coat it in oil and seal in a container or zip-top bag.
- Freeze: Wrap each dough ball in plastic, then stash in a freezer bag with the air pressed out. Freeze for up to 3 months.
- To thaw: Thaw dough in the fridge overnight, then let it rest at room temp for 20–30 minutes before shaping.
For more pizza dough recipes, try my sourdough pizza dough and my whole grain Einkorn pizza crust. I also have an Ooni pizza dough with a lower hydration.
Reliable Homemade Pizza Dough
Quick pizza dough that’s fast, reliable, and actually tastes like real pizza? This one delivers. It’s flexible enough to handle weeknights or freezer prep, and the short rise time doesn’t mean you’re sacrificing texture. Crisp edges, chewy center, no special flour or drama required. Once you see how easy it is, store-bought dough won’t stand a chance.
Pin this now to find it later!
Pin It
Fast Pizza Dough
If you make this recipe, please leave a star rating and comment.
Ingredients
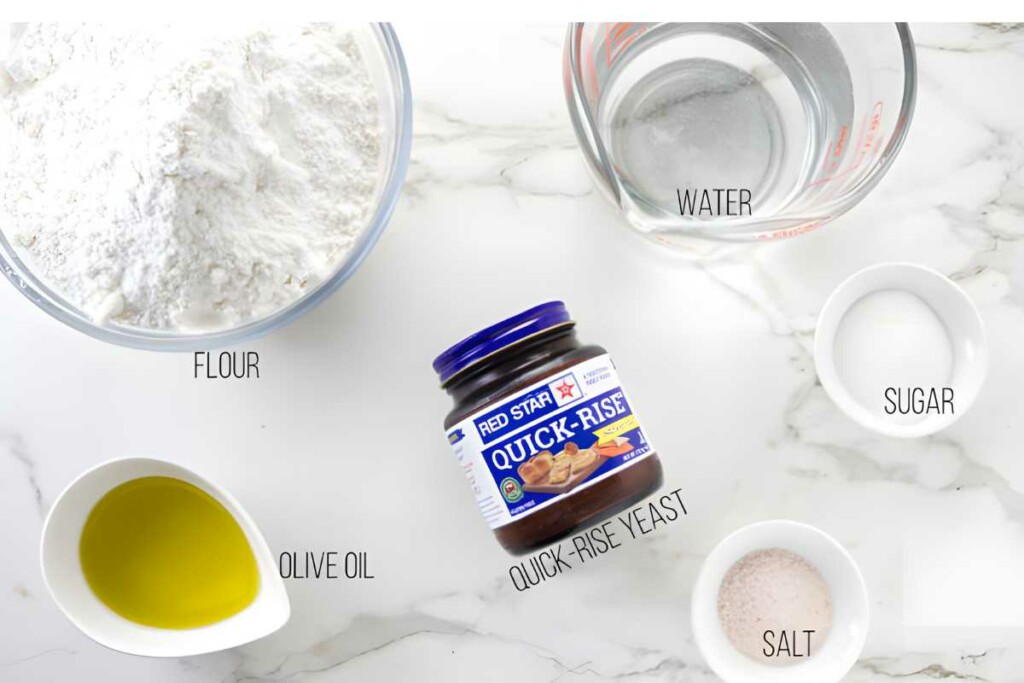
- 4 to 4½ cups all-purpose flour, pizza flour, or bread flour (480 to 540 grams)
- 1 tablespoon granulated sugar, (13 grams)
- 2 teaspoons salt, (12 grams)
- 2¼ teaspoons Quick Rise Instant yeast, (7 grams or 1 packet)
- 1½ cups water, warm; (354 grams)
- 3 tablespoons olive oil, (39 grams)
Instructions
- Preheat the oven to 450°F if you plan to bake a pizza (otherwise you can freeze the dough after you make it).
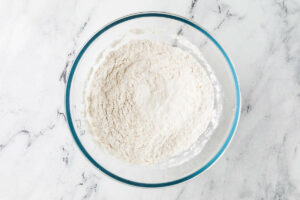
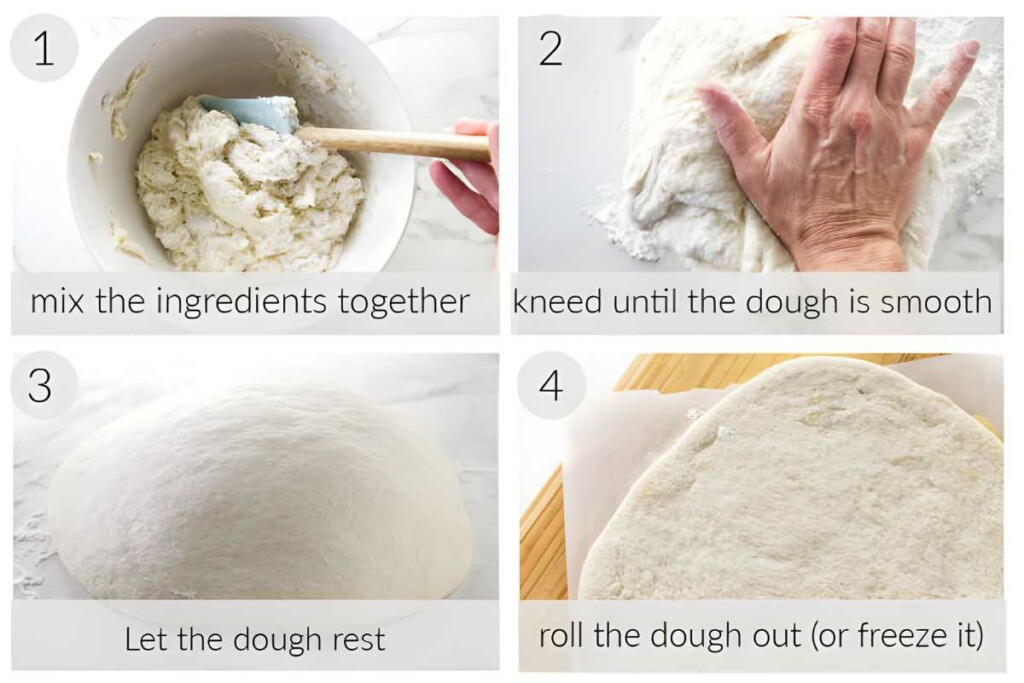
- Combine 4 cups of flour, sugar, salt, and yeast in a mixing bowl and whisk together.
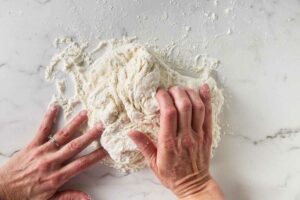
- Add the water and olive oil. Mix until blended. If it is too wet, gradually add enough flour to make a soft dough. The dough should be slightly sticky.

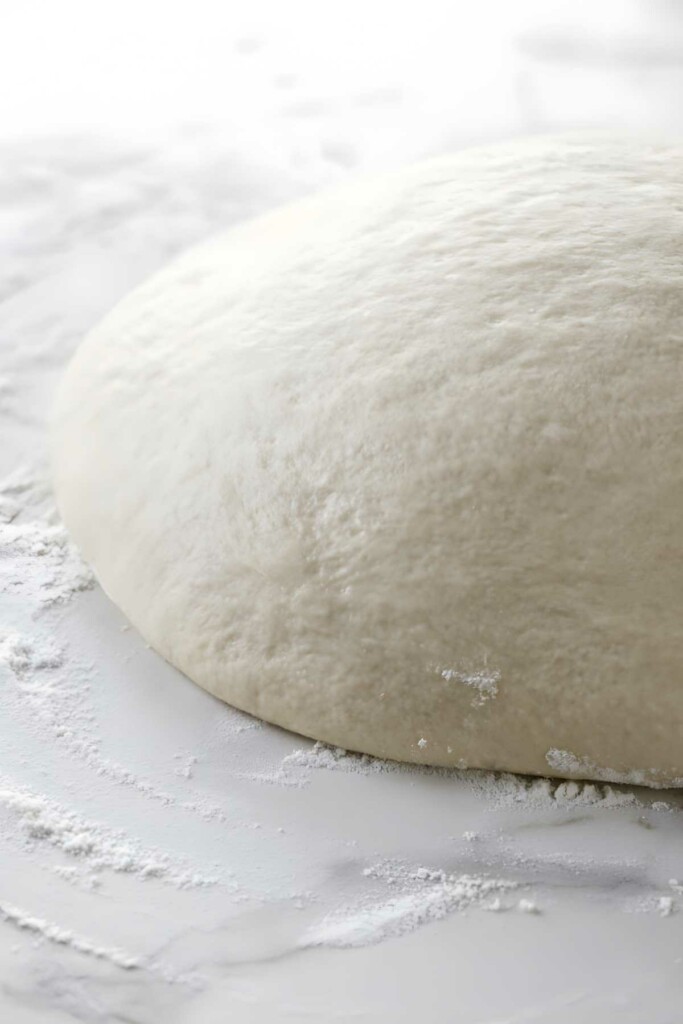
- Transfer the dough to a floured surface and knead until smooth, about 5 minutes (you can also use your stand mixer with a dough hook).
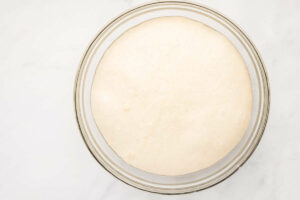
- Place the dough in a greased bowl and let it rest on the counter for 10 to 15 minutes if you use Quick Rise instant or for 60 to 90 minutes if you use standard instant yeast. The dough should almost double in size.
- Divide the dough into two balls.
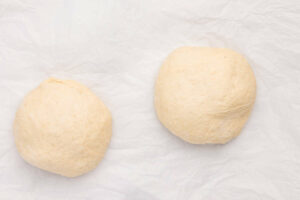
- At this point, you can either freeze the dough or prep it for a pizza.
To freeze the dough:
- Coat each ball of dough in some olive oil. Wrap the dough in plastic wrap then slide it into a zipper-seal bag.
- Squeeze all the air out of the bag then freeze if for up to 3 months.
To Bake the pizza:
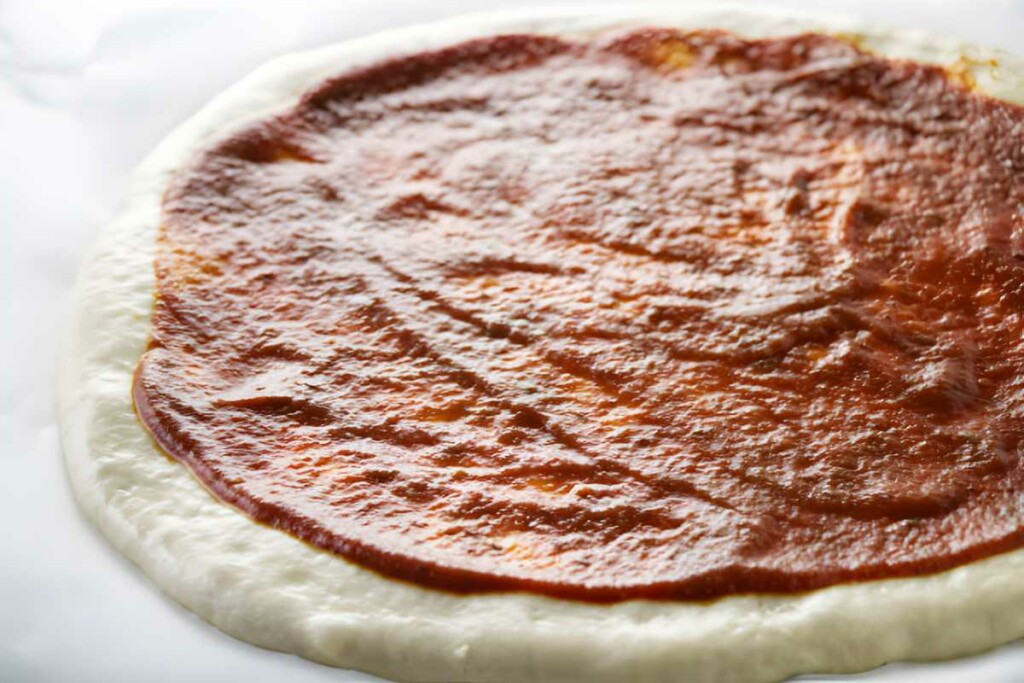
- Roll the balls of dough into 10 to 12” circles and place them on a sheet of parchment paper (or press them into a greased sheet pan). Form a rim around the pizza dough by rolling the edges in and pinching.
- Spread pizza sauce on the dough and add your desired toppings.

- Bake for 12 to 15 minutes until the edges are golden brown and the cheese is bubbly (a thicker crust will need to bake for 20 to 22 minutes).
Notes
Nutrition
Nutrition information is automatically calculated, so should only be used as an approximation.
 Like this recipe? Rate & comment below!
The Process Photos


So I just took mine out of the oven! It looks beautiful but I’m fearful the crust is going to be dense! I used a scale to weigh the flour, the dough was really tacky, hard to work with so I added 1/2 cup more flour.
Thanks for the comment. Adding extra flour can sometimes make the crust a bit firmer. The tackiness of the dough is intentional, it helps keep the final texture soft and airy. A little stickiness is okay, but if it’s too difficult to handle, lightly flouring your hands and work surface can help without altering the dough’s hydration too much.
If you make it again, try adding flour just a tablespoon at a time until it’s manageable rather than adding a full ½ cup at once. I’d love to hear how the final crust turned out for you!
Can I prep this dough the day before using it without having to freeze it?
Yes, absolutely! You can prep the dough the day before and let it cold ferment in the fridge. Just cover the bowl tightly with plastic wrap or transfer the dough to an airtight container. When you’re ready to use it, let it come to room temperature for about 30 to 60 minutes before shaping. The overnight rise will actually enhance the flavor.
Can this dough be prepped a few hours ahead of time and put in the fridge?
Yes it can. Let it sit at room temperature for at least 30 minutes before you stretch it, otherwise cold dough is difficult to shape. Thanks for the question.
Oh my!!! This has become a family favorite from my first try! Everyone loved it and have asked for the recipe. So simple and quick! I have experimented with adding spices and parmesan cheese to the dough…..it’s so versatile! It is crisp on the outside and soft and airy on the inside! Today, I’m making a pizza and cheesy bread twists with the second batch of dough….can’t wait!
Adding spices and parmesan sounds like a fantastic twist. There is so much room for creativity! Your pizza and cheesy bread twists sound incredible. I hope they turn out just as delicious! Thanks for sharing your experience!
Turned out amazing! I used a skillet and it was so good!
Question: if I want to do the overnight ferment, do I reduce the yeast BY 1/4 tsp making it 2tsp total or reduce TO 1/4 tsp meaning only 1/4 tsp?? Just wanted to clarify what was written! Thanks!
Great question! For an overnight ferment, you would reduce the yeast to 1/4 teaspoon total. This smaller amount of yeast allows the dough to rise slowly in the fridge overnight, developing more flavor without overproofing.
When you’re ready to use the dough, let it sit at room temperature for about 30 minutes to 1 hour before shaping and baking to make it easier to work with.
10/10! I made this tonight for my boyfriend and I, we both loved!!
It made 2 10” cast iron skillet pizzas (500° for 14 min) – one being stuffed crust + one 8” (thin) cheese sticks.
This will be my go to recipe. I did use vegetable oil instead of olive just because I didn’t have any & it worked perfect.
Thank you so much for the glowing review! I’m thrilled to hear it’s a new go-to recipe for you. Happy pizza nights ahead, and thanks for sharing your experience!
This was super easy to make and quick. I used bread flour and regular yeast (what I had on hand) I don’t usually knead by hand but it was so easy to work with. The pizza crust was exactly what I wanted light inside and crisp on the bottom. I will definitely make this my go to recipe
Thank you for sharing! I’m so glad the recipe worked well for you, even with the substitutions. Happy to hear it’s your new go-to. Thanks for the comment.
Can I bake it in a cast iron skillet?
Yes, absolutely! Baking the pizza dough in a cast iron skillet works wonderfully. It helps create a crisp, golden crust while keeping the inside soft and chewy.. especially if you preheat the skillet. Just be sure to add a light coat of oil to prevent sticking.
I usually use my stand mixer for making bread style doughs. I decided to kneed it by hand and it came together so well. Definitely friendly to those who do not have a mixer! 10/10 recipe, flavor, and execution!
I’m so glad to hear that kneading it by hand worked so well for you! Thank you for the 10/10 review, your feedback made my day!
I feel like I had to use way more than 4 cups of flour to make a solid ball that I could knead..like 6 cups…is that normal?
It’s not uncommon for the amount of flour needed to vary a bit. Six cups of a big difference though.
Keep in mind, you want the dough to be pliable and not too dry, adding too much flour can make the pizza crust denser. If you have a kitchen scale, weighing the flour and water can help ensure your measurements are accurate.