
This post may contain affiliate links. Please read our disclosure policy. As an Amazon Associate, I earn from qualifying purchases.
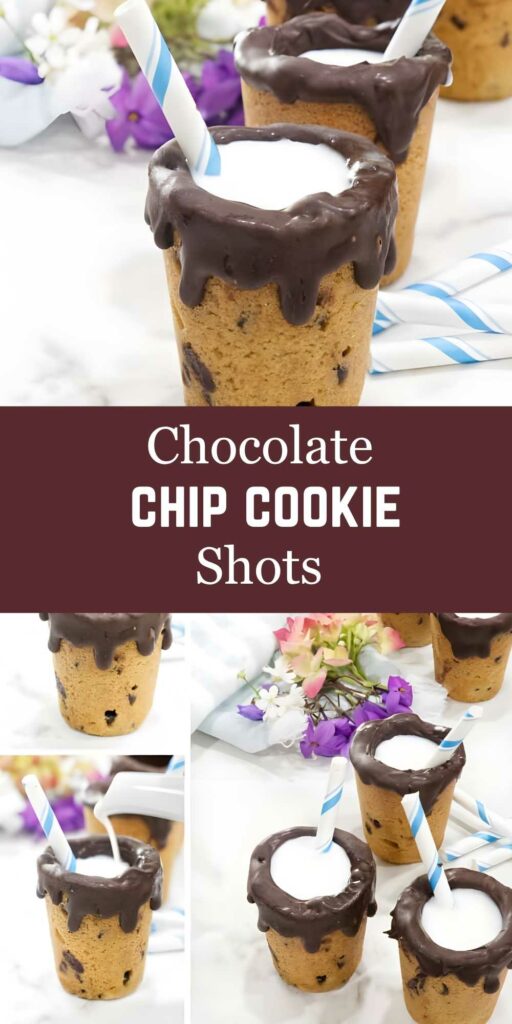
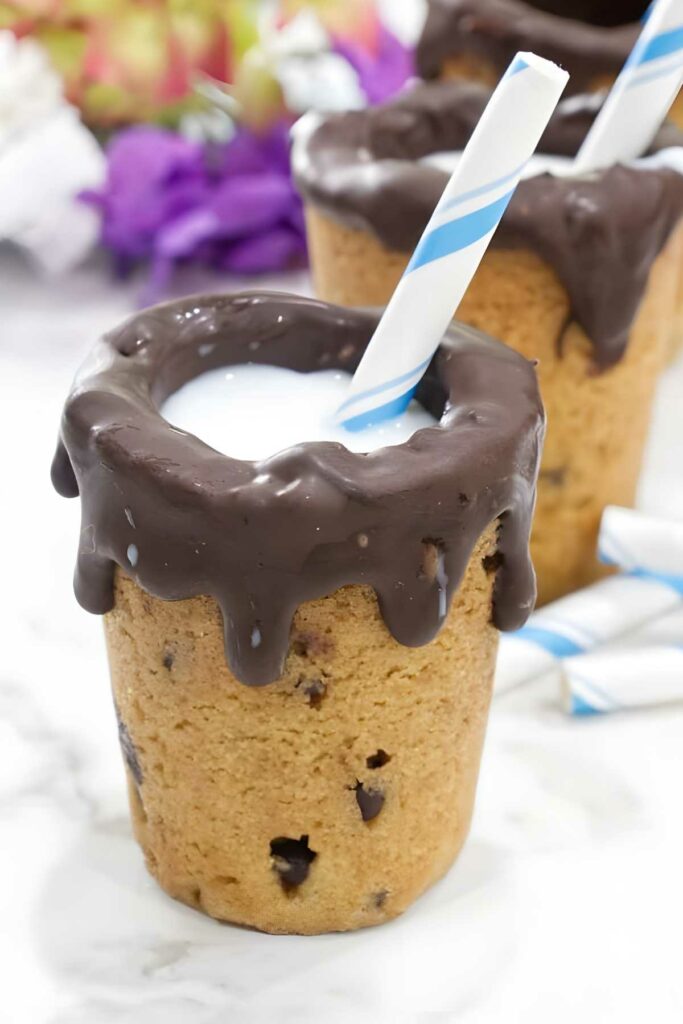
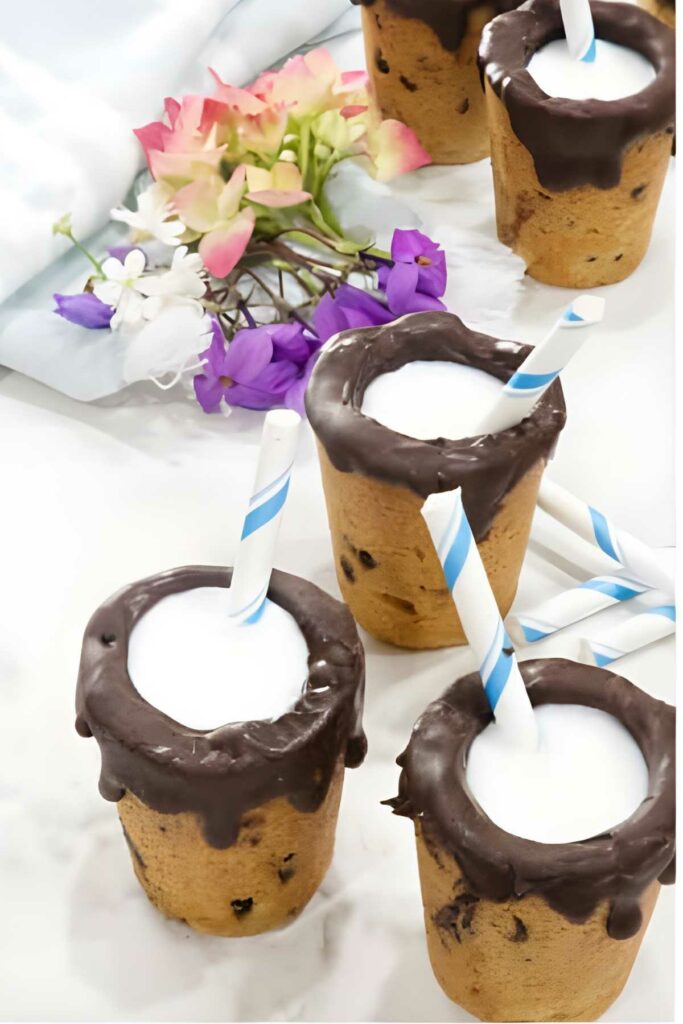
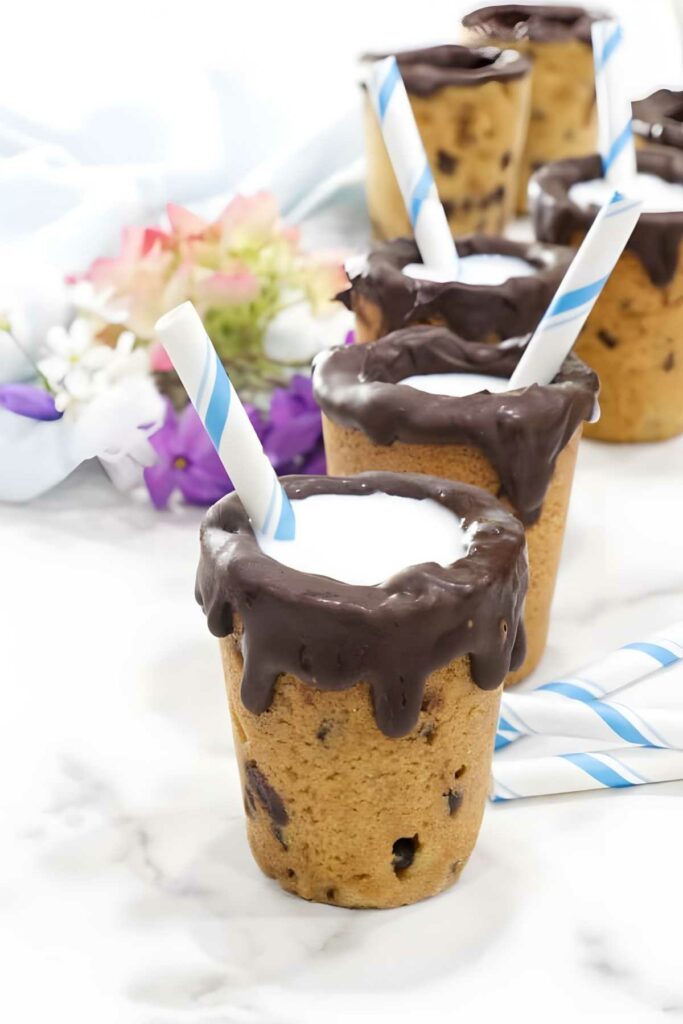
Because drinking milk out of a regular glass is boring. These chocolate chip cookie shots are crispy, chewy, and lined with melted chocolate.
Basically a dessert and a drinking vessel in one. Fill ’em with milk, Bailey’s, or whatever mischief you’re into. They’re part treat, part party trick, and totally worth the hype.
Here’s Why This Cookie Shot Glass Recipe Works
The dough holds its shape: This cookie base is thick, sturdy, and built to bake into molds without collapsing or spreading.
Mini chips mean smooth interiors: Tiny chocolate bits mix evenly and stay out of the way when you coat the cups.
Double-duty chocolate coating: It prevents leaks and adds a rich bonus layer of flavor.
They’re make-ahead friendly: Bake, coat, and stash them until you’re ready to pour and serve
Recipe Tips
Use mini chips or finely chopped chocolate. Big chunks won’t behave. They’ll tear the dough and fight the mold.
Don’t skip the chill. Cold dough holds its shape better. Warm dough turns into a hot mess.
Scrape mid-bake. Press the inserts down halfway through, then scrape off any overflow while it’s still warm for smooth, clean edges.
Let them cool with the inserts in. Yanking them out too soon is a fast track to cracked cups. Be patient.
Seal the deal. Give the chocolate coating a second swipe to catch any sneaky gaps and keep the leaks at bay. Then double check to make sure there aren’t any gaps in the chocolate coating.
Storing Leftovers
Refrigerate: Store cookie shooters in an airtight container for up to 5 days.
Freeze: Freeze unfilled, chocolate-coated cookie shots for up to 2 months. Thaw at room temp before serving.
Want to mix things up? Try our spelt chocolate chip cookies for a nutty twist or go green with these matcha chocolate chip cookies.
Edible Cookie Shot Glass
Chocolate chip cookie shots bake up crisp-edged, chewy in the center, and lined with chocolate to prevent leaks. Fill them with milk, Baileys, or whatever you’ve got on hand. They hold their shape and bring the fun to the party.
Got sourdough starter to use up? Try using my sourdough chocolate chip cookie recipe for the cookie shooters.
Pin this now to find it later!
Pin It
Chocolate Chip Cookie Shots
If you make this recipe, please leave a star rating and comment.
Equipment
Ingredients
- 1 cup butter, 2 sticks, softened
- 1 cup brown sugar
- ¾ cup granulated sugar
- 2 large eggs
- 1 ½ teaspoons vanilla extract
- 4 cups all-purpose flour, 480 grams
- 1 ¼ teaspoons salt
- ¼ teaspoon baking soda
- ¾ cup mini chocolate chips
To coat the inside of the cookie shots:
- 10 to 12 ounces chocolate, finely chopped
Instructions
This recipe uses this cookie shot glass mold.
- Toss the butter and both kinds of sugar into a mixing bowl. Beat for a couple of minutes until it is light and creamy. Add the eggs and vanilla and beat well.
- In a separate bowl, combine the flour, salt, and baking soda then gradually add the flour mixture to the butter mixture. The dough will be thick and stiff.
- Stir in the mini chocolate chips. For best results, refrigerate the dough for one or two hours.
- Pre-heat the oven to 350°F while the cookie dough chills.
- Pack balls of chilled cookie dough into the cookie shot mold. Press the inserts into the center of each mold. Some cookie dough will push up and out of the mold. Leave the inserts in place and scrape the excess cookie dough away.
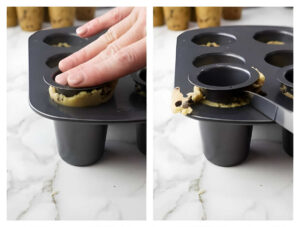
- Bake for 20 to 22 minutes. Halfway through the baking time, use an oven mitt and push the inserts down again. Cookie dough will expand out of the mold as it bakes but you can remove the excess later.
- When the baking time is finished, let the cookie shots cool for a few minutes so you can handle the mold without getting burned. While the cookie shots are still warm and with the inserts still in place, scrape away the excess cookie dough that expanded out of the mold while baking.
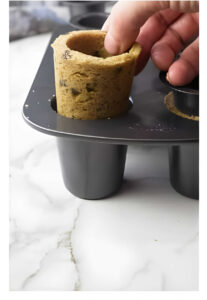
- Now let the cookie dough cool completely. (Keep the inserts in until the cookie dough is cool.)
- Once the cookie dough is cool, twist the inserts and lift them out of the mold. Next, twist the cookie cups and lift them out of the mold. Set the cookie cups aside while you prepare the chocolate coating.
Prepare the chocolate coating:
- To melt the chocolate in the microwave place it in a microwave proof bowl and melt it in 20 to 30-second intervals, stirring in between.
- To melt the chocolate in a water bath, simmer some water then turn off the heat. Put a bowl of the chopped chocolate over the hot water and just let the chocolate sit for several minutes.
- Whatever method you use, don’t rush the melting process or it will get thick and clumpy. Chocolate that melts slowly will be smooth and easy to work with.
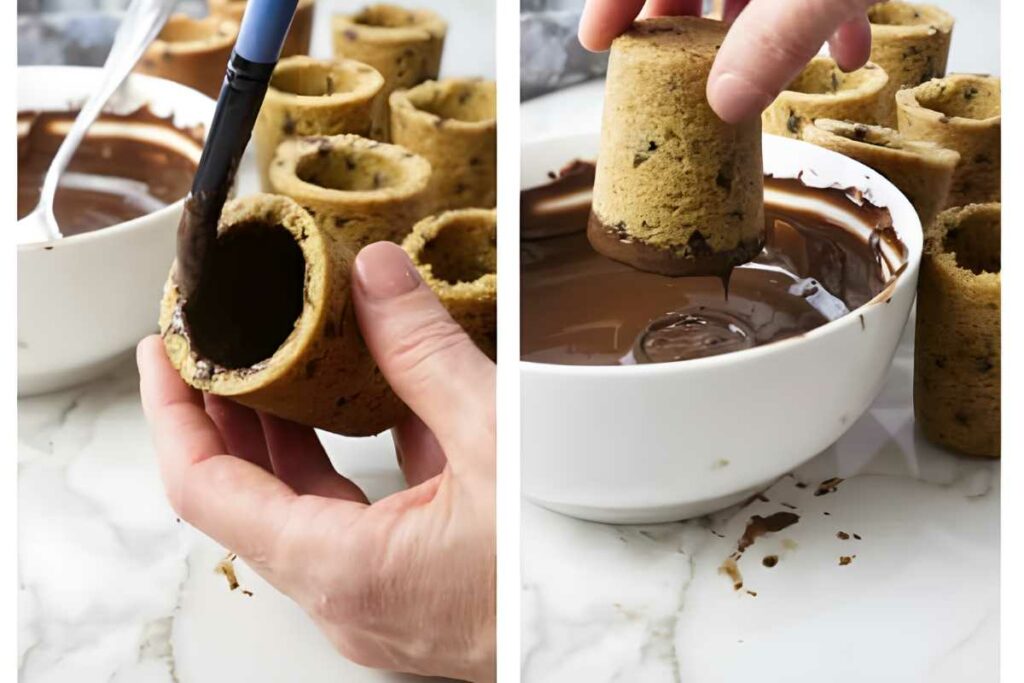
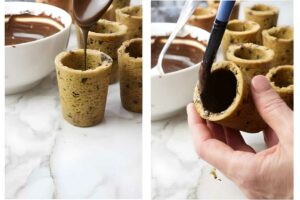
Coat the inside of the cookie shots:
- Pour a little melted chocolate inside the cookie shot glasses then use a clean paintbrush to thoroughly coat the inside cavity of the cookies.
- Turn the cookie shots upside down and dip the tops of them into the chocolate then set them aside until the chocolate is completely set.
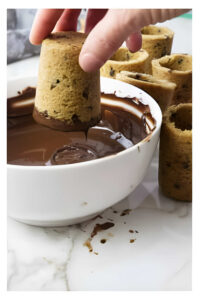
- After you coat all the cookie shot glasses, go back and inspect them for any areas that did not get coated well. Give them a second coating if needed.
- Once the cookie shot glasses are finished, fill them with a splash of cold milk.
Video
Notes
Nutrition
Nutrition information is automatically calculated, so should only be used as an approximation.
 Like this recipe? Rate & comment below!


I have not made these yet but plan to! If I make them one day prior do you suggest freeze or just refrigerate? If just refrigerated works fine, is with the coating ok or better to wait?
I you are just making them one day in advance then you can store them in the fridge. Otherwise if you make them more than 4 days in advance, I would keep them in the freezer. I would add the chocolate coating to them before storing them then when the chocolate hardens you can check for areas that didn’t get coated well and add extra chocolate.
I am going to make these for our cookie-baking even in a couple weeks! Have you stored these and reheated for an event? if so, any recommendations on how to make ahead of time and then heat up a bit once they are ready to be used? thank you!
You can definitely make these ahead of time but I would not reheat them after you coat them with chocolate. You don’t need to reheat them after you make them. I would recommend freezing them after you finish baking them and coating them in chocolate. If you store them in a sealed container, they will freeze well for a few months.
Great recipe and very successful! I had silicone molds and found I had to take extra care to make sure the bottoms or lids of the glasses were fully filled with the dough before baking. I used regular size chocolate chips and it worked just fine but I imagine the smaller chips would have resulted in a better looking final product.
Thanks for the comment, I’m glad to know it works in a silicone mold.
Hi! Where did you find the mini straws or did you cut those from larger ones?
Yes, I cut the straws to fit inside the little cups. They are paper/cardboard straws.
Hi, amazing recipe. I bake cookies with an egg substitute. I have the same Wilton shot glass mold but for some reason, the cookie shot glass came out really dark and crispy. When I bite on it with milk in it, the glass would crack from the other side as well and the milk would start to pour out.
what am I doing wrong?
An egg substitute will change the texture of the cookie cups. You might want to try reducing the baking time to compensate for the egg substitute. There just aren’t any egg substitutes that do exactly what eggs do so some recipes will need extra adjustments. I haven’t tried this with an egg substitute so I don’t know all the tricks but I would start with shaving 5 minutes off the baking time. Since it might take a bit of trial and error then I would suggest just baking one cookie cup at a time until you get the baking time nailed.
Hi! These are awesome. If you wanted to make ahead for a party, would you freeze the shot glasses with the chocolate coating or before the shot glasses were coated in chocolate? Thank you
You can definitely freeze the shot glasses with the chocolate in them. Just double-check the shot glasses when you thaw them out. If you notice cracks then patch the cracks with extra chocolate.
Hi, great recipe 🙂 I wonder if it’s going to work if i cut on sugar a little bit?
I haven’t tried it. Sugar plays an important role in the structure of the cookie so you wouldn’t be able to cut back on it too much.