
This post may contain affiliate links. Please read our disclosure policy. As an Amazon Associate, I earn from qualifying purchases.
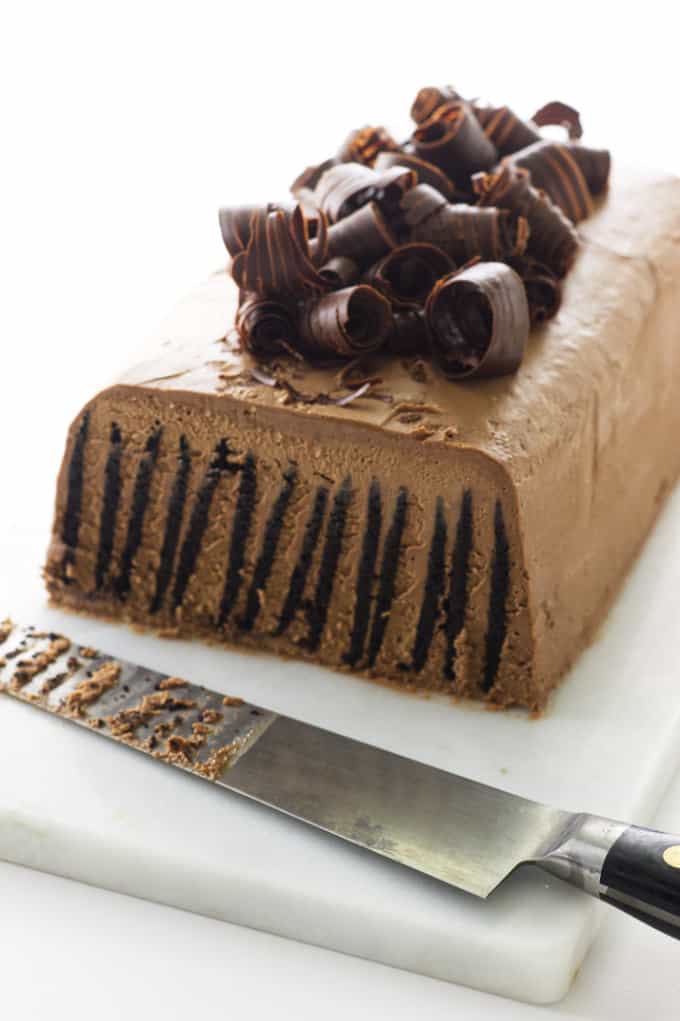
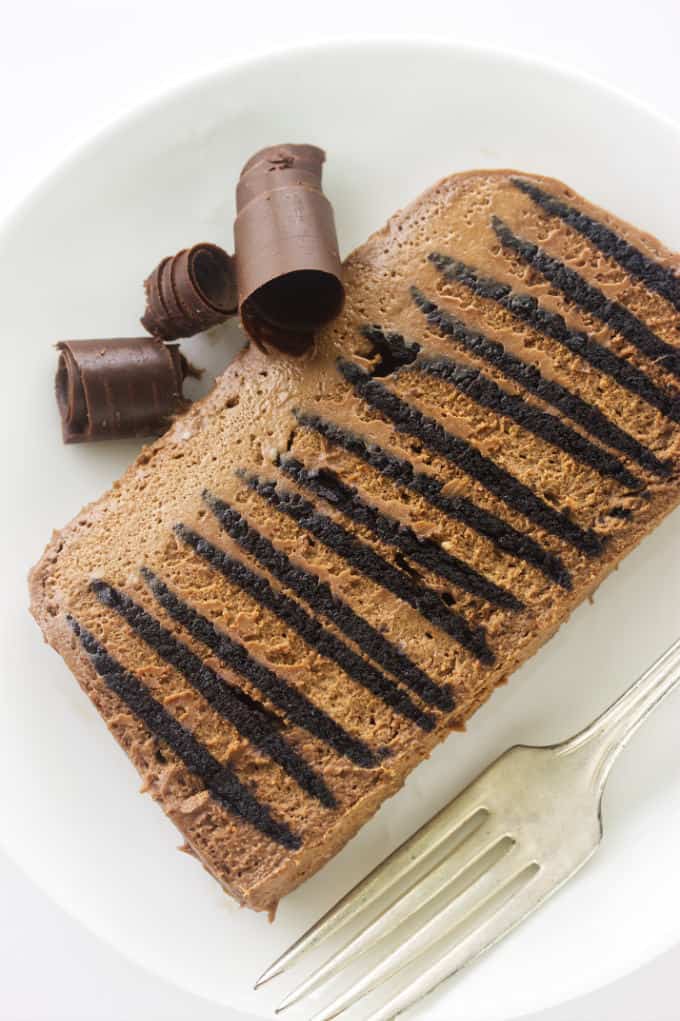
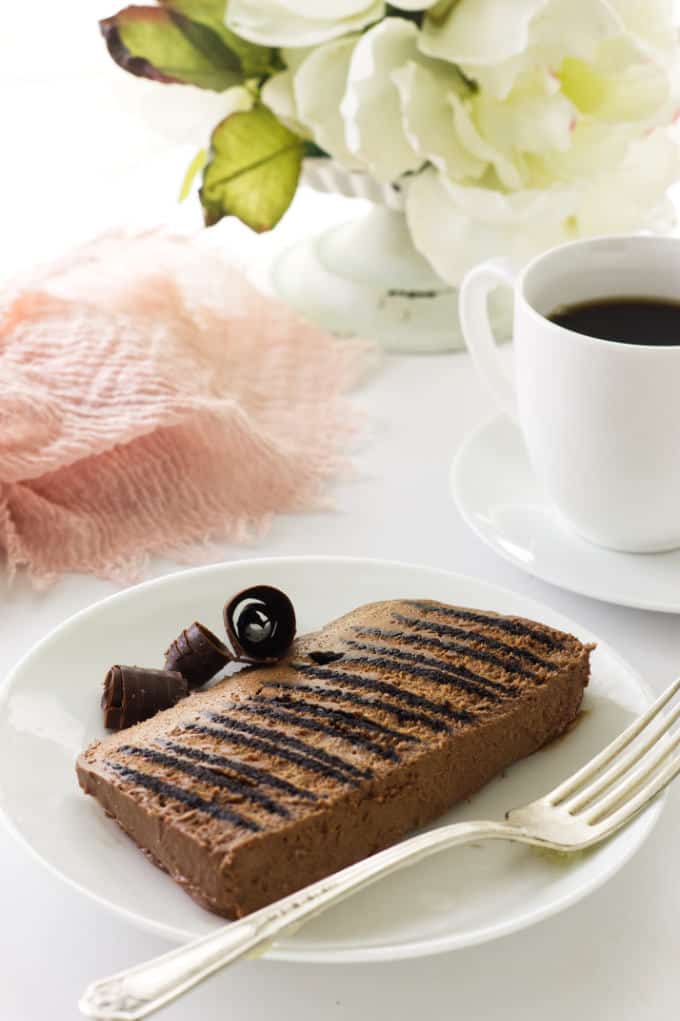
Sweet dreams are made with chocolate, and this Double Chocolate Wafer Icebox cake is a dream come true! Creamy, mousse-like filling, laced with stripes of chocolate, create a stunning dessert! An attractive bouquet of chocolate curls tops off this old-fashioned dessert.
Making this chocolate dessert recipe even more attractive is the fact that it is a no-bake, make-ahead dessert. It can be assembled a couple of days in advance and refrigerated until ready to serve.
What is an Icebox Cake?
This isn’t anything like our traditional chocolate cake. Old fashioned icebox cakes were originally made with crisp cookies and whipped cream. Icebox cakes became popular in America after 1950 when refrigerators and freezers became more affordable to the average homemaker.
Since these no bake cakes are made with creamy, delicious things like whipped cream and cream cheese, they need to be kept in the refrigerator, or icebox. That is how they got their name “icebox cakes.”
Ingredients
Here is a list of the ingredients you will need for this old fashioned chocolate wafer icebox cake. Scroll down to the printable recipe card for all the details.
Oh, the things you can do with chocolate! This cake has a deep chocolate flavor and a silky mousse-like texture with chocolate cookies embedded inside. Here’s what you need to make this double chocolate icebox cake:
- Semi-sweet chocolate
- Bittersweet chocolate
- Heavy cream
- Cream cheese. Use the block-style cream cheese, not the kind that comes in a tub. The tub of cream cheese will not firm up as well when you put the cake in the fridge.
- Sugar
- Vanilla
- Chocolate wafers. We used Famous Chocolate Wafers but any brand will work. If you want to use homemade cookies, try making our crispy chocolate cookies.
This old-fashioned chocolate icebox cake is fast and easy to make and only has a few ingredients.
That’s it! This is a fun cake activity to involve your young children with but watch those chocolate wafers, so they don’t munch too many of them! You need a minimum of 56 wafers but it should allow for some breaking.
Recipe Highlights
Here is a brief overview to get an idea of what to expect with this recipe for our chocolate wafer icebox cake. Scroll down to the printable recipe card for all the details.
This dreamy, creamy dessert was inspired by the photo on the box of the Famous Chocolate Wafer cookies. These instructions may appear intimidating, but trust me, this is very doable and makes an impressive presentation!
The chocolate stripes are created with Famous chocolate wafers sandwiched together and set on edge in rows in a loaf pan. Please scroll on down to the bottom of the post for the full instructions.
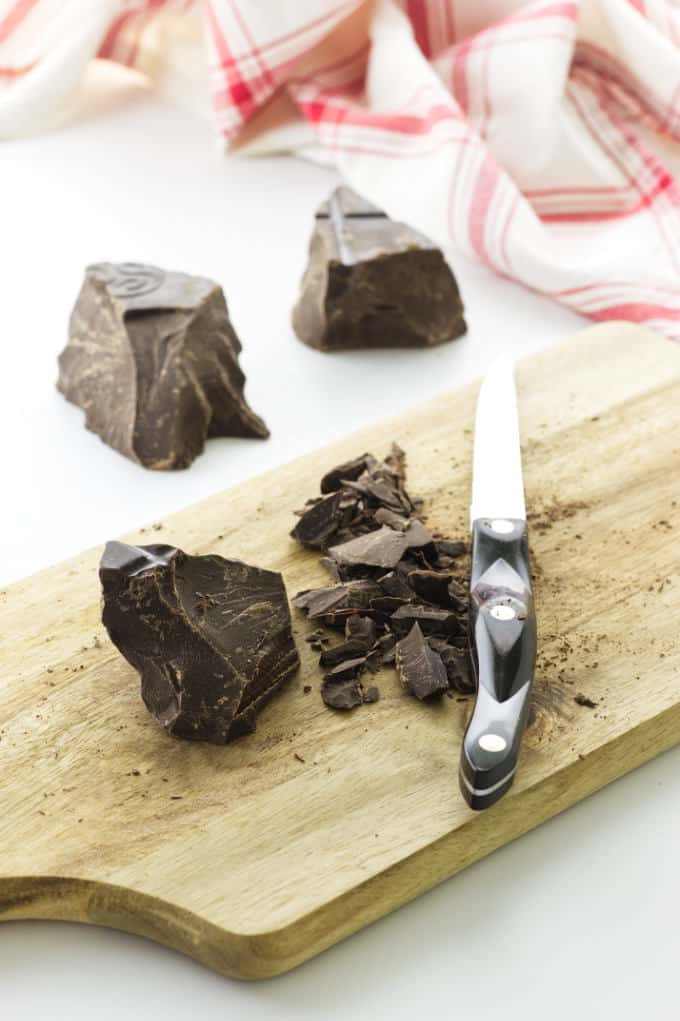
- This is a basic chocolate ganache sauce of cream and chocolate. Use a bar of really good quality chocolate, do not use chocolate chips intended for cookies (chocolate chips don’t melt as well). Let the chocolate sauce sit until it is cool, thick, and spoonable.
Tip: You can also use a store-bought 16-ounce jar of fudge sauce instead.
- Coat a 9x5x3-inch loaf pan with oil spray and line the long end with a strip of parchment paper. Set aside.
- To make the chocolate cream, place the softened cream cheese, sugar and vanilla in a large mixing bowl. Using the paddle attachment, beat until smooth and creamy.
- Add the chocolate sauce and beat the mixture for several minutes until blended. Be sure to stop the motor to scrape the bottom and sides of the bowl to get every bit of the white mixture blended.
Tip: For a smooth mixture, make sure the cream cheese is at room temperature. If it is cold then it will have lumps when you beat it.
- Now change the paddle attachment to the whip attachment. Pour the cream over the mixture and begin whipping on low speed. Gradually increase the mixer speed to high. Beat the mixture to a thick, fluffy mixture.
Let’s Assemble the Cake:
- Spoon about 2 cups of the creamy mixture into a bowl, cover and refrigerate. You will use this mixture to finish the cake when removed from the pan.
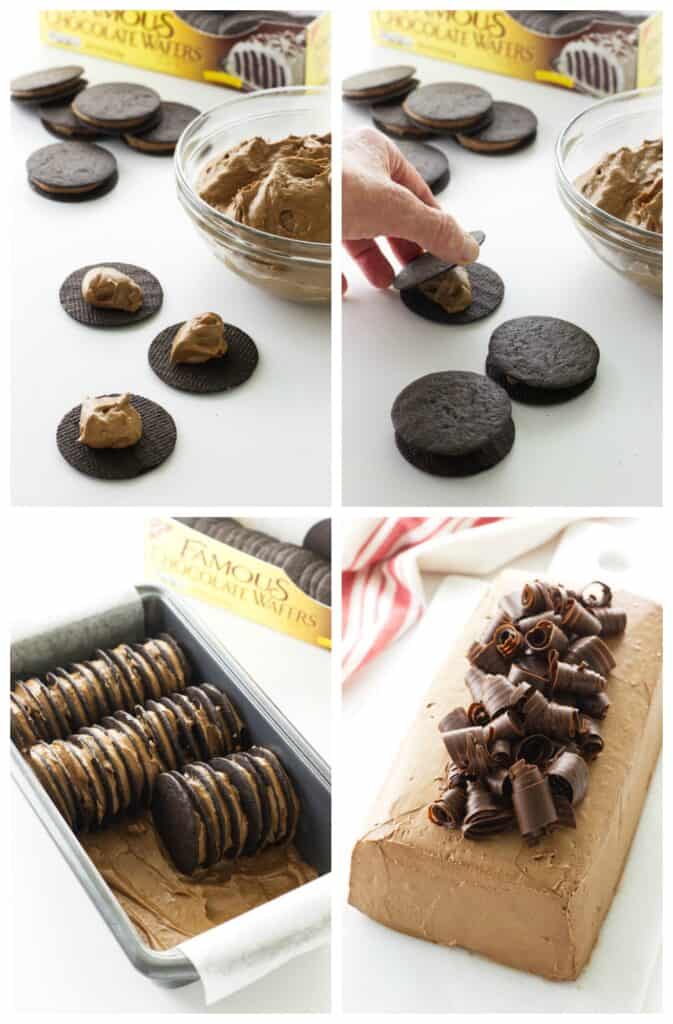
- Spoon a cup of the mixture into the prepared pan and smooth across the bottom. Make several sandwich cookies by spreading the chocolate mixture between two chocolate wafers.
- Place seven of the sandwich cookies on their edge across the narrow end of the pan to form a row. Continue the process so you have four rows filling the bottom of the pan.
- Spread a thick layer of chocolate cream mixture over the top of the completed rows of sandwich cookies. Cover with plastic wrap and refrigerate overnight.
- Invert the pan onto your prettiest cake plate and frost the sides of the cake with the reserved chocolate cream. Decorate the top with chocolate curls, crushed chocolate wafers, or something pretty. Then refrigerate the cake until ready to serve.
Tips for Success
This chocolate wafer icebox cake is easy to make but there are a few things that will help make it perfect.
- Use good chocolate. We used Callebaut chocolate from the bulk foods section. Another recommendation is Baker’s chocolate squares or a good chocolate bar. Chocolate chips will work, but they don’t melt as well (and they don’t taste as good).
- The chocolate ganache should be a thick consistency that is firm, yet not solidified.
- Cream cheese. Use block-style cream cheese. For a smooth mixture, it is important that it comes to room temperature.
- You will not need all of the wafers from both boxes. Extra cookies can be crushed and used as a topping to the finished cake.
- To slice the wafer icebox cake, dip a knife in warm water. A warm knife will glide through the creamy cake.
When slicing the cake, use a sharp knife dipped and wiped in warm water for each slice. Enjoy!
More Recipes You Will Love
A Triple Chocolate Brownie Cheesecake with a decadent fudgy brownie bottom, creamy dark chocolate center and rich chocolate ganache on top.
This Chocolate-Mint Tart is fast and easy to make. A crunchy, buttery shortbread crust filled with a silky chocolate custard that is not too sweet, with just a touch of mint added that enhances the chocolate flavor.
Our Flourless Chocolate Torte is made with only three ingredients! Chocolate, butter, and eggs. Rich and velvety smooth with an intense chocolate flavor that is unforgettable, this is truly a chocolate-lover’s dream dessert.
Pin this now to find it later!
Pin It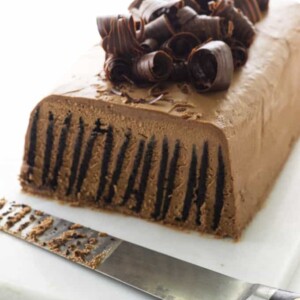
Chocolate Wafer Icebox Cake
If you make this recipe, please leave a star rating and comment.
Ingredients
For the Chocolate Sauce:
- 12 ounces semi-sweet chocolate, chopped
- 8 ounces bittersweet chocolate, chopped
- 1 cup heavy cream
For the Filling:
- 24 ounces cream cheese , room temperature
- ¾ cup granulated sugar
- 1 teaspoon vanilla extract
- 1 ½ cups heavy cream
- 18 ounces chocolate wafers
Instructions
For the Chocolate Sauce:
- Chop the chocolate very finely and place in a medium size bowl; then set aside.
- Add the cream to a small saucepan set over medium heat and bring almost to the boil. Pour the hot cream over the chopped chocolate. Allow the mixture to sit for 30 seconds to melt the chocolate, then with a spatula or a spoon, gently stir the chocolate mixture until it is well combined and smooth.
- Let the mixture sit at room temperature until very thick and firm.
For the Chocolate Cream Filling:
- Coat a 9x5x3 loaf pan with oil spray and line it with a strip of parchment paper then set aside.
- In the bowl of a stand mixer or an electric hand-held mixer with the paddle attachment, beat the cream cheese, sugar and vanilla until smooth and creamy, about 2 to 3 minutes. Be sure to stop the motor a couple times to scrape down the sides and bottom of the bowl.
- Spoon in the thick chocolate sauce and beat the mixture together for 2 minutes on medium speed. Stop the motor and scrape down the bottom and sides of the bowl. Continue beating for another minute or until the mixture is smooth and creamy and there are no streaks of white showing.
- Switch the mixer paddle attachment to the whisk attachment. Pour the cream over the mixture and begin beating the mixture on low speed while gradually increasing the speed to medium high. Beat the mixture until fluffy and creamy, about 2 minutes.
- Spoon 2 cups of the chocolate mixture into a separate bowl, cover with plastic wrap, refrigerate and reserve for later. (This will be used to cover the outside of the cake later.)
- Spread about 1 cup of the chocolate cream mixture on the bottom of the prepared loaf pan.
- Place 28 chocolate wafers on the work surface and add 1 tablespoon of the chocolate cream to each wafer. Top each wafer with another wafer, sandwiching them together.
To Assemble the Cake:
- You will have 28 wafer sandwiches that will be arranged on their sides in 4 rows of 7 cookie sandwiches per row. (See photo)
- Place one wafer sandwich into the loaf pan next to the side of the pan, standing on edge. Add a teaspoon of chocolate cream mixture to the exposed sandwich so the next wafer sandwich will stick to it. Continue adding the wafer sandwiches to make a row of 7 sandwiches.
- Repeat the procedure for 3 more rows of cookie sandwiches.
- Spoon a thick layer of chocolate mixture over the top and spread evenly.
- Drape a piece of plastic wrap over the cake and refrigerate overnight.
To Finish the Cake:
- Remove reserved chocolate cream mixture from the refrigerator and let it soften at room temperature for 30 minutes.
- Transfer the cake from the refrigerator and remove and discard the plastic covering. Place a serving plate over the top of the cake and invert. Lift off the pan, remove and discard the parchment paper.
- Cover the sides of the cake with the reserved cream and garnish the top with chocolate curls, crushed chocolate cookies or grated chocolate.
- Refrigerate until ready to serve, cut into 3/4 inch slices with a thin sharp knife dipped in warm water and wiped with each slice.
Notes
- Do not use chocolate chips that are made for cookies. We used Callebaut chocolate from the bulk foods section. Another recommendation is Baker's chocolate squares or a good chocolate bar.
- The chocolate ganache should be very thick and firm but not a hard solid mass.
- It is important that the cream cheese is at room temperature to get a lump-free mixture. Be sure to scrape the bottom and sides of the bowl often.
- You will not need all of the wafers from both boxes. Extra cookies can be crushed and used as a topping to the finished cake.
- When ready to serve, for each slice, dip a knife in warm water, wipe it off and slice.
Nutrition
Nutrition information is automatically calculated, so should only be used as an approximation.
 Like this recipe? Rate & comment below!
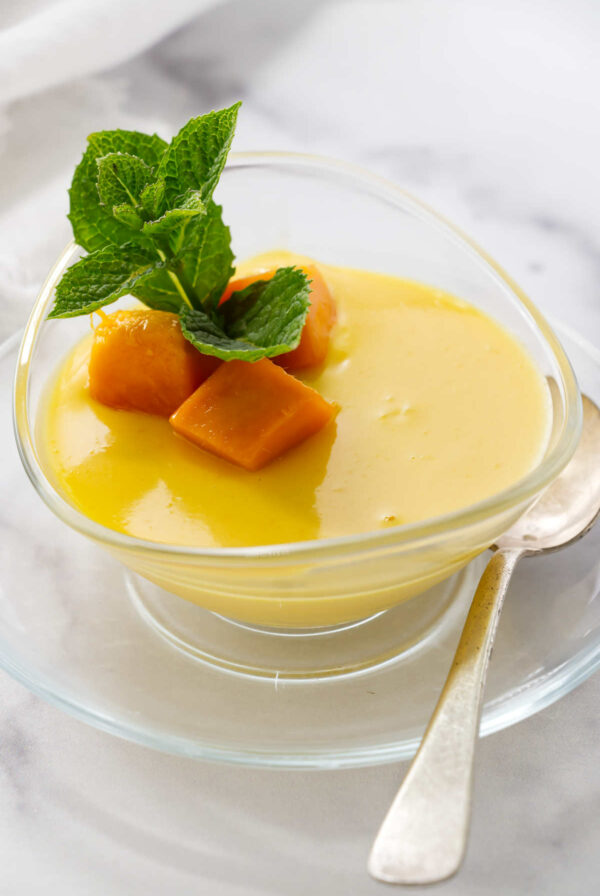


The instructions don’t say when to add the sugar and vanilla. I added it with the cream. Just popped it in the fridge. Fingers crossed it works out!
Hi, Jennifer….thank you for reporting that boo-boo to me. You did good adding the sugar and vanilla with the cream cheese. My apologies for the omission, I corrected the recipe card. I hope you enjoy this icebox cake as much as my husband and I did!
This is one good looking cake! Great tasting too, I’ll bet. 🙂 Really excellent recipe — thanks.
Thank you, John! It is decadent and delicious!
wow this could be the BEST icebox cake that I have ever seen!
Thanks, Angie, it really is delish!