
This post may contain affiliate links. Please read our disclosure policy. As an Amazon Associate, I earn from qualifying purchases.
This hot milk sponge cake is simply amazing. It is light, velvety, tender, and springy. If you’re looking for that light springy texture like you get from a box cake mix, but without the strange chemical flavors, you have to try this sponge cake.
This is an old fashioned recipe with modern baking techniques. I have adapted the instructions to make this an easy sponge cake even for beginners.

There is nothing better than a home-baked, from-scratch cake. If you like the texture of a box-mix cake, you are going to like this hot milk sponge cake much more. Not only does it rival the texture that so many people want from a box cake, but it also tastes far better.
Most sponge cakes tend to be dry and require a simple syrup to add moisture to the cake. This vanilla sponge cake, however, bakes up moister, richer, and softer than most sponge cakes, thanks to the hot milk and butter.
The hot milk sounds like a strange thing to add to cake batter but it is key to this recipe. Heating the milk will denature the proteins and give the sponge cake a softer, lighter texture and help it retain moisture.
The Texture of a Box Mix with the Flavor of a From- Scratch Cake
I have made a lot of wedding cakes for people in the past and every once in a while I would have a bride request a cake from a box mix. They would explain that they don’t like butter cakes because they are dense and dry.
They grew up on home-baked cakes that came from a box mix and that is the flavor and texture they like. It always seemed strange to me because I think box cake mixes have a chemical flavor that almost coats your mouth.
I think it comes down to what a person is exposed to. If the only cakes you ever eat come from a box mix, that is what your taste buds will learn to love.
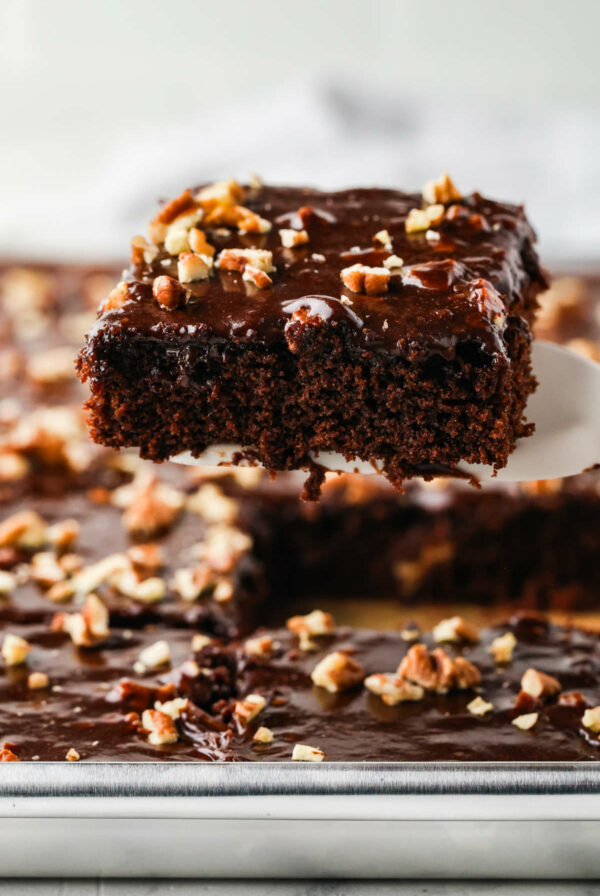
The thing that people seem to favor with the box mixes is the texture. They are light, fluffy, tender and moist. That texture is pretty easy to get in a from-scratch chocolate cake (like our chocolate coffee cake with cream cheese frosting) but much more difficult to achieve in an old fashioned vanilla butter cake.
Sponge cakes are different though. Sponge cakes are light, fluffy, and tender. They are not dense and heavy like a pound cake or other all-butter cakes like our white chocolate cake. Instead, sponge cakes are “spongy” and soft yet they tend to be a little dry since there is not much fat in the batter.
How to make a sponge cake moist.
Since sponge cakes have very little or no fat in them, they can often seem dry. Especially sponge cakes that do not have any fat, like a classic genoise. However, the great thing about a sponge cake is they can soak up a fair amount of syrup without getting soggy.
Syrup will make a dry sponge cake moist and it can even add some extra flavor if you use a flavored syrup. This recipe for hot milk sponge cake makes a fairly moist cake compared to other sponge cakes but you can still add syrup to it without making it soggy.
How much syrup can a sponge cake hold?
As a general rule, sponge cakes can hold 3 to 4 tablespoons of syrup for every egg used in the cake recipe. The less oil and butter in a recipe, the more syrup the cake will hold without getting soggy.
This hot milk sponge cake has butter and milk which makes it a pretty moist sponge cake already. However, even though it has fat added to it, it will hold almost a full cup of syrup without getting soggy.
If you want to use syrup in this cake, drizzle about 1/2 cup of syrup on each layer.
Easy Vanilla Sponge Cake
Of all the sponge cakes I have made, this one is the easiest and least fussy. Instead of separating the eggs, you beat whole eggs to a thick ribbon stage. I will explain what that means in a minute but basically, you just beat the heck out of the eggs.
Beating whole eggs to their ribbon stage is much more forgiving than beating egg whites to stiff peaks.
For example, if you beat egg whites, you simply can not have any of the yolks get into the whites. Even a small fleck of egg yolk will sabotage the process. Heck, even a greasy bowl or spoon will contaminate the egg whites and prevent them from whipping into lovely peaks.
You can also over beat egg whites and they will collapse and get watery. But not this technique. Beating whole eggs to the ribbon stage takes longer but it is harder to mess up.
What is Ribbon Stage?
The ribbon stage is when the eggs become so thick and fluffy that the batter will fall off the beaters and form a ribbon pattern on top of the mixture.
The eggs will get so much air in them that they will actually triple in volume and become very pale yellow. Then when you lift the beaters and let the mixture fall back into the bowl they fall in a ribbon-like pattern. They will keep the ribbon pattern for only a second or two and then dissolve back into the mixture.
For the best success at getting the eggs to a ribbon stage, the mixture needs to be warm. Most recipes will instruct you to place the eggs and sugar in a bowl, then set that bowl over a pot of simmering water.
You will usually spend the first several minutes beating the eggs over simmering water until the mixture is warm. After the eggs get warm, you take them off the heat and continue beating them until they get to the ribbon stage.
An Easier Technique for Beginners.
I have made the technique a little easier for beginner bakers by eliminating the step with simmering water. Instead of whisking the eggs over simmering water to warm them, I use eggs that have already been warmed up.
In order to warm the eggs, place the eggs (while still in their shell) into a bowl of very warm water. The water should be about 110°F.
Let the eggs sit in the warm water for several minutes so they are completely warm all the way through. The warm eggs will hold more air when you whisk them.
Of course, if you want to whisk the eggs over simmering water then you can use that technique instead and you will get a slightly thicker batter.
What Makes Sponge Cakes Light and Fluffy?
Sponge cakes depend on well-beaten eggs for a light and fluffy texture. The ribbon stage that I mentioned above is key to success with this hot milk sponge cake.
If the eggs do not beat to a thick ribbon stage, your cake will be flat, dense, eggy, and rubbery. Make sure you whip the eggs and sugar very well before you start adding the other ingredients.
By the way, did you know that cake rolls are made with sponge cakes? If you use a recipe for butter cake then the cake will crack when you roll it up. Check out our coconut roll cake or our red velvet cake roll.
Ingredients Needed for this recipe
You only need 8 ingredients for the cake:
- Flour. All-purpose flour works great for this recipe. You can also use cake flour if you have it on hand.
- Sugar. Regular white granulated sugar.
- Eggs. The eggs should be room temperature or slightly warmer. Warmer eggs will whip better and hold more air.
- Butter. Use real butter and not margarine for the best results.
- Milk. Real milk works best in this recipe. Milk replacements do not have the same fat content and do not give you the same results.
- Baking powder. Make sure you use baking powder and NOT baking soda.
- Salt. Just a pinch of salt enhances the flavors.
- Vanilla extract. Another flavor enhancer that makes a big impact.

How to make this hot milk sponge cake
1. Beat the eggs:
The most important part of this recipe is often viewed as the most challenging. It will take a good 10 to 15 minutes of beating for the eggs to reach the ribbon stage. A stand mixer with the whisk attachment is a life saver as it can be running while you are busy with other elements of the recipe.
If all you have is an electric hand mixer this is still doable, you will just have to hold the mixer and be patient. Beating the eggs to a ribbon stage is essential to a light and airy sponge cake. Normally you need to beat the eggs over a pan of simmering water.
The problem with this technique is that people can end up with scrambled eggs if it is not done correctly. This recipe modifies the technique by having you warm the eggs up while they are still in their shell.
Once the eggs get warm, you are able to beat them to the ribbon stage without placing the bowl over simmering water. The technique is a bit unconventional but it works.
2. Add the flour mixture:
When you add the flour mixture, you can either fold it in with a spatula or use a whisk at low speed. Make sure you sift the flour so all the lumps are removed. All-purpose flour works very well with this recipe. There is no need to buy special cake flour.
3. Add the hot milk:
Before you start, heat the milk and butter over medium heat and keep it warm while you work on the rest of the cake. After you mix the flour into the egg mixture, pour the hot milk in and stir it well.
4. Bake the cakes:
As soon as the cake batter is blended together, you want to cook the cakes right away. This isn’t a batter that you can sit aside for 30 or 40 minutes before baking it or it will start to deflate.
Just make sure you pre-heat the oven before you start.
5. Make the frosting:
The frosting for this cake tastes like a cheesecake mousse. It is as light as a cloud and as sweet as heaven. It is also super simple to make.
The key to success is to whip the cream cheese and sugar very well before you add the heavy cream. You want to make sure there are not any lumps in the cream cheese when you add the heavy cream. That will ensure you don’t have any lumps in the frosting.
6. Assemble the cake:
Once the cakes cool down, drizzle them with some simple syrup. You can either make the syrup by bringing a cup of water and a cup of sugar to a boil (super simple) or you can purchase the syrup. It is easy to find and usually in the coffee aisle of the grocery store.
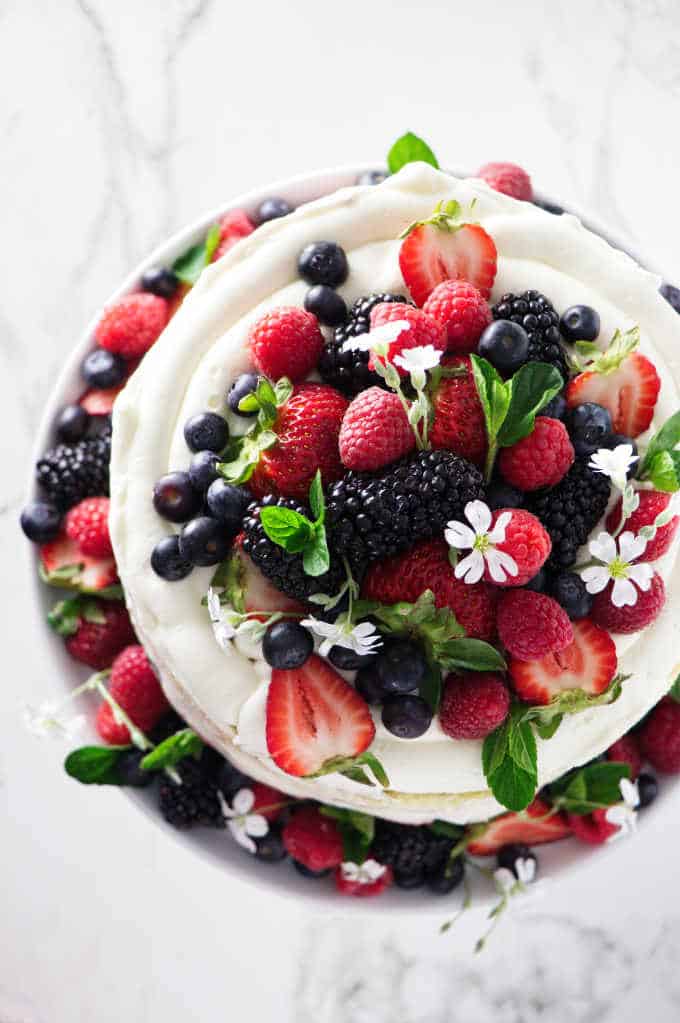
Next spread some berry jam over the top of the cake and then spread some frosting over that. Cover that first layer of frosting with some fresh berries then spread some more frosting over the berries to hold them in.
Repeat the process with the next cake and decorate the cake with mint leaves and babies breath or some other flowers.
I just spread a very thin film of frosting on the sides of the cake so it looks more like a naked cake. That way the berries in the middle of the cake can peak out.

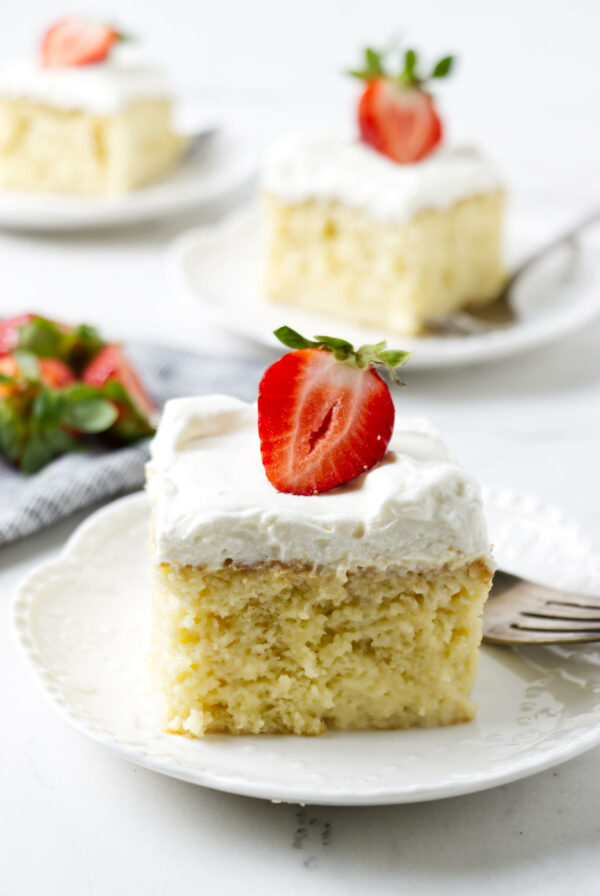
This hot milk sponge cake is the base I used to create my tres leches cake. Just a few adjustments turned it into the perfect soak-ready sponge.
Pin this now to find it later!
Pin It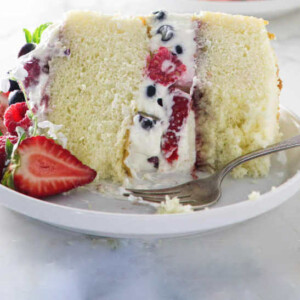
Hot Milk Sponge Cake with Berries
If you make this recipe, please leave a star rating and comment.
Ingredients
FOR THE HOT MILK SPONGE CAKE:
- 5 large eggs
- 1 ¼ cup whole milk
- 12 tablespoons butter
- 2 cups granulated sugar, 400 grams
- 3 cups all-purpose flour, 360 grams
- 4 teaspoons baking powder
- ½ teaspoon salt
- 1 tablespoon vanilla extract
CHEESECAKE MOUSSE FROSTING
- 12 ounces cream cheese, room temperature
- 1 ⅓ cups powdered sugar
- 1 teaspoon vanilla extract
- 2 ½ cups heavy cream
FOR ASSEMBLY:
- 1 cup vanilla syrup
- ½ cup berry jam
- 4 to 5 cups fresh berries
Instructions
For the Sponge Cake
- Place the eggs (while still in the shell) in a bowl of warm water. This will warm them up and help them whip to a higher volume. Let them sit while you prep the cake pans and the ingredients.
- Preheat the oven to 350°F
- Grease and flour two 9-inch cake pans and place some parchment paper in the bottom of the pans. (see notes for different size pans).
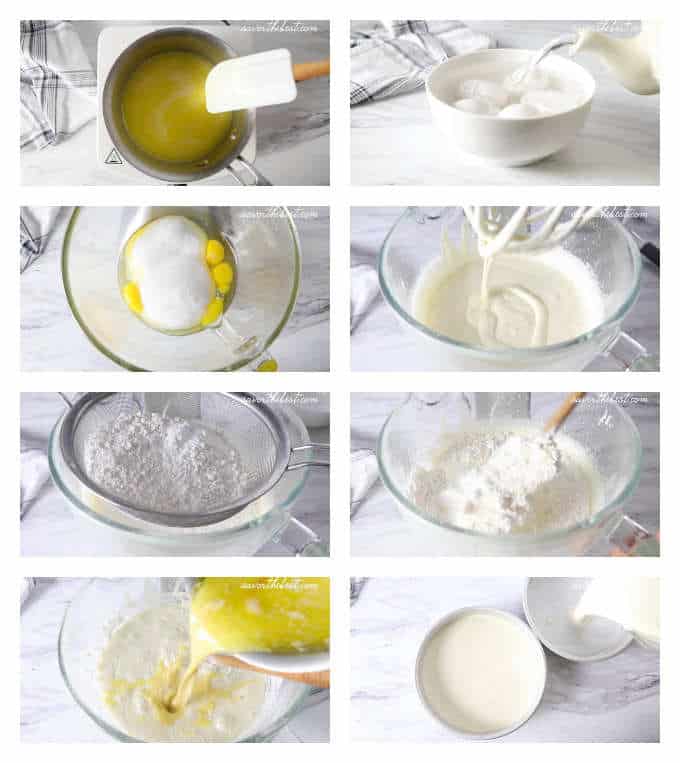
- Place the milk and butter in a saucepan and warm it over low heat until the butter melts. Keep the pan on the lowest heat setting to stay warm while you beat the eggs.
- A stand mixer with the whisk attachment is recommended but an electric hand mixer will do the job.
- Crack the eggs in a large mixing bowl and add the sugar. Beat on high speed for about 8 to 10 minutes. The eggs should triple in volume and become pale yellow in color. (see notes)
- Sift the flour, baking powder, and salt together. Add half of the flour to the egg mixture and fold in with a spatula until it is combined. Fold in the second half of the flour.
- Add the vanilla to the warm milk mixture and gradually pour the milk into the batter. Stir the mixture by hand or on low speed. Scrape the sides and bottom of the mixing bowl with a spatula to make sure all the flour is incorporated.
- Divide the batter into the cake pans.
- Bake for 25 to 32 minutes or until a toothpick comes out clean (see the notes if you are using a different size pan).
- When the cakes are finished baking, set the pans on a wire rack on the counter and let them cool in the pans.
For the Cheesecake Mousse Frosting
- Place the cream cheese, sugar, and vanilla in a mixing bowl and beat on high speed until smooth.
- Slow the mixer to low speed and slowly pour the heavy cream into the bowl, gradually increase the speed of the mixer to high speed. Beat on high speed until stiff peaks form.
Assemble the Cake
- Brush or drizzle the simple syrup on each cake layer.
- Place one layer of cake on a cake stand, spread with a thin layer of the strawberry jam then a thin layer of the frosting. Top with berries and spread or pipe a layer of frosting over the berries.
- Place the other cake layer on top and spread or pipe the rest of the frosting on the top. Decorate with the remaining berries.
Video
Notes
- If you are using a stand mixer be sure to use the whisk attachment.
- Warmer eggs will whip up to higher volumes than cold eggs. Place the eggs (while still in their shells) in warm water for about 5 minutes to get them slightly warmer than room temperature. The goal is to just warm them up, not cook them. The water should feel like hot bath water.
- Beat the eggs and sugar until they triple in volume. The mixture will become pale yellow and when you stop the mixer and raise the whisk, the mixture will fall back in a ribbon-like pattern. This process takes about 8 to 10 minutes in a stand mixer and a bit longer with a handheld electric mixer. It will take all day if you whisk it by hand so get out an electric appliance for this step.
- Prepare the cake pans and let the oven pre-heat before you start to mix the batter. Do not let the batter sit for too long after you mix it or it will settle and create a very dense layer on the bottom of the cake pans.
- Do not use pans that have a removable bottom. The batter is pretty thin and will leak out of springform pans.
- You can purchase vanilla syrup in the coffee aisle of most grocery stores or you can make your own very easily. To make your own simple syrup, combine 1/2 cup sugar with 1/2 cup water in a saucepan and bring to a boil. Boil for about 30 to 60 seconds then remove from heat, add 1/2 teaspoon vanilla extract and let cool before using.
- You can bake the cake in three 8-inch cake pans for 22 to 28 minutes (rotate the pans half-way through the baking time). You can also bake the cake in a 13×9 inch cake pan for 30 to 34 minutes.
Nutrition
Nutrition information is automatically calculated, so should only be used as an approximation.
 Like this recipe? Rate & comment below!
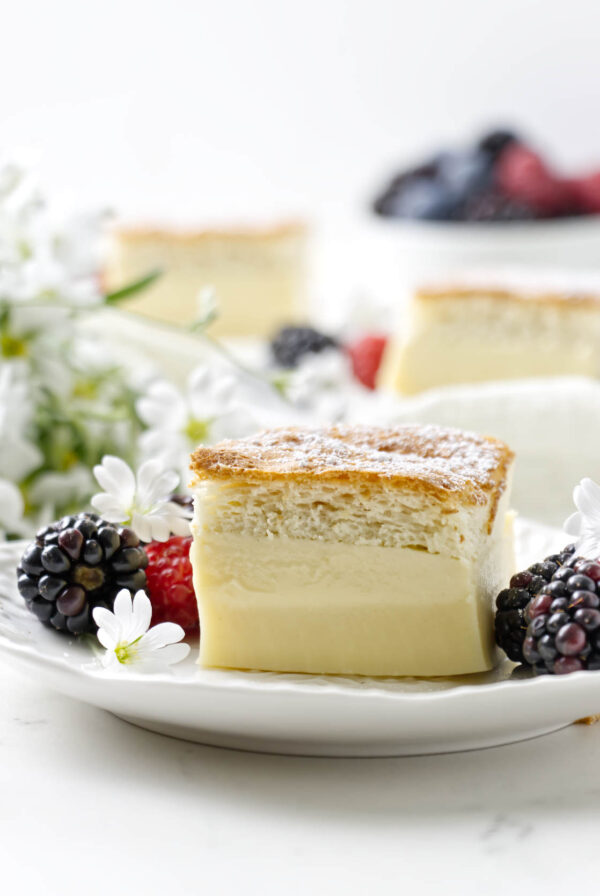


Hi, your recipe looks great and I will bake it this weekend for my wife’s birthday. I’m wondering if it is possible to add citron juice / zest to the dough?
Adding juice will alter the ratios and change the outcome of the cake. We haven’t tested the recipe to find the correct ratio for juice. But, you can add zest to the cake batter without any problems. You can also add lemon or citron extract. A teaspoon or two of extract will be fine.
Can this sponge be used to stack layers and decorate with buttercream?
Yes, it can. If I stack more than two layers I will use a cake board and dowels for support between each tier.
Thank you so much for this amazing recipe. Cake is moist, fluffy and very soft. I’ve tried a few cake recipes before and this was by far the best one. This will be my go to cake recipe from now on ♡
Hi, Kat… We are thrilled that this recipe was a winner for you, it is also one of our favorite cakes. We love hearing from our reader on how our recipes work out for them and we thank you for your great review! ❤️
Can this cake be made in a Bundt pan?
I am sure it would do fine in a bundt pan but I have not tested it yet so I don’t know how long it would need to bake. I would recommend doing a toothpick test to see when the cake is finished baking.
If I doubled this recipe would it work out fine? Or if I used 9” pans instead?
Yes, it works fine if you double the recipe. If you use 9- inch pans then the cake will not be as tall unless you double the recipe. You actually only need about 1-1/2 times the recipe for two 9-inch pans but it is easier to double the recipe and then make a few cupcakes with the extra batter.
Can this be made in a rectangle pan for a one layer cake?
It should work but I haven’t tried it. I would think that a 9 x 13 will be too large however it might work as long as you watch the baking time. It will be thinner in a 9 x 13 so you will not need to bake it as long. Use a toothpick to determine when it is finished.
How is this cake if I make it the day before needed? Or is it better the day it’s made? Thanks for all the good detail to make the cake successful. The pics are beautiful!
This cake works great if you make it a day in advance as long as you use fresh berries. Frozen berries will leach out too much juice and make the cake soggy. Thanks for your comment 🙂
This cake looks amazing! My daughter loves berries
Oh thanks, Marie, it is always a favorite and hard to go wrong with this cake! 🙂
Thank you so much for this recipe. I made it for my mother-in-law’s 73rd birthday, last week and it was such a hit!!!!! OMG!!!!
Thanks for the comment, Maureen. Happy birthday to mom!!