This post may contain affiliate links. Please read our disclosure policy. As an Amazon Associate, I earn from qualifying purchases.
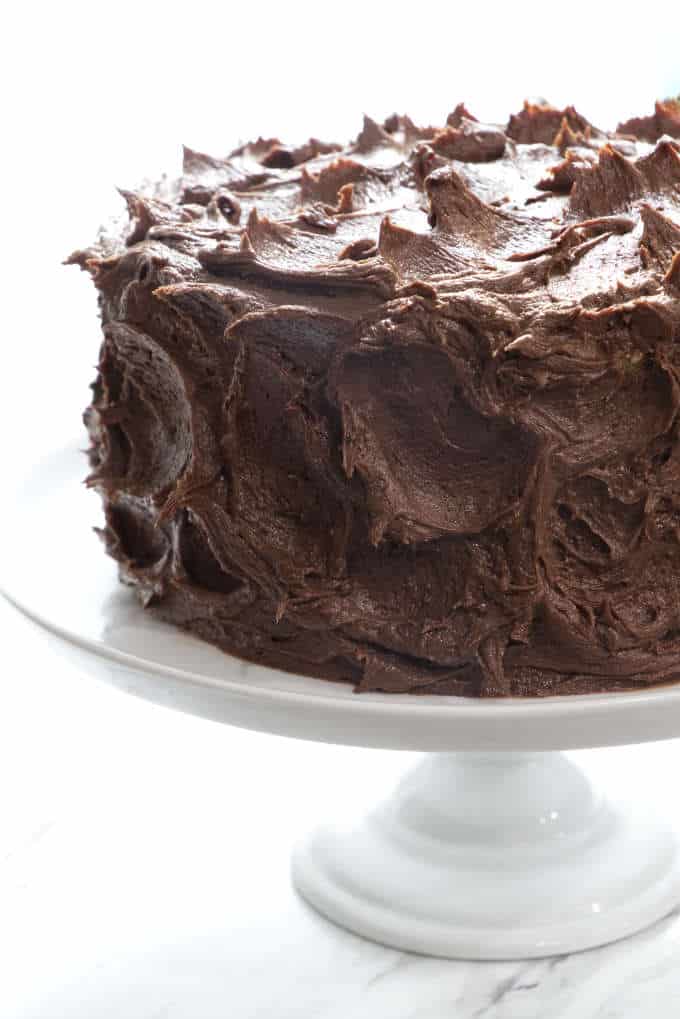
This is an all butter yellow cake with chocolate frosting and it is perfect for any occasion. It’s the kind of cake that you will want to keep on record to make over and over.

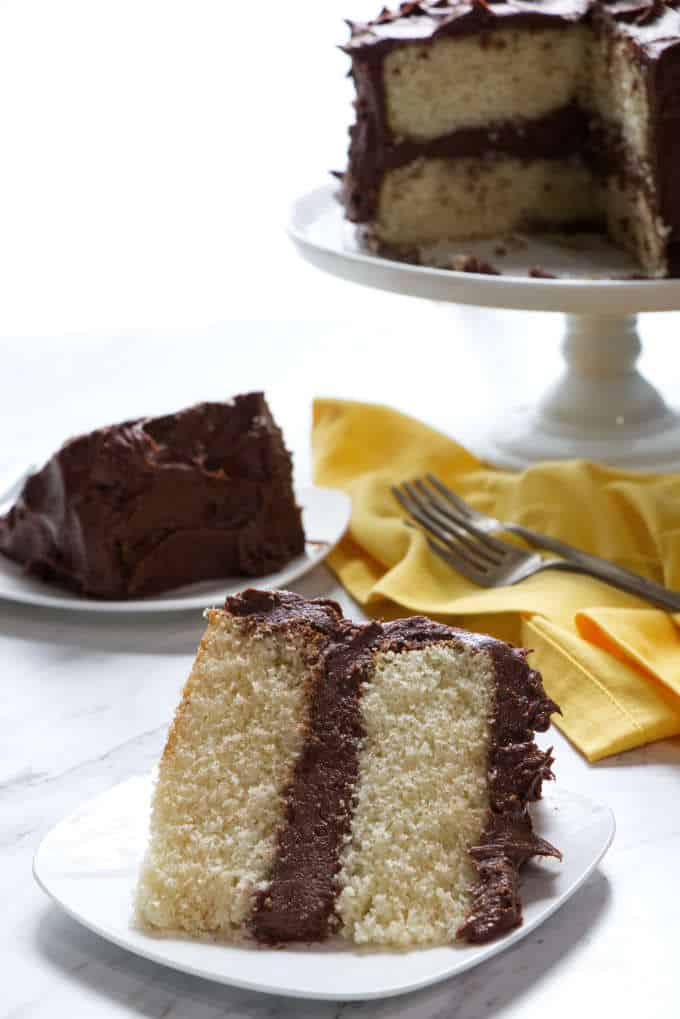
This yellow cake has a soft, tender texture and a rich buttery flavor. It is all dressed up in a luscious, creamy, smooth, double chocolate cream cheese frosting. Have mercy, someone is going to have to force you to put the fork down. This cake is UH-mazing!
I’m talking rich, butter-lishes yellow cake with chocolate frosting. Not just any chocolate frosting. No, this is double (as in double dose) chocolate cream cheese frosting. You all need this cake.
If you are looking for a yellow butter cake, look no more. This is the one.
This is not a cake mix
Now I want to get things straight. This is a butter cake. No box mix, no chemicals, no fake flavors, no artificial colors or strange chemical agents. Nope. This is all butter and all natural goodness.
So, if you’re looking for the texture and flavor that will replicate a box mix. It’s not gonna happen with this cake. This is a classic, all-butter yellow cake. If you have never had a through and true butter cake, you should know that the butter will make it more dense and heavy than an oil cake or a box mix.
If you want a lighter, spongier texture then try our hot milk sponge cake. But if you’re looking for the best all-butter cake around, this is the recipe.
The butter gives the cake a little bit of the yellow color but most of the yellowness comes from using all egg yolks. By using all egg yolks, the cake also has a higher fat content which helps create a more tender crumb.
There are a few things you need to know to make this the best yellow cake with chocolate frosting you have ever eaten.
How to eat a butter cake
I know! Who on earth would ever need help knowing how to eat a cake? You dive in with your fork, grab a bite and stick it in your mouth. Enjoy. Swallow. Go back for more. And more. And more.
But, if you really want to taste all that this cake can be, you need to serve the cake at room temperature. The temperature will affect how a butter cake tastes.
Think about what butter is like when you pull it straight out of the fridge. It is hard and cold. This cake is so high in butterfat that the same thing will happen when you pull it out of the fridge. A cold butter cake will be firm, dense, hard and cold.
If you let the cake sit at room temperature, the butterfat will soften which will make the cake soft, tender and delicate. It will coat your tongue when you eat it and taste so much better.
This is a tip that is frequently overlooked. Butter cakes are better when they are served at room temperature.
How to make a yellow cake with chocolate frosting
First the cake
If you have made our intense chocolate cake then you know how easy it is to make a cake from scratch. That cake does not require any special techniques. Just throw all the ingredients in a bowl, give em a good stir and bake. Heck, it even calls for regular ol’ all-purpose flour. It is hard to mess that cake up.
This cake is different. It is not difficult to make but it is easy to mess up if you don’t follow the instructions and use the right ingredients.
By right ingredients I mostly mean cake flour. Yes, you can use all-purpose flour in this recipe but cake flour will make it better. Cake flour has a finer texture and has less gluten than all-purpose flour. Both of these qualities lead to a softer, lighter, more delicate cake. You will notice a difference if you use cake flour.
Here are some more tips to get a tender yellow cake
- Use Room Temperature Ingredients: Start by setting your butter, milk, and egg yolks on the counter to reach room temperature.
- Measure Ingredients Accurately:
- Avoid using a measuring cup to scoop flour directly from the container as it compacts the flour, leading to dense, heavy cakes.
- If available, use a kitchen scale for precise measurements in grams or ounces. If a scale isn’t available, sift the flour first, then lightly spoon it into measuring cups.
- Mixing the Batter:
- Add the flour to your batter in thirds to ensure even mixing without overworking. Over-mixing can develop the gluten excessively, making the cake tough.
- Choosing the Right Pans:
- Opt for light metal pans, ideally 1-1/2 to 2 inches tall, to prevent over-browning and allow proper rise.
- Oven Rack Positioning: Place the oven rack in the center for even baking.
- Optional: Use Magi-Cake Strips:
- For more even baking and to prevent the edges from over-browning, consider wrapping the pans with Magi-Cake strips. This also helps the cake rise more uniformly and achieve a flatter top.
- Avoid Overbaking:
- Bake until a toothpick inserted comes out with a few moist crumbs. Pulling the cake out at this stage ensures it won’t become dry, as the residual heat will continue to cook it slightly.
Now for the frosting:
This cake goes well with any flavor frosting. It even goes well with yummy fillings like lemon curd or even fresh fruit. That’s why it is an all-occasion kind of cake. You can adapt it to fit in with any occasion.
This time around, we frosted it with a decadent double chocolate cream cheese frosting. The kind of frosting that you’re going to want to lick clean. The kind of frosting that says “take me to a birthday party”.
The recipe for the frosting is right below the recipe for the yellow cake.

Traditional Creaming vs. Reverse Creaming Method
This recipe has been loosely adapted from The Cake Bible by Rose Levy Beranbaum. Rose uses a reverse creaming method in her recipe. If your curious what that looks like then check out our video for our Lavender Cake with Lavender Cream Cheese Frosting.
I made this recipe so many times I have lost count. I have switched back and forth between the reverse creaming method and the classic creaming method. That classic creaming method that you probably learned from your grandma or Betty Crocker. I set them side by side. Tasted. Tested. Enlisted taste testers.
In the end, there was no substantial difference in the taste or texture of the cake whether it was made with the traditional creaming method or the reverse creaming method. There were only a few people that noticed a very slight difference in the sponginess and height of the cakes.
I chose to use the traditional creaming method for this recipe since it seemed to give a slightly higher rise to the cake. I’m talking micrometers, maybe nanometers.
But the main reason I chose to use a traditional creaming method is that it is familiar to most people. And I want this cake to feel familiar and easy to make. I want you to feel good about mixing it and baking it. … And eating it.
Pin this now to find it later!
Pin It
Yellow Cake with Chocolate Frosting
If you make this recipe, please leave a star rating and comment.
Ingredients
- 3 cups sifted cake flour, (360 grams)
- 4 teaspoons baking powder
- ¾ teaspoon salt
- 12 tablespoons butter, softened
- 1 ½ cups granulated sugar, (300 grams)
- 6 large egg yolks
- 2 ¼ teaspoons vanilla extract
- 1 cup milk, (242 grams)
- Chocolate Cream Cheese Frosting
Instructions
- Preheat oven to 350°F. Grease and flour two 8-inch cake pans and line the bottoms with parchment paper.
- Sift the cake flour, baking powder, and salt in a medium bowl and set aside.
- In a large mixing bowl beat the butter and sugar on medium high speed for about 4 to 5 minutes until it is light and fluffy.
- Add half the egg yolks and beat well then add the rest of the egg yolks and beat on medium speed until fully blended.
- Beat in the vanilla extract.
- Pour ⅓ of the flour mixture into the butter mixture and mix it on low speed only until incorporated. Next add half of the milk and mix until the milk is blended in.
- Add another ⅓ of the flour mixture and mix on low speed until it it is just barely incorporated again. Some streaks of flour is fine. Then add the rest of the milk and mix until the milk has been blended in well.
- Finally add the last ⅓ of the flour mixture and mix on low speed until it is all incorporated.
- Divide the batter between the two cake pans. Bake for 28 to 33 minutes or until a toothpick inserted in the center comes out with just a few crumbs.
- Let the cake cool in the pans for 10 to 15 minutes before inverting them onto a cooling rack. If you remove the cakes while they are piping hot, they are more likely to crack.
- Allow the cakes to cool completely before frosting them. If you stick them in the freezer for 15 to 20 minutes they will be even easier to frost.
Notes
- The nutrition label on this recipe card does not include a calorie count for the frosting, see the recipe card below for the frosting nutrition label.
Nutrition
Nutrition information is automatically calculated, so should only be used as an approximation.
 Like this recipe? Rate & comment below!


hello I have a great recipes for the filling of a Boston Cream Pie using Vaniila pudding mix ., could I swap out the Vanilla for chocolate so I would have a chocolate filling??
Sure! That sounds delicious.
Can I use some whole eggs along with just yokes? If so, what do you recommend please?
You can replace 2 egg yolks with a whole egg but the cake will have a richer flavor if you use all egg yolks.
This cake did not work for me. Followed the recipe exactly. After letting it cool for recommended time could not get it to come out of the pan. Let it cool a little longer. Used a knife to go around the edges and it just crumbled when it came out. Very disappointed. But, the ruble did taste good.
Sorry it didn’t work for you Amanda. This can happen if you over-measure the flour. I recommend using a scale to get the flour amounts correct. I also highly recommend using parchment paper and greasing the pan then dusting it with flour so it does not stick to the pan. Non-stick spray works pretty well too. All is not lost though, you can combine the crumbs in a bowl with some frosting and make cake balls. Yummm 🙂
That is one DEELISH looking cake!!! Can you please post the ingredients for the frosting in grams?? Thank you!!
Chandra, I’m happy to add that to the recipe, thanks for the comment. Enjoy the cake.