
This post may contain affiliate links. Please read our disclosure policy. As an Amazon Associate, I earn from qualifying purchases.
Instant Pot roasted garlic is the fastest way I know to get soft, spreadable cloves without babysitting the oven. You pressure-cook the bulbs until they’re tender, then hit them under the broiler for that golden, caramelized finish.
Use it anywhere you’d use roasted garlic; mashed potatoes, sauces, soups, or straight on a slice of bread.
Normally it takes one full hour in the oven to roast garlic. Are you ready for some Instant Pot roasted garlic magic?!
Ingredients for Instant Pot Roasted Garlic
We like to roast several heads of garlic at the same time because, a) we use a lot of it, (you’ll understand once you’ve tried it) and b) you can keep it in the fridge for up to two weeks! Here’s what you’ll need:
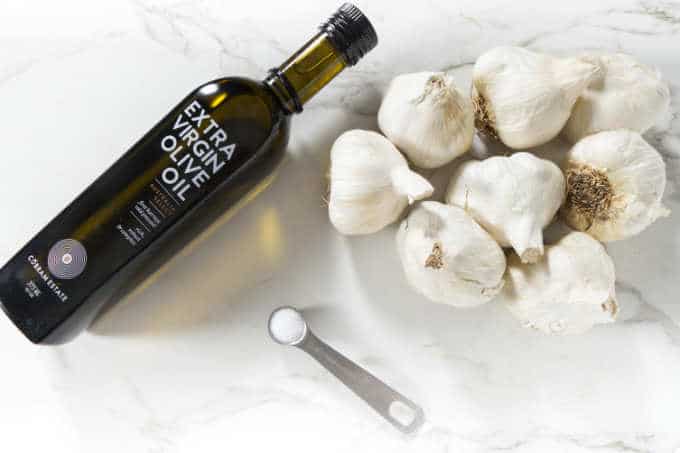
- Whole heads of garlic (we do 4 to 8 at a time)
- Olive oil
- Salt
- Water
Recipe Tips
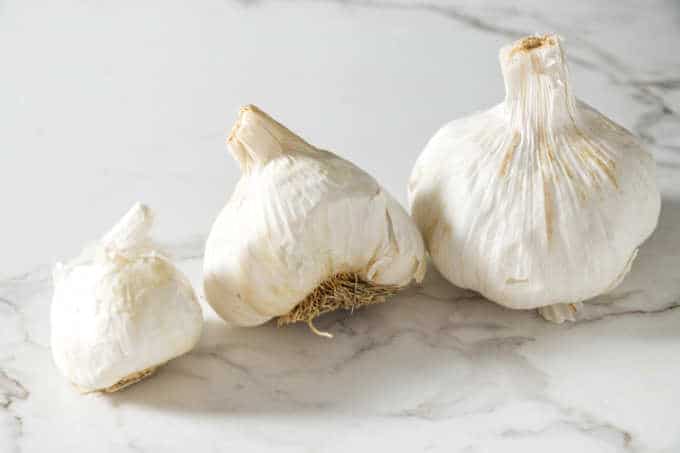
Pick similar-sized garlic heads. If one bulb is huge and the rest are small, the cook time won’t fit all of them.
Don’t peel the bulbs. Leave the papery skins on. They protect the cloves, keep them from getting watery, and make the bulbs easier to handle.
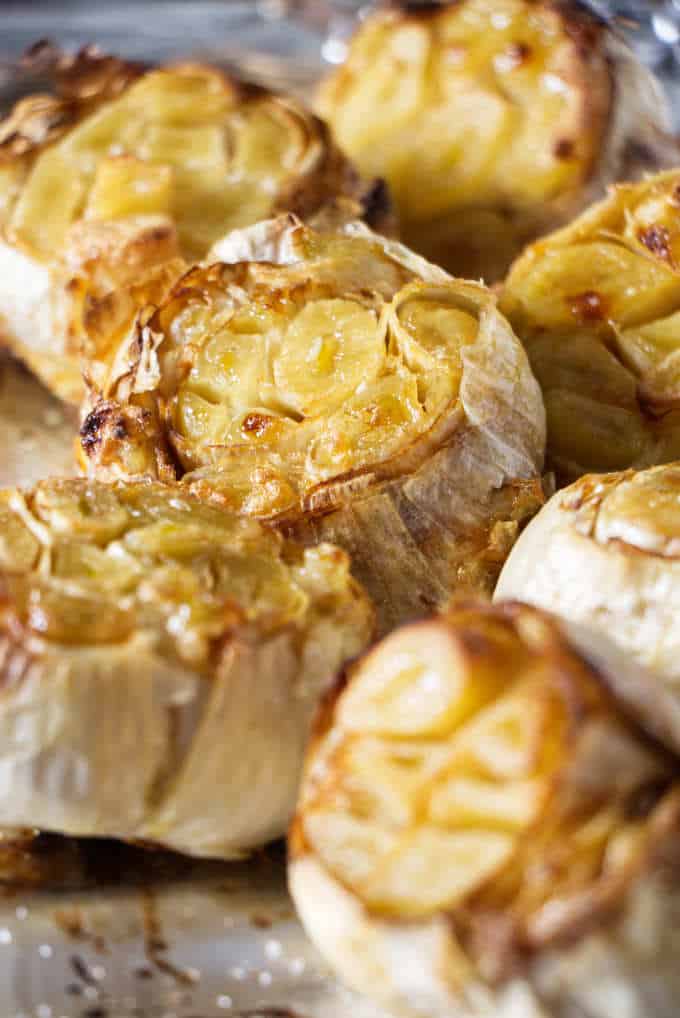
Cut just the top off. About ¼ inch is enough to expose the tops of the cloves without drying the bulb out.
Keep the garlic on a rack or steamer. If the bulbs sit in water, they can turn soggy and the flavor gets muted.
Broil if you want more color. The Instant Pot softens the garlic; the broiler gives you the roasted, golden top.
Let it cool before squeezing. Hot garlic is slippery (and it burns). Give it a few minutes, then squeeze from the base and the cloves pop right out.
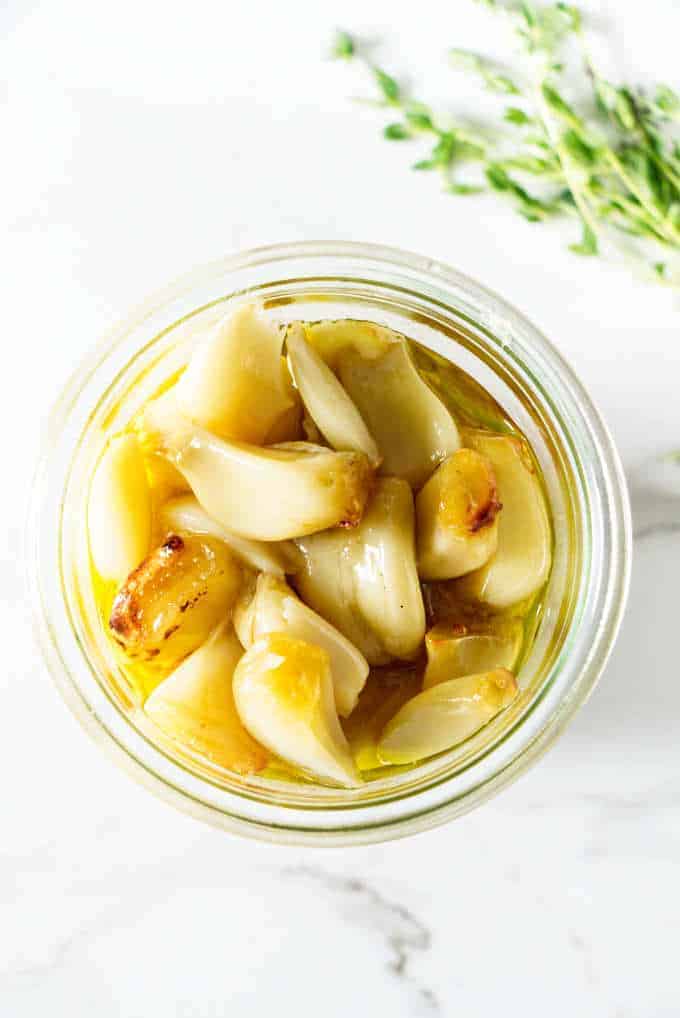
Storage tip for best flavor: If you’re refrigerating, coat the cloves with olive oil and keep them in a tight container so they don’t dry out or pick up fridge smells.
Freeze for longer storage. Squeeze out the roasted cloves, mash them into a paste with a little olive oil, then freeze in teaspoon portions in an ice cube tray. Once frozen, pop the cubes out and store them in a freezer bag.
how do you remove roasted garlic?
After roasting the garlic, you’ll want to allow it to cool long enough to handle. To remove each roasted garlic clove, simple squeeze the bottom of each bulb and the cloves will pop right out!
How long does it take to pressure cook garlic?
The cooking time will depend on the size of the garlic head. The picture above shows 3 different sizes of garlic. The small one is 1-1/2 inches in diameter, the medium one is approximately 2-1/2 inches, and the larger one is a little over 3-1/2 inches in diameter.
| Size of garlic head | Pressure cook time |
|---|---|
| Small | 6 minutes |
| Medium | 7 minutes |
| Large | 8 minutes |
How to Use it
These roasted garlic cloves are little gems in cooking! They bring a smooth, sweet and wonderfully delicious burst of flavor when added to recipes. And there truly are MANY ways to use it!
- Add it to your favorite hummus recipe or charcuterie board
- Add it to soups and stews, or casseroles
- Blend it with my make ahead mashed potatoes for a roasted garlic spin on your favorite classics!
- Use it in place of butter and spread it on warm sourdough bread.
- Switch up the flavor of garlic butter sauce by using roasted garlic.
There’s nothing better than being able to make a favorite in a fraction of the time! We love having roasted garlic cloves on hand – they’re so easy to use and up the flavor of any dish!
Pin this now to find it later!
Pin It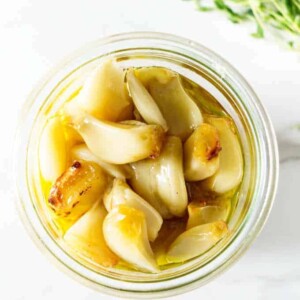
Instant Pot Roasted Garlic
If you make this recipe, please leave a star rating and comment.
Ingredients
- 8 heads garlic
- 3 tablespoons olive oil
- ¾ teaspoon salt
- 1 cup water
Instructions
- Cut ¼ inch off the top of each of the garlic heads. Drizzle them with oil and sprinkle a bit of salt on each of them.
- Place the rack or steamer insert in the Instant pot and add the water.
- Set the garlic heads on the rack, cut side up.
- Seal the lid. Cook on high pressure for 6 to 8 minutes (6 minutes for small garlic heads, 7 minutes for medium, 8 minutes for large).
- Let the pressure cooker release the pressure naturally for 5 to 10 minutes then release the rest of the pressure manually.
- While the pressure cooker is releasing pressure set the oven to broil and line a baking sheet with aluminum foil.
- When the pressure is released, transfer the garlic to the baking sheet and drizzle with a bit more olive oil.
- Broil for 4 to 6 minutes or until golden brown.
- When the garlic cools enough to handle, squeeze the bottom of each bulb and the individual cloves will pop out.
- Use in recipes right away or store in the fridge with a coat of olive oil for up to 2 weeks.
Video
Notes
Nutrition
Nutrition information is automatically calculated, so should only be used as an approximation.
 Like this recipe? Rate & comment below!


This is a brilliant recipe! And you’re right — it might get me to buy an Instant Pot. Kudos for this — really good stuff.
Thanks John!!
A life saving recipe, Dahn, I will have to try it ASAP!
thanks Angie