This post may contain affiliate links. Please read our disclosure policy. As an Amazon Associate, I earn from qualifying purchases.
Making a sourdough starter from scratch can feel intimidating, but the pineapple juice method takes away some of the uncertainty. By using pineapple juice for the first few days instead of water, you create a slightly acidic environment that helps the good yeast and bacteria thrive while discouraging the unwanted ones.
This step-by-step guide will walk you through the entire process, from mixing the very first jar on Day 1 to having a bubbly, active starter ready for bread baking. It’s not an overnight project. A strong starter takes time, daily attention, and a little patience, but the payoff is worth it.
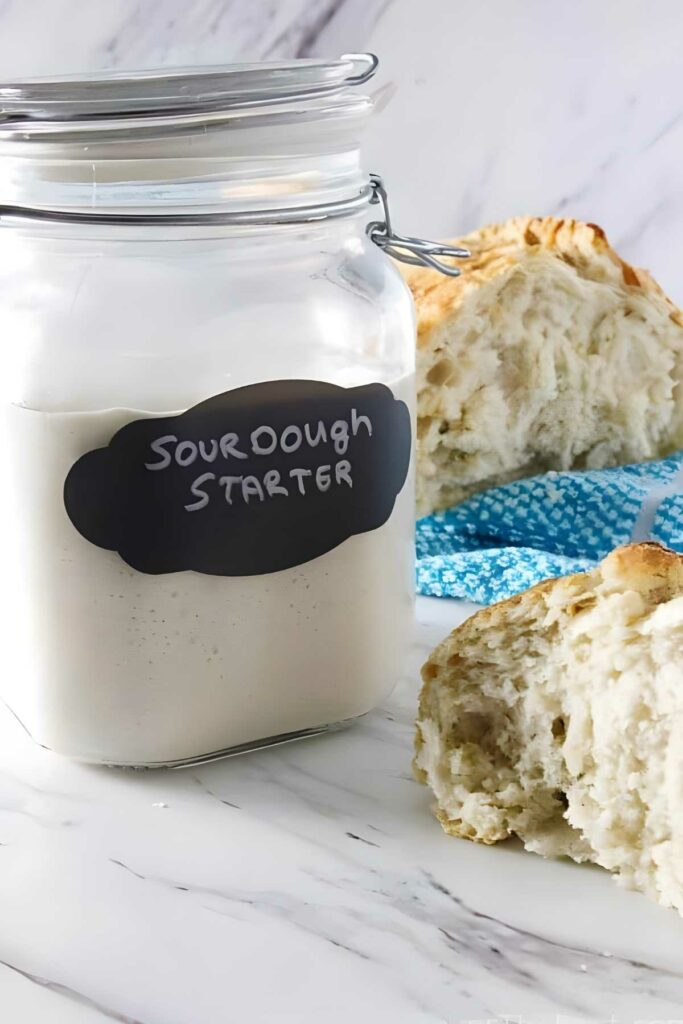
Once your starter is established, you’ll have the foundation for homemade sourdough bread, sourdough pancakes, pizza dough, and more, all from a living culture you built yourself.
Once you understand the science behind it, the pineapple juice method makes a lot of sense. Here’s why it works so well for starting a healthy sourdough culture from day one.
Here is Why The Pineapple Juice Method Works
Beginner-friendly and predictable: With clear day-by-day instructions, you’ll know exactly when to switch from juice to water, when to start discarding, and what to look for at each stage.
Creates the right environment from the start: Pineapple juice lowers the pH in those crucial first days, making it harder for unwanted bacteria to take over while giving the good yeast a head start.
Encourages early yeast activity: Many bakers see bubbles and signs of life sooner with this method compared to starting with water alone. It doesn’t guarantee instant results, but it often shortens the waiting game.
Helps avoid unpleasant odors: New starters made with plain water can sometimes smell a little “off” in the early stages. The pineapple juice method helps prevent that sour, cheesy smell that can make you wonder if something’s gone wrong.
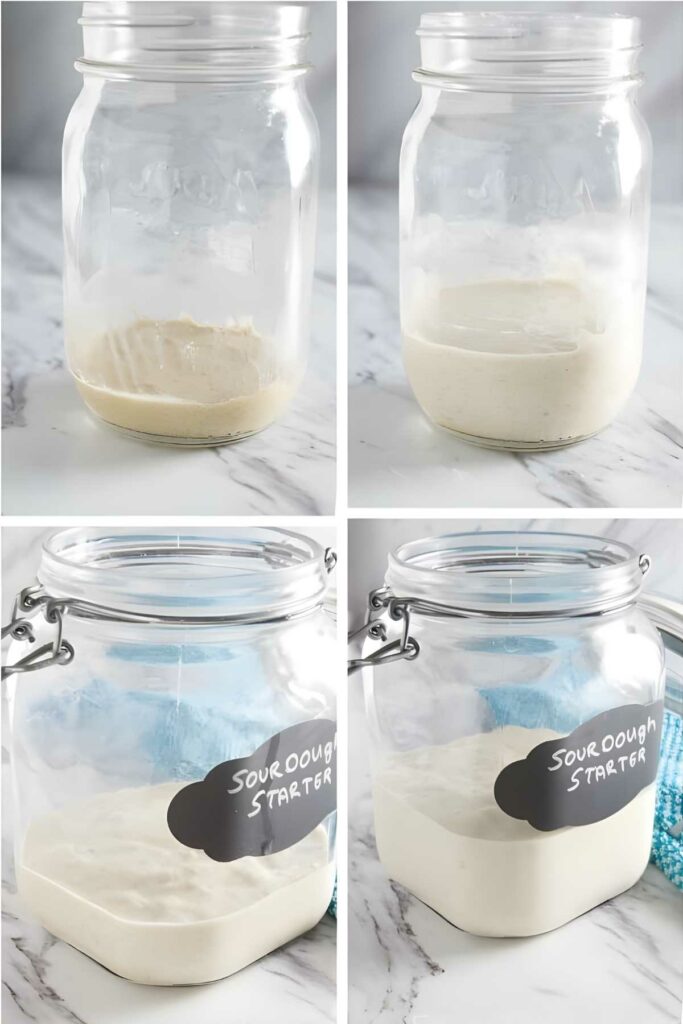
Tips for success
Be patient: Every kitchen is different. Some starters are ready in a week, while others take two or even three weeks to become strong and reliable.
Switch to water on Day 4: Pineapple juice is only for the first three days. After that, water is all your starter needs, extra acidity can harm the yeast once it’s established.
Use unbleached flour: Bleached flour is treated with chemicals that can slow yeast growth. Whole grain flour in the first couple of days can give your starter a boost, but white flour works too.
Watch the temperature: Try to keep the starter stored between 70–75°F. Too warm can encourage unwanted bacteria; too cool can slow yeast activity.
Choose non-chlorinated water: Chlorine can harm the wild yeast and bacteria in your starter, especially in the early days.
Don’t seal the jar tightly: Your starter gives off gas as it ferments. Keep the lid loose or use a breathable cover like a paper towel or coffee filter to let gases escape while keeping out dust and insects.
Feed at consistent times: Try to feed your starter around the same time each day so it develops a predictable rhythm.
Use a clear container: Seeing the sides of the jar makes it easier to track bubbles, rise, and fall, all signs of activity.
Mark the starting level: Use a rubber band or piece of tape on the jar to mark the height right after feeding. This makes it easy to see when it has doubled.
Expect some variation: Don’t panic if your starter smells different from one day to the next. Fresh, fruity, tangy, or even a bit yeasty are all normal during early fermentation.
Questions About Building a Sourdough Starter
If you didn’t remove some before feeding, your starter would grow exponentially. A 1:1:1 feeding means you’re doubling the total amount every time, so in just a few days, you’d have jars of starter taking over your kitchen and you’d be using huge amounts of flour to keep it going. Discarding keeps the quantity manageable
Your starter may look sluggish, but it’s rarely ruined. Just resume your regular schedule and it should bounce back.
New starters can have different smells during the first week. Sharp, tangy, fruity, or yeasty smells are normal. A strong rotten odor is a sign something’s wrong and you may want to start over.
That’s a sign your starter is hungry. You can stir the hooch back in or pour it off before feeding. I usually recommend pouring it off because mixing it in can make your starter more acidic, which can weaken it over time.
You can use your starter once it reliably doubles in size within 4–6 hours of feeding and shows lots of bubbles throughout. For some kitchens, that’s around Day 7; for others, it might take 1–2 more weeks.
Most recipes work best when your starter is at its peak, after it has doubled (or tripled) in size and is full of bubbles but before it starts to collapse. This is when the yeast is at its most active and ready to give your dough the best rise.
Take it out 1–3 days before you plan to bake and feed it twice a day until it’s bubbling and doubling reliably. Then use the amount your recipe calls for, and feed the remaining starter as usual before returning it to the fridge.
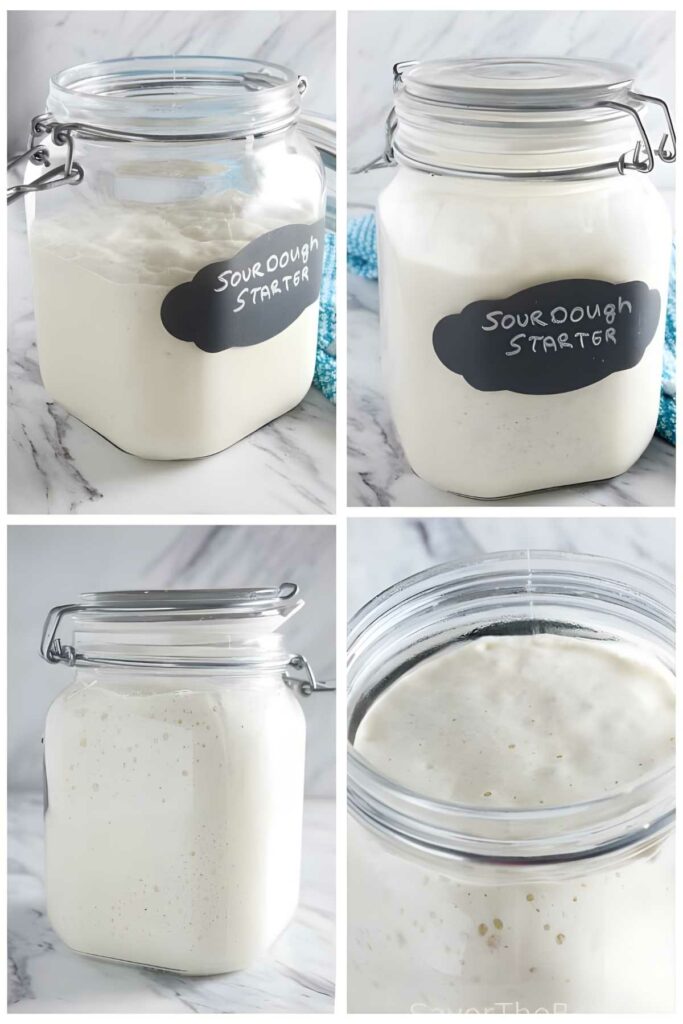
Building a Sourdough Starter From Scratch
Starting a sourdough starter with pineapple juice is a simple way to give the culture the best possible beginning. Once it’s active and doubling reliably, you’ll have a living ingredient you can use for sourdough pizza dough, bread, pancakes, and more, all from a starter you built yourself.
If yours takes a little longer to mature, don’t be discouraged. Every kitchen is different, and a slower start doesn’t mean it won’t become strong and dependable. Keep feeding it, watch for those signs of growth, and before long, you’ll be baking with a starter that’s truly your own.
Pin this now to find it later!
Pin It
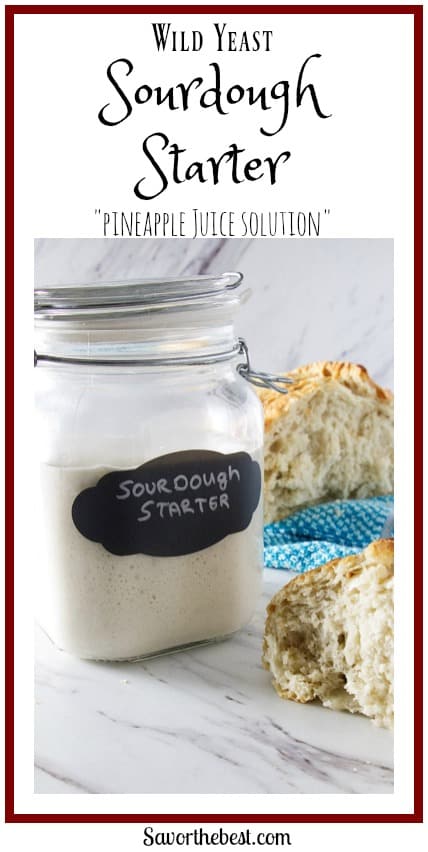
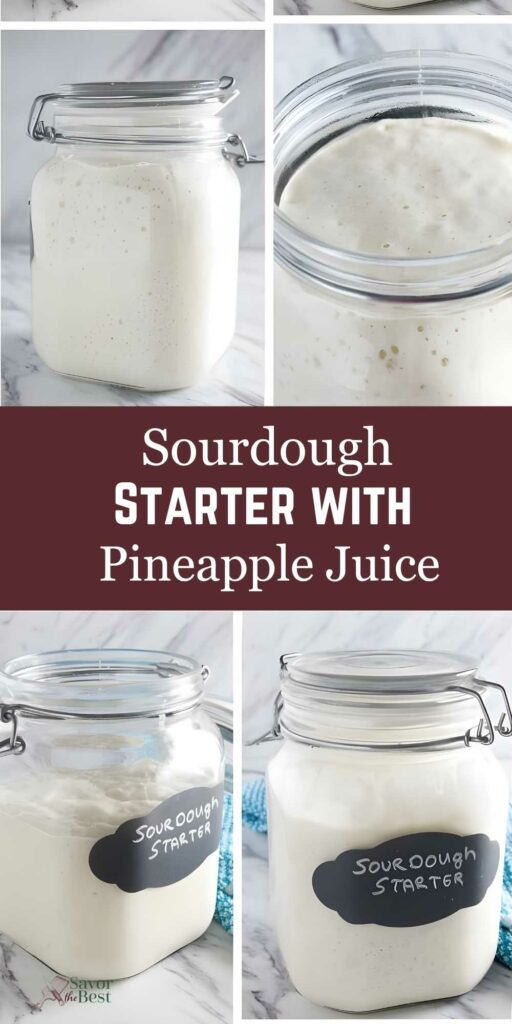
Making a Sourdough Starter with Pineapple Juice
If you make this recipe, please leave a star rating and comment.
Ingredients
- all-purpose flour, see notes
- Unsweetened Pineapple Juice
- Water, non-chlorinated
Instructions
Day 1: Start Your Starter
- In a small jar or bowl, mix 2 tablespoons flour (15 grams) and 2 tablespoons unsweetened pineapple juice (30 grams). This is the beginning of your starter.
- Stir 2–3 times during the day to mix in air. Keep it loosely covered with a paper towel or coffee filter to allow airflow while keeping out dust and insects.
Day 2: First Feeding
- Add 2 tablespoons flour (15 grams) and 2 tablespoons unsweetened pineapple juice (30 grams) to the starter you made on Day 1.
- Stir well to combine, then stir 2–3 times during the day to keep it aerated. Cover loosely as before. You won’t see any activity yet, the yeast is still getting established.
Day 3: Second Feeding
- Add ¼ cup flour (30 grams) and ¼ cup unsweetened pineapple juice (60 grams) to the existing starter and stir well.
- You may start to notice bubbles. If not, don’t worry, some starters take longer. There’s no need to discard any starter yet, just feed it, stir it, and wait.
Day 4: Begin Discard and Regular Feeding
- Starting today, switch from pineapple juice to water. Keep only ¼ cup (about 60 grams) of your starter and discard the rest.
- Add ¼ cup water (60 grams) and ½ cup flour (60 grams) to the remaining starter and stir well. Transfer the starter to a quart-size jar or larger so it has plenty of room to rise without overflowing.
Day 5: Continue Feeding
- Repeat the same feeding process as Day 4. If your starter doubles in size in less than 12 hours, start feeding it twice per day. If it’s still slow, keep feeding once a day. Some starters just need more time to get going.
Day 6: Maintain the Schedule
- Continue discarding down to ¼ cup (60 grams) of starter before each feeding, then add ¼ cup water (60 grams) and ½ cup flour (60 grams).
- Feed once or twice a day depending on how active your starter is. Look for a consistent rise and fall between feedings.
Day 7: Ready to Use (or Keep Feeding if Needed)
- If your starter is reliably doubling in size between feedings, it’s ready to use in baking. Remove the amount needed for your recipe, then feed what remains at a 1:1:1 ratio by weight. For example, 20 grams starter, 20 grams water, 20 grams flour.
- If your starter still isn’t doubling, keep feeding daily until it’s strong and active, which can sometimes take another week or two.
Storing and using your sourdough starter:
- Room temperature maintenance: If you plan to bake often, you can keep your starter at room temperature. Feed it once or twice a day (following the Day 4 feeding amounts) depending on how quickly it rises and falls between feedings.
- If you won’t be baking for a while, store your starter in the refrigerator and feed it once a week using a 1:1:1 ratio by weight (equal parts starter, water, and flour). As an example, you might keep about ¼ cup starter (around 60 grams), then feed it with ¼ cup water (60 grams) and ½ cup flour (60 grams).
- The flour amount looks larger because flour is lighter than water; ½ cup flour weighs about the same as ¼ cup water. The exact amount isn’t critical. Just keep the ratio the same.
- When you’re ready to bake again, take the starter out of the fridge 1–3 days before you need it and feed it twice a day until it’s fully active. Keep the lid loose so gases can escape.
Notes
Nutrition
Nutrition information is automatically calculated, so should only be used as an approximation.
 Like this recipe? Rate & comment below!




Hi, I was wondering what is the amount of apple cider vinegar I should use if I want to substitute pineapple juice?
Oh don’t use vinegar, you want to substitute with apple cider juice or orange juice if you can’t use pineapple juice. You would just use a 1:1 replacement. Thanks for the question, I will make sure that gets clarified in the text above.
@Dahn Boquist,
Can you replace the pineapple juice with lemon juice?
Mary
No, but you can use orange juice or apple cider juice (not apple cider vinegar but apple cider juice). Lemon juice is about 10 times more acidic than pineapple, orange, or apple juice so the apple or orange juice are better substitutes for the pineapple juice.
Thank you so much for the information and insight! This is my first attempt at a starter using pineapple juice. I am on day 3 and from the beginning my starter has been very thick. (More like wet dough than pancake batter) I would rather start over than waste my time if this isn’t right. Should it be this thick?
It will be thick when you first get started and until it develops more natural yeast. Even after you have an established, mature starter, it will be thicker immediately after you feed it…. then as it sits and the yeast “consumes the food”, the starter will get thinner.
Getting started with a brand new starter is the hardest part and always feels like you are doing something wrong. Sometimes it takes considerably longer than it should and then one day it just starts to take off. If you start over, you will lose the last three days and you won’t be any further along by the end of the week. If you just can’t stand it and feel like you have to start over then I would encourage you to keep this starter going while you begin with a new batch.
hello!! so my starter is around 2 weeks old and i tried my first loaf about a week ago and it was the wrong thing to do because i think it wasnt strong enough yet… however now it doubles in size consistently and has a slight alcohol smell (which i assume is normal) so im wondering whether i should give it another go? i heard from others that you need your starter to be at least tripled at peak so im a bit reluctant at giving it another go… advice please!
It is certainly worth giving it a try. If you are concerned that you might waste your ingredients then I would recommend making a half batch of bread and don’t use an expensive flour. Just use all-purpose flour or bread flour. That way if the starter isn’t quite strong enough, it won’t be an expensive trial. The alcohol smell is pretty typical. It means the yeast is fermenting. The stronger the smell, the more likely the starter is over-fermented and needs to be fed. If you use the starter at that stage of growth then your bread will not rise as well. The best time to use the starter in a recipe is when it reaches its peak growth after you feed it. The timing is different for each individual starter. Just watch the starter after you feed it. It will grow and bubble up. As soon as it stops growing and begins to start falling back down, that is the time to use it in a recipe. An even better time to use it is just BEFORE it starts to fall back down. It just takes time to get to know your starter and the more you bake with it, the better you will get.
This is my 5th day, and I’ve had zip activity. The starter smells fine. Yesterday it had become a little thick from evaporation in the bowl, so I added a bit of extra water. Except for that, I’ve weighed ingredients carefully. Any thoughts?
Don’t give up. For some reason, this process seems to take some people much longer. Some people don’t see activity for over 10 days. Are you using bleached or unbleached flour? Bleached flour will retard yeast growth. A bit of whole wheat flour helps if you are not already using that. It shouldn’t evaporate that fast. Are you keeping it near a heat source? If it is too hot then the yeast will not grow and it will evaporate. You do want it to be comfortably warm but make sure you cover it with a kitchen towel or paper towel
I am so sorry, I just saw you had the recipe for sourdough starter, right there at the top , thanks again.
sylvie clement
Can you get away with using bleached flour? I neglected to check that the AP flour I’m using was unbleached and whoops, it is bleached. I’m going into week 3 of this recipe, it rises about 25% in 12 hours then is back to starting height when I feed at 24 hours. I’m in a warm climate, ranging from about 75F-88F in a day. If I can get a hold of unbleached flour, do I need to start over, or can I just transition to feeding that instead?
You could most likely transition to a different flour without starting over. The best bet would be to get your hands on whole wheat since that will have more natural yeast present to give the starter a better boost.
My breads great it inflates huge the day I feed it. My first 6 hour rise is always pretty nice but my second fails to amaze. I have talked to others in hot houses they get a better rise, my house is always about 69-70. Could they be it. Could I be kneading it too much? Any other trouble shooting? Again the bread is pretty great and the yeast is freakishly
Yeasty so why the rise trouble? I thank you.
If your house is warm, you may be letting the first rise go for too long. Try reducing the time for the first rise. You might only need 4 hours. You could also try letting it rise in the fridge overnight.
I’m on day 4 with double the rise. When you say to feed it twice. Is that duplicate step 4 (ie. Take out the 1/4 cup and add water and flour to it), or just add more water and flour. Thank you
Usually, by day 4 you will only need to feed it once, however if it doubles in size within 8 to 12 hours then you will want to feed it again. Definitely discard all but 1/4 cup before you feed it or you will have a very large batch. If your starter is not very active (getting bubbly and doubling in size) then you do not need to feed it twice per day. You only want to increase the feeding regimen when your starter is consuming all the food (and you know it is doing that when it is really active).
I went ahead and started this in a pint jar. I am on day two and this stuff smells amazing. I am very new to this so forgive me for being a pest. Is it normal for day 1 and 2 for it to be more liquidy than doughy?
Yes, especially the first couple of days because there is a higher ratio of liquid for the first couple of days. By day 3 to 5 it will start to look more like a thick pancake batter. As time goes by, you may notice some variances in the consistency of the starter. It will vary a bit depending on your feeding schedule and the type of flour you use. For the most part, it will look like a pancake or muffin batter.
Can this recipe be stored in a ziplock bag like many of the friendship breads are stored? Or would that just be too messy?
Well, that would be terribly messy. This is a starter that can last a lifetime if properly cared for. It would be difficult to maintain the starter if you keep it in a plastic bag. If you want to give some of your discard to a friend then you could place the discard in a plastic bag but I would recommend telling your friend to transfer the discard to a jar that would make it easy to maintain her new starter.
I went ahead and started this in a pint jar. I am on day two and this stuff smells amazing.
Oh yes, for a few days it will have a slight fruity smell from the pineapple juice. It’s good stuff 😉
I am so excited. Today was day 5 I think. I get a bit lost on my count. I can’t tell if it is rising or not. I guess I need to add a marker to my jar so that I will know. I did have bubbles on top of it today and I used my discard to make pancakes that were very good. I also saw the recipe here for bread and I am assuming that I can make other recipe using my starter. My question now is can I use this starter with any recipe I find on google that calls for a sourdough ingredient? And you were correct it has begun to thicken up, will it get too thick ?
Yes Wona, this starter will work in any sourdough recipe but make sure the starter is doubling in size before you use it to make bread. Until then, you can use the discard to make things like pancakes, waffles, and crackers. This starter is 100% hydration. You may find some recipes that use a sourdough starter that has a lower hydration (and thus a much thicker starter) but you can still modify your starter for those recipes.
At 100% hydration the starter will not get too much thicker however you will notice differences in the consistency depending on the type of flour you use to feed the starter. For instance, whole grain flour will absorb more liquid so the starter will look thicker. It doesn’t really matter how thick the starter is as much as how active it is.