
This post may contain affiliate links. Please read our disclosure policy. As an Amazon Associate, I earn from qualifying purchases.
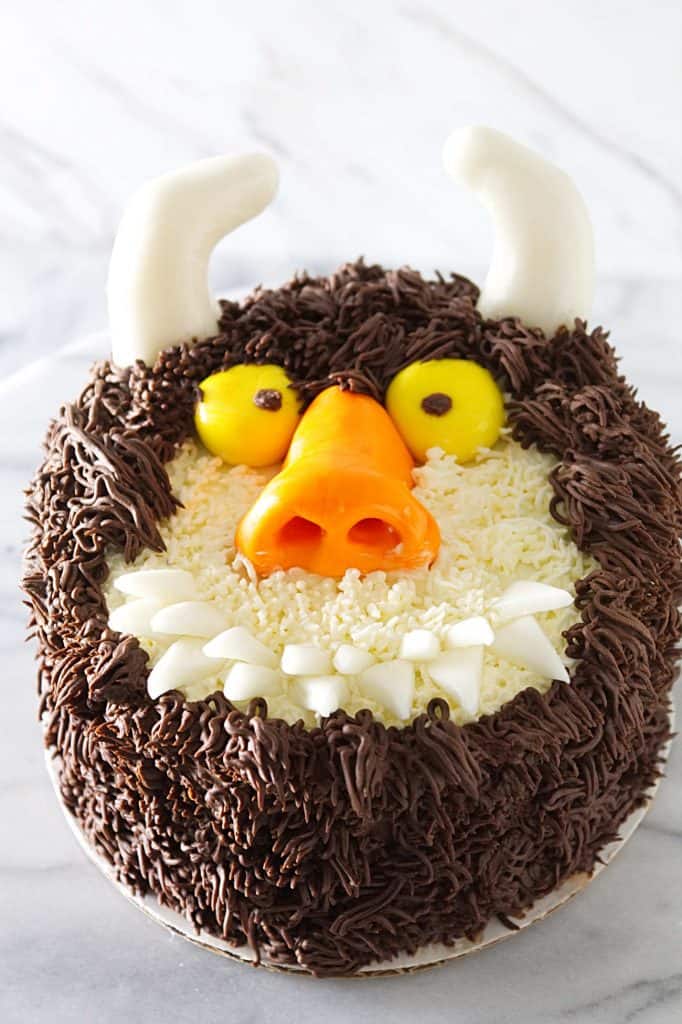
Create a fun and easy monster cake for a monster theme party.

This is a quick and easy way to make an adorable and original birthday cake for a kids birthday party. I based this monster face cake off the monster in the book “Where the Wild Things Are”. This is a really easy cake to decorate and it is so much more fun than a standard grocery store cake.
I baked a chocolate cake that stays fresh and moist for a couple of days so I could decorate the cake in advance. I used my recipe for moist chocolate cake with cream cheese icing.
That left me with time to get some other projects done without making a crazy last-minute dash to finish the cake. If you are like me you always have extra projects and decorations to prepare right up to the very last minute. It really helps to have the cake decorated a day or two in advance.
Creating the Fur
I used a standard American buttercream to pipe the “fur” on the cake. After making a batch of buttercream, I set some of it aside to remain white. With the rest of the buttercream, I simply used unsweetened cocoa powder to give it a brown color.
First I used a grass tip to cover the top of the cake in the white buttercream. Once the top was covered, I used the same grass tip to cover the sides of the cake in chocolate buttercream. I used longer strands to give the chocolate portion fur a more ‘hairy’ look . It’s hard to go wrong with this kind of decoration, the messier you are, the better the monster looks. This is a great design for beginner decorators.
After the buttercream was pipped, I stuck on the nose, eyes, teeth and horns. A few extra wisps of chocolate frosting helped cover the top of the nose and eyes.

Making the Fondant Shapes
The nose, eyes, teeth and horns are all made from fondant. If you have never worked with fondant before, it is just as easy as working with clay or Play-Doh.
I used yellow fondant to make round balls for the eyes then I used some chocolate buttercream to make the pupils. The nose was shaped with orange fondant and the nostrils were formed with a fondant tool but the end of a paint brush would work just as well.
I shaped the horns with white fondant and then stuck a wooden skewer into them so they would have some support all the way down through the cake.
With the rest of the white fondant I made small triangles to represent the teeth.
I should leave you with a word of warning about the fondant decorations. The fondant can turn into a sticky mass if you take a large bite. This is especially a problem with young children and can become a chocking hazard. I would recommend removing the fondant decorations prior to serving the cake.
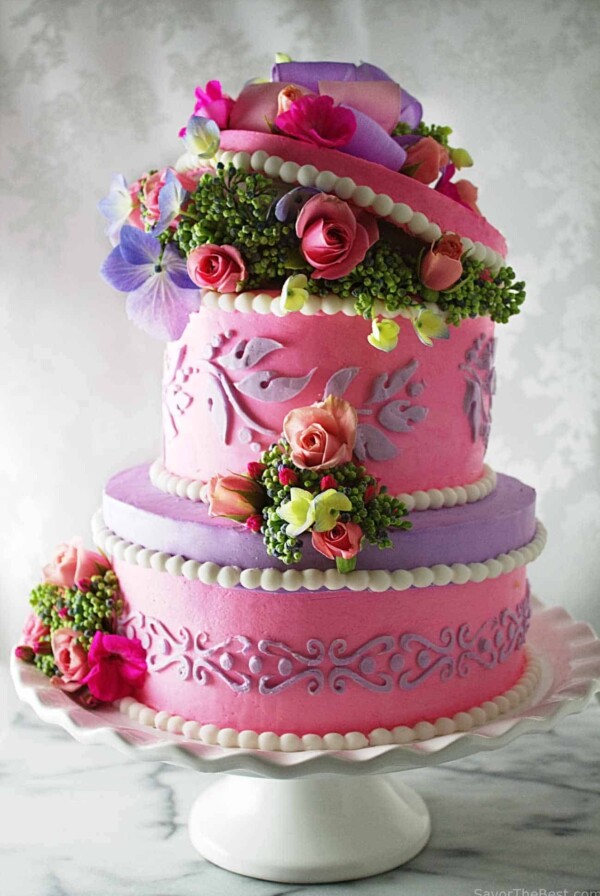
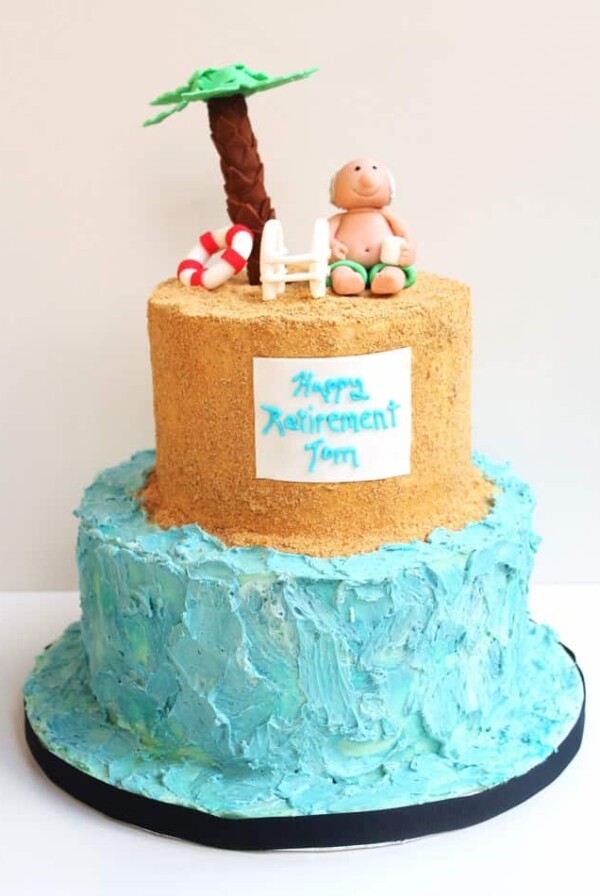
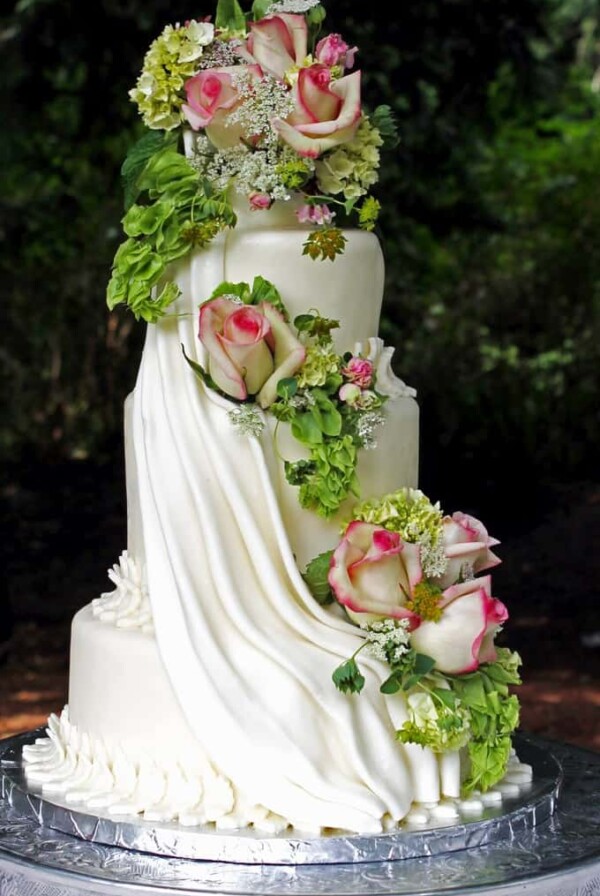
Here are some other fun cake designs you might be interested in:


This cake is fabulous! I love it.
Thanks Elizabeth, It sure was fun to make 😉
This looks wonderful! SO creative! Terrific decorating job — I’m decorating-challenged, so this is probably a bit out of my league, but I’d love to be served a piece of this. 🙂 Terrific cake — thanks.
ha,ha, thanks John! I’ll decorate and you can eat 🙂