
This post may contain affiliate links. Please read our disclosure policy. As an Amazon Associate, I earn from qualifying purchases.
This chocolate shortbread crust is dark, crisp, buttery, and not here to play backup to the filling. It has a firm, cookie-like texture that holds its shape, slices neatly, and brings real chocolate flavor to the tart instead of just sitting there looking pretty.
The melted butter makes the dough easy to mix and press into the pan, and a little espresso powder gives the cocoa a deeper flavor without stealing the show.
This chocolate crust recipe is a cocoa-packed version of our easy shortbread pastry. It’s just as rich, flaky and buttery, but chocolate.
Highlights For This Chocolate Shortbread Crust Recipe Works
Melted butter dough: Melted butter blends quickly with the other ingredients, creating a smooth dough that presses easily into the pan without needing a mixer.
Cocoa + espresso combo: Unsweetened cocoa powder adds deep chocolate flavor, while a touch of espresso powder quietly boosts the richness without making the crust taste like coffee.
Egg yolks for structure: Two egg yolks add richness and help the chocolate shortbread crust bake up firm enough to slice cleanly without crumbling.
Cornstarch for tenderness: A small amount of cornstarch keeps the crumb tender so the crust stays crisp and delicate instead of dense or tough.

Recipe Tips
Use melted, cooled butter: Melt the butter first, then let it cool down before mixing the dough. Hot butter can cook the egg yolks and make the dough harder to work with.
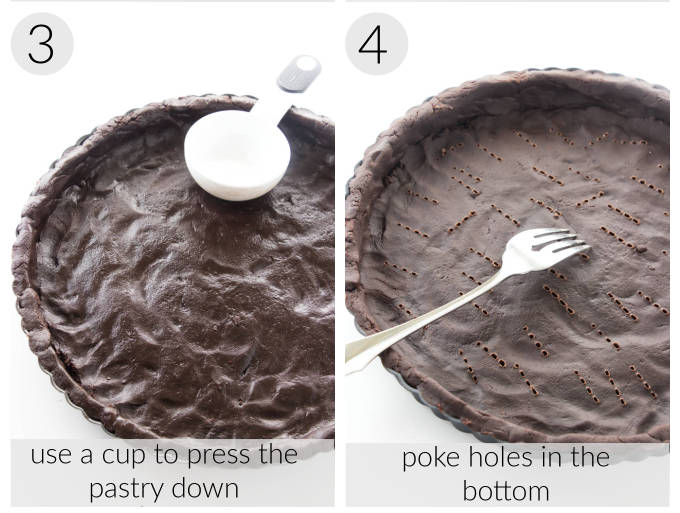
Press the dough evenly: Use your fingers, the back of a spoon, or the bottom of a measuring cup to press the dough into an even layer across the bottom and up the sides of the pan.
Freeze before baking: Chilling the crust for 30 minutes helps firm up the butter so the dough keeps its shape in the oven.
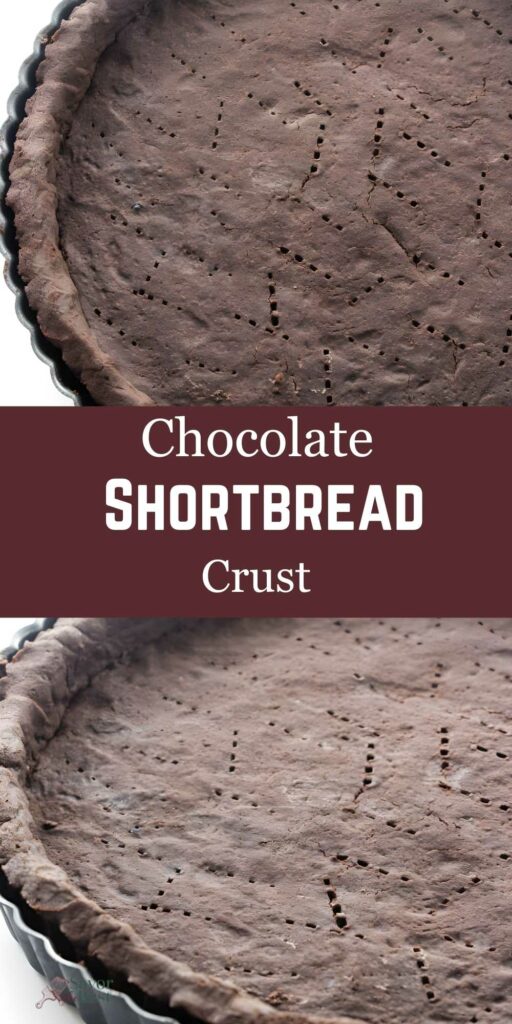
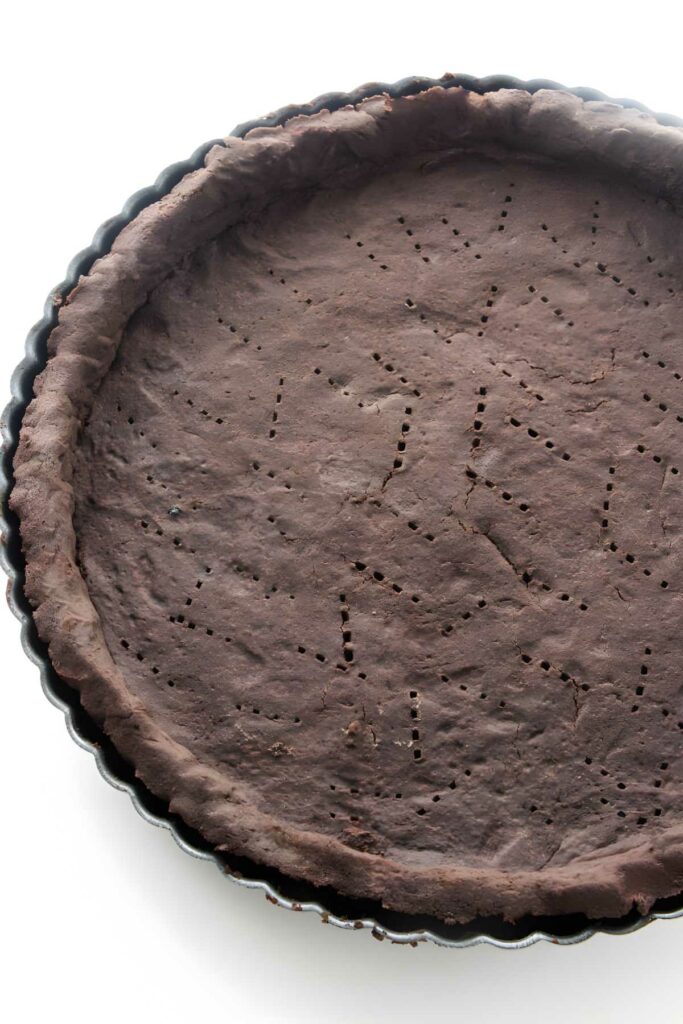
Dock the crust: Prick the bottom and sides with a fork before baking. That helps prevent air pockets and keeps the crust from puffing up.
Use pie weights for the first bake: Line the crust tightly with foil and fill it with pie weights, dried beans, or rice. That helps keep the sides from sliding down while the crust sets.
Let it cool completely before filling: Filling a warm crust can soften it and undo all that work you just did to keep it crisp.
Both my Chocolate Mint Tart and my chocolate peanut butter tart are great recipes for using this shortbread crust.

Chocolate Shortbread Tart Crust
This chocolate shortbread crust is a good one to have on hand when you need a tart shell that is sturdy, crisp, and full of chocolate flavor. It pairs especially well with our butterscotch tart, and it also makes a great base for our no-bake peanut butter pie if you want to switch things up.
Pin this now to find it later!
Pin It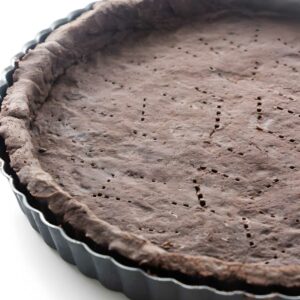
Chocolate Shortbread Crust
If you make this recipe, please leave a star rating and comment.
Ingredients
- ½ cup powdered sugar, 57 grams
- 1 teaspoon vanilla extract
- 2 egg yolks, whisked lightly with a fork, 34 grams
- ¼ teaspoon salt
- 1 cup butter, melted and cooled, 227 grams
- 1 ½ cups all-purpose flour, 180 grams
- 1 tablespoon espresso powder
- ½ cup unsweetened cocoa powder, 42 grams
- 1 tablespoon cornstarch
Instructions
- Preheat the oven to 350°F and spray the bottom of an 11-inch tart pan with non-stick baking spray.
- In a medium-size bowl, mix with a spatula or wooden spoon, the powdered sugar, vanilla, egg yolks, and sea salt. Add the butter and mix to a smooth consistency. Add the flour, cocoa, and cornstarch and stir until the dough forms a smooth ball.
- Transfer the dough to an 11-inch tart pan with removable bottom. With your fingers and a tablespoon, press the dough evenly across the bottom and up the sides of the pan. You can also use the bottom of a measuring cup. Prick the crust, bottom, and sides, with a fork set the tart pan on a baking tray, and transfer to the freezer for 30 minutes.
- Remove the baking sheet with the crust from the freezer, spray a piece of aluminum foil with non-stick spray. Press the sprayed side of foil very tightly against the bottom and up the sides of the crust. Add pie weights and transfer to the middle rack of the oven.
- Bake for 15 minutes. Carefully remove foil and pie weights. Continue to bake uncovered for another 15 minutes. Remove from the oven and allow to cool on a wire rack before filling.
Notes
Nutrition
Nutrition information is automatically calculated, so should only be used as an approximation.
 Like this recipe? Rate & comment below!


This would be better in a metric format using Grams instead of measuring cups
thanks for the comment, I updated the recipe card with grams as well
Recipe says a 13 x 9 cookie sheet pan is an option. Do I line it with something to lift it out when cooled or just flip it over? How long bake it in 13 x 9 pan? I want to bake it for a bottom layer to an ice cream cake , do you think that will work?
If you’re using a 13×9-inch pan, I recommend lining it with parchment paper so you can lift it out after it cools. The crust will be thinner and a bit more fragile than in a tart pan so you may want to freeze it before removing it from the pan to prevent cracking. For baking time, start checking a couple of minutes earlier. It should work for an ice cream cake; just make sure it’s completely cooled
Love shortbread. And chocolate. So you know where I’m going with this, right? 🙂 This looks really, really good. Such a nice recipe — thanks.
It’s hard to go wrong with chocolate and shortbread 😉