
This post may contain affiliate links. Please read our disclosure policy. As an Amazon Associate, I earn from qualifying purchases.

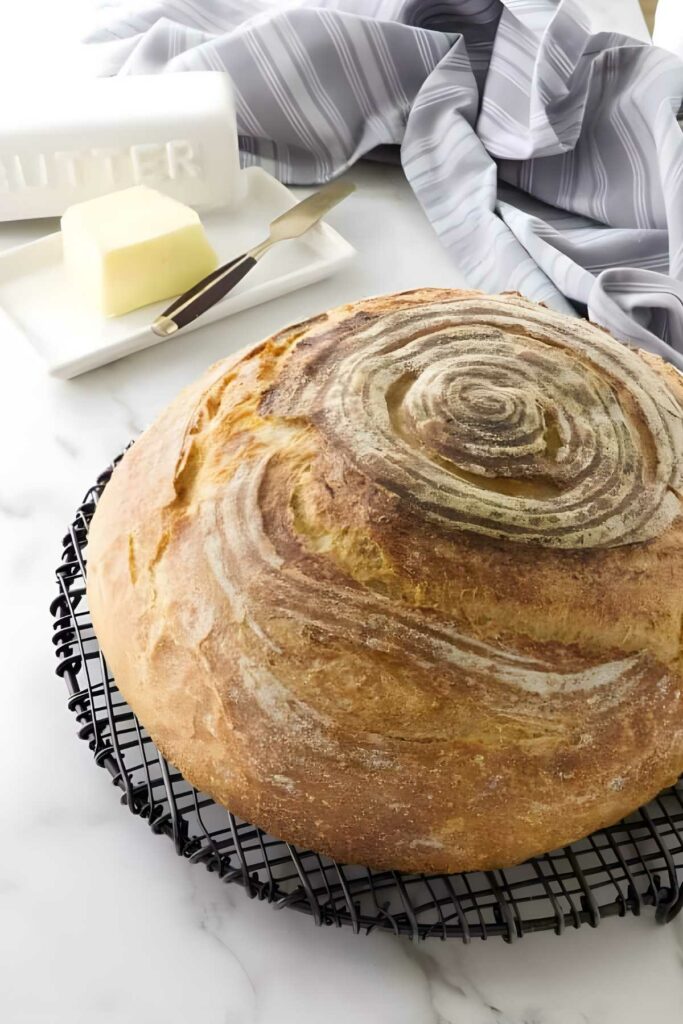
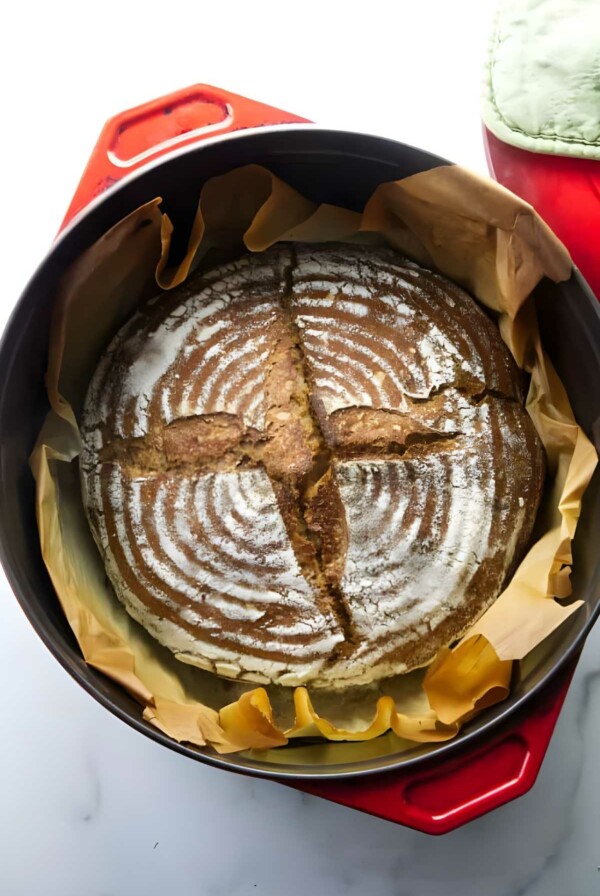
This rustic sourdough bread bakes up with a crisp, blistered crust and a chewy, open crumb. No fancy techniques required. A long, slow fermentation builds complex, well-developed flavor, while the Dutch oven traps steam for that golden artisan finish. With just four ingredients and a little planning, you’ll get a loaf that looks and tastes like it came from a bakery
Looking for a version made with ancient grains? Try our Einkorn Sourdough Bread for a nutty, flavorful twist.
Here’s Why This Sourdough Bread Recipe Works
A Dutch oven creates its own steam chamber, helping the loaf rise fully and develop a crisp, crackling crust.
Long fermentation builds better flavor. A slow rise (especially overnight) develops complexity without pushing the dough into sharp sourness.
Sticky dough makes great bread. This high-hydration dough can be a little messy, but it’s worth it. The extra moisture helps create an open, chewy crumb.
Stretch and fold, or knead if you prefer. A few quick folds during the first rise are all it takes to build structure. But if you’re more comfortable with traditional kneading, we’ve included notes for that method too.
For a sweeter way to use your sourdough starter, these Sourdough Raised Donuts are soft, pillowy, and downright irresistible.
Recipe Tips
Weigh your ingredients. Measuring flour by volume can swing wildly. Using a scale keeps your hydration consistent and your dough predictable.
Handle sticky dough with wet hands. This dough is higher in hydration and a bit sticky. A quick splash of water on your hands makes shaping easier.
Dust proofing baskets with a rice flour blend. All-purpose flour tends to stick. A 50/50 mix of rice and AP flour creates a drier surface that helps the dough release cleanly.
Preheat your Dutch oven. You can bake in a cold pot, but a fully preheated Dutch oven gives you better oven spring and a more dramatic rise.
Watch the dough, not the clock. Rising times vary with temperature and starter strength. Instead of timing it strictly, look for dough that’s puffy and slightly jiggly before baking.
Use leftovers to make my sourdough French toast that uses discard as well as sourdough bread.
Rustic Sourdough Bread
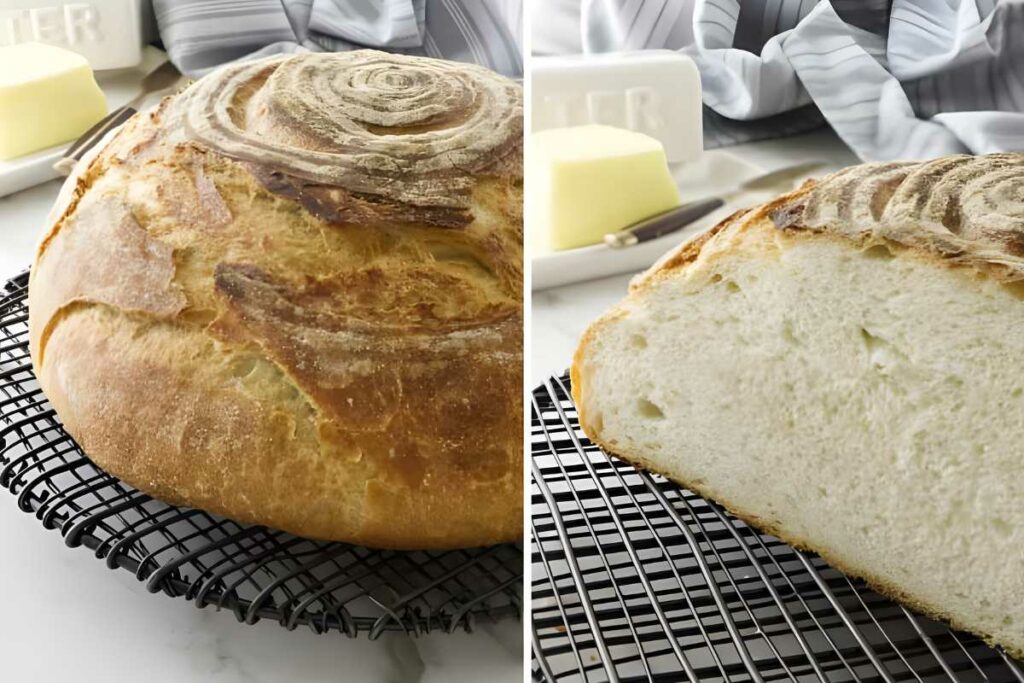
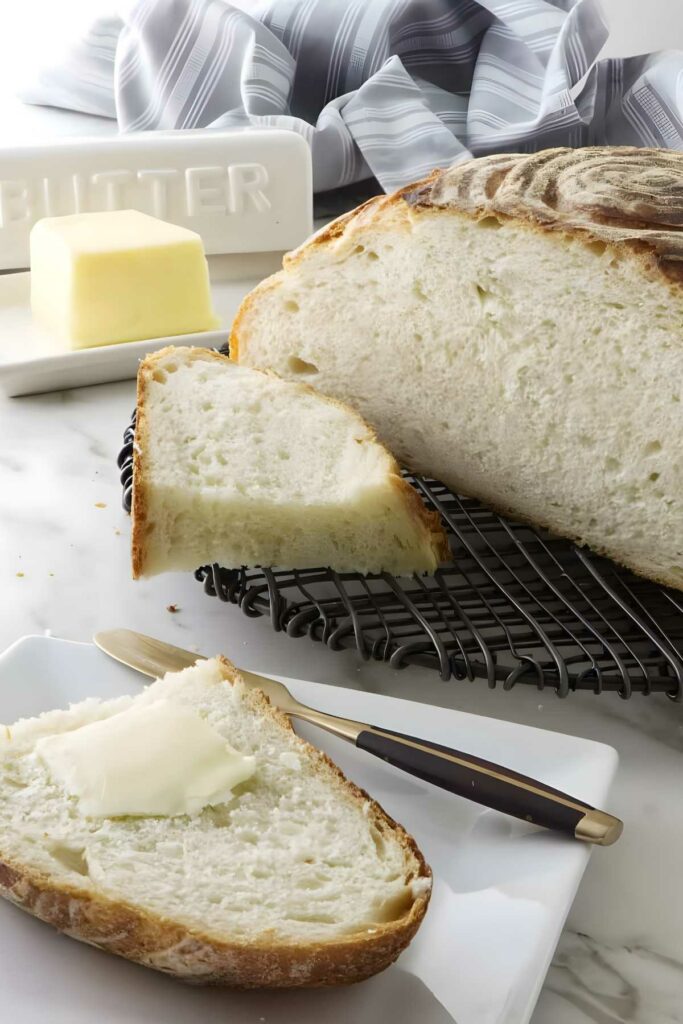
This is the kind of bread that reminds you why baking from scratch is worth it.
The crust sings, the crumb is open and chewy, and the flavor runs deep. You don’t need fancy tools or a complicated routine, just patience, good ingredients, and a Dutch oven.
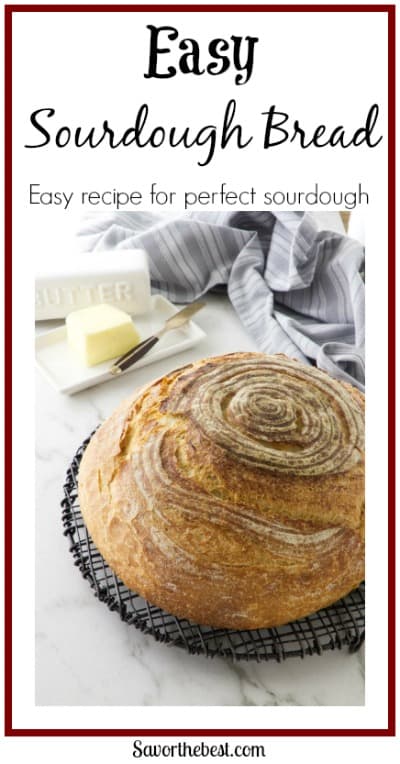
Pin this now to find it later!
Pin It
Easy Sourdough Bread Recipe
If you make this recipe, please leave a star rating and comment.
Ingredients
- ⅔ cup active sourdough starter, (160 grams)
- 1⅓ cups warm water, (314 grams)
- 4¼ cups all-purpose flour, (510 grams)
- 2 teaspoons salt, (12 grams)
Instructions
Mix the dough
- In a large bowl, combine the sourdough starter, warm water, flour, and salt. Stir with a spatula or your hands until no dry spots remain. The dough will be sticky and shaggy. Cover the bowl with a damp towel or plastic wrap and let it rest for 30–45 minutes.
Stretch and fold and Bulk Rise
- After the rest, perform the first stretch and fold: with wet hands, grab one side of the dough, stretch it upward, and fold it over the center. Rotate the bowl and repeat 3 more times for a total of 4 folds.
- Repeat this process 2 more times, spaced 30 minutes apart, for a total of 3 rounds. After the final fold, cover the bowl and let the dough rise at room temperature until puffy and nearly doubled in size, about 4 to 6 hours, depending on the temperature.
Shape and proof
- Turn the dough out onto a lightly floured surface. Gently shape it into a round by folding the edges toward the center and flipping it over. Use your hands or a bench scraper to tighten the shape slightly.
- Place the dough seam-side up in a floured proofing basket or towel-lined bowl. Cover and refrigerate for 8 to 12 hours for a cold fermentation that develops more flavor and makes scoring easier.Short on time? You can skip the fridge and let the shaped dough rise at room temperature for 1 to 3 hours, or until it looks slightly puffy and airy. See the note below about signs that the bread is ready to bake.
Score and bake
- Place a Dutch oven with the lid on into the oven and preheat to 475°F. Let it heat for at least 30 minutes to ensure the pot is thoroughly hot.
- Remove the dough from the fridge and invert it onto a sheet of parchment paper. Score the top with a sharp knife or lame.
- Carefully transfer the dough (on the parchment) into the hot Dutch oven. Cover and return it to the oven. Lightly spritz the surface of the dough with water. This encourages extra steam in the pot and helps create a crisp, blistered crust.
- Bake covered for 20 minutes, then uncover and bake for another 20–25 minutes, or until the crust is deep golden and crisp. Transfer to a wire rack and let the loaf cool completely before slicing.
Notes
Nutrition
Nutrition information is automatically calculated, so should only be used as an approximation.
 Like this recipe? Rate & comment below!
For a reminder of the true Bread of Life, read John 6:35. If you’re hungry for more than bread, this verse is worth a pause.


I made this last week and turned out so well so that I am making again this morning:) It was very crunchy and very delicious with out sugar! I’m testing by using bread machine from Japan so that I can avoid stickiness on my hand, lol.
I’m so glad you enjoyed it, thanks for the comment.
I made the starter from your site. Used it with this recipe. The dough was wet as compare to the video. I am using Gold Medal AP Flour. Checked with the Baker Percentage: which is about 61% (water), it is suppose to be wetter compare to the video?
If you use a 100% hydration sourdough starter, the bread in this recipe will have a 66% hydration. There are a lot of factors that will change the hydration and feel of bread dough but this recipe will work well if the hydration gets adjusted up or down. Extra hydration will make the dough more difficult to work with, but the bread will be lighter and fluffier. Less hydration will make the dough easier to work with but it will result in a denser, heavier loaf of bread.
I started this bread last night and put it in the fridge to rise overnight. When I checked it this morning (10hrs later), it had not risen at all. I now have it in the oven, which I warmed slightly at the lowest setting, in hopes that it will rise in there. Is there anything I can do at this point to salvage? Do you know why it might not have risen at all in the fridge? I followed the recipe and the instructions exactly, except I added a very small additional amount of water, as my dough was a little dry and shaggy at first. I put it in a large glass bowl with a silicone lid in my fridge- which is 34 degrees (too cold??) I used my starter when it was almost back down to its base level but not quite. Would love some feedback. Thanks!
34 degrees is too cold for your dough to have any significant activity. If you try this again and the dough does not rise in the fridge, set it out at room temperature until you see it rise. Sometimes it can take several hours at room temperature if it was in an extra cold fridge. The bread won’t have time to rise enough now that you put it in a hot oven. You will get better results if you use the starter when it reaches peak activity next time as well, although the temperature of the dough has a bigger impact.
@Dahn Boquist, thank you for your reply. I didn’t actually put it in a hot oven- I just warmed my oven a bit (I turned it on the lowest setting- 170 degrees F- for 4 minutes and then shut it off) and then allowed the dough to rise in the warm oven. It took a bit to start rising but it did eventually rise! After about 5 hours, I kneaded it and then allowed it to rise another 3 hours and then baked it in a Dutch oven- it turned out beautifully, although a bit dense- great flavor, crunchy outside, soft inside!
Next time I’ll let it rise on the counter instead!! 🙂
I’m glad it turned out. Great to hear. Thanks for the comment.
Twice I attempted this recipe with the worst success ever . Followed all instructions but it was like trying to need yogurt. The second attempt I tried less water still the same . I make lots of bread and have been successful at other sourdough recipes. Sorry this didn’t work for a waste of time and effort . Good others had success must be a flour thing . US flour is quite different to Euro .
Sorry, you didn’t have any luck. I don’t know if it could be the flour but there is a difference between the US and European flour.
This bread turned out excellent. I used 50% hydration starter. I did 6 stretch and folds over 3-4 hours and put it overnight in fridge. After it came up to room temp, I baked it in a Dutch oven at 450. Good sourdough flavor and great oven spring. Thanks so much.
Glad you liked it. Thanks for the comment.
I had to read this crappy article to get a recipe that is blocked cool
I don’t have this content blocked. Can you send me a screenshot so I can help resolve the issue?
This is my second attempt at using this recipe… the dough is very, very dry, more than a yeast bread. I thought I mis-measured so I tried it again and same result.
This recipe was made with 100% hydration sourdough starter. If your sourdough starter isn’t at 100% hydration it will make a big difference in the hydration of the final dough. Since there are so many variables in baking bread it is much easier to go by the feel of the dough. You can adjust the liquid if the dough feels too dry or if you use a lot of flour during your kneading process. One of the key’s to baking bread is being flexible. Using a different type of flour, using a starter with less hydration, using extra flour to knead, and many more factors will affect the final outcome of bread. If the dough doesn’t feel right then go ahead and adjust the flour and liquid during the kneading process.
Do I need to leave the liner in the basket when bread is rising?
You certainly can, it is a matter of personal preference really. Without the liner, you will see more of the design from the basket left on the bread. The liner will give the bread a smoother surface. Also, some people find that the liner helps the bread release from the basket easier.
When preheating the Dutch oven does the lid go on the DO to get preheated or to keep the in?
Thank you for sharing.
Also, you mention using rice flour but just as a nonstick agent, right?
I’ve read some other recipes suggesting using rice flour in the recipe. I have never seen rice flour.
Thanks again.
Yes, I preheat the lid on my Dutch oven as well. Make sure your Dutch oven can withstand the high temperatures and put it in the oven before you turn the oven on. That way you don’t shock it with an immediate high temperature. The rice flour is used just for a non-stick agent in the brotform. It is the best thing I have found to prevent the dough from sticking to the brotform. If you can’t find rice flour then you can make your own by grinding rice in a spice grinder or blender. The rice flour is optional but really does help the shaped dough release from the mold.
HI there. I”ve made two loaves thus far using your tutorial. I just inherited a Kitchenaid and wondered how long to mix with the hook? I’ve never used one before. BTW my first loaf was amazing, the second I overproofed. Fingers crossed on this third one.
Thanks for the comment Gena. Kitchenaid says that you only need to knead dough for 2 minutes with their mixer. I will let the mixer need for 2 minutes then let the dough rest for 5 to 10 minutes before checking it. The rest time makes a big difference in the texture of the dough but if it doesn’t look smooth enough then let the mixer knead the dough for another 2 minutes. I don’t like to let the mixer knead dough for longer than 2-minute intervals because the motor starts to get warm.
Also…. keep it on the number 2 setting while you knead.