This post may contain affiliate links. Please read our disclosure policy. As an Amazon Associate, I earn from qualifying purchases.
Craving something sinfully delicious that won’t just sit pretty on your Pinterest board but actually tastes as good as it looks? Enter the chocolate cassata cake – your dessert ego’s answer to “Can you top this?”
With layers of rich, moist chocolate cake and a creamy, dreamy ricotta filling that scoffs at the mere thought of store-bought frosting, this is the cake that’ll have your taste buds throwing a standing ovation. Scroll down, grab your whisk, and let’s whip up a storm with a cake that’s unapologetically decadent.
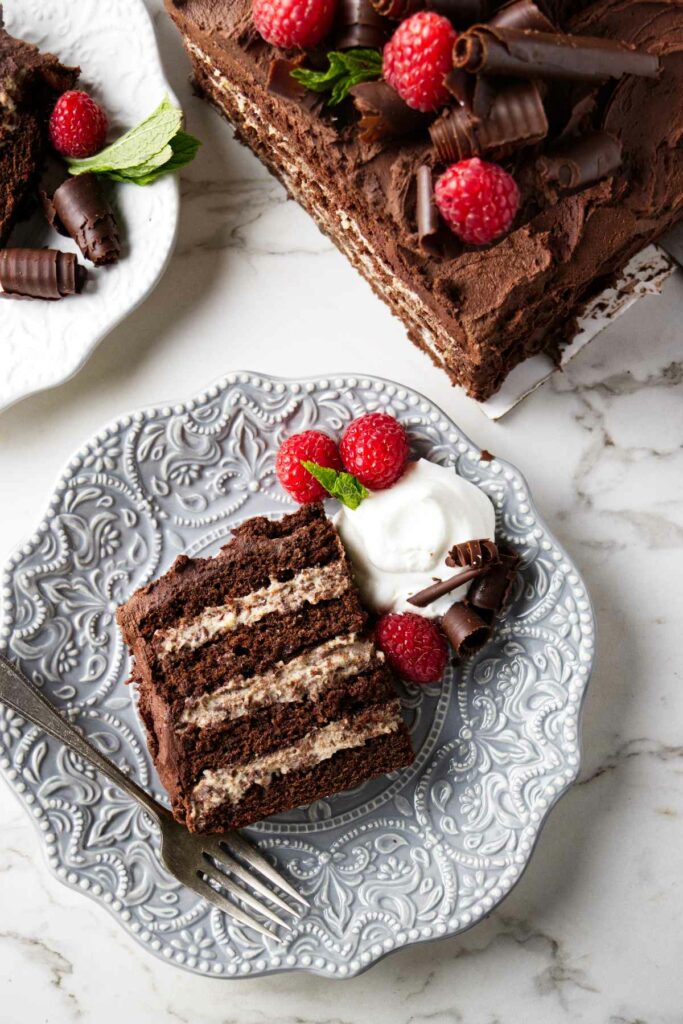
Here is Why This Chocolate Cassata Layer Cake Works
- Balance of Flavors: Cue our game-changer: a chocolate cake so rich it should be illegal, paired with ricotta that’s light yet daringly creamy. Forget bland; this duo’s jazzed up with orange zest and a hint of rum, crafting a flavor riot in every bite. It’s a sophisticated twist on our chocolate cake with cream cheese frosting.
- Texture Heaven: Just when you think you’ve hit peak indulgence, in come the chocolate chips, throwing in a crunchy twist that’s too tempting to resist.
- Visually Impressive: This cake is a feast for your eyes. Its layers are the envy of any dessert, with a stunning contrast of rich, dark cake against the creamy, dreamy filling.
For more decadent recipes, try our einkorn chocolate cake or chocolate Italian love cake.
Ingredients For Our Ricotta Filled Torte
Here is a list of the ingredients you will need for this recipe. Scroll down to the printable recipe card for all the details.
- Dry Ingredients: All-purpose flour, Dutch process cocoa powder, baking powder, espresso powder, powdered confectioners sugar, granulated sugar, salt.
- Dairy: Ricotta cheese, butter, heavy cream, milk.
- Flavor Enhancers: Vanilla extract, optional rum, optional candied orange rind.
- Produce: Orange (for the zest)
- Add-ins: Finely chopped chocolate or mini chocolate chips, optional candied orange rind or dried fruit.
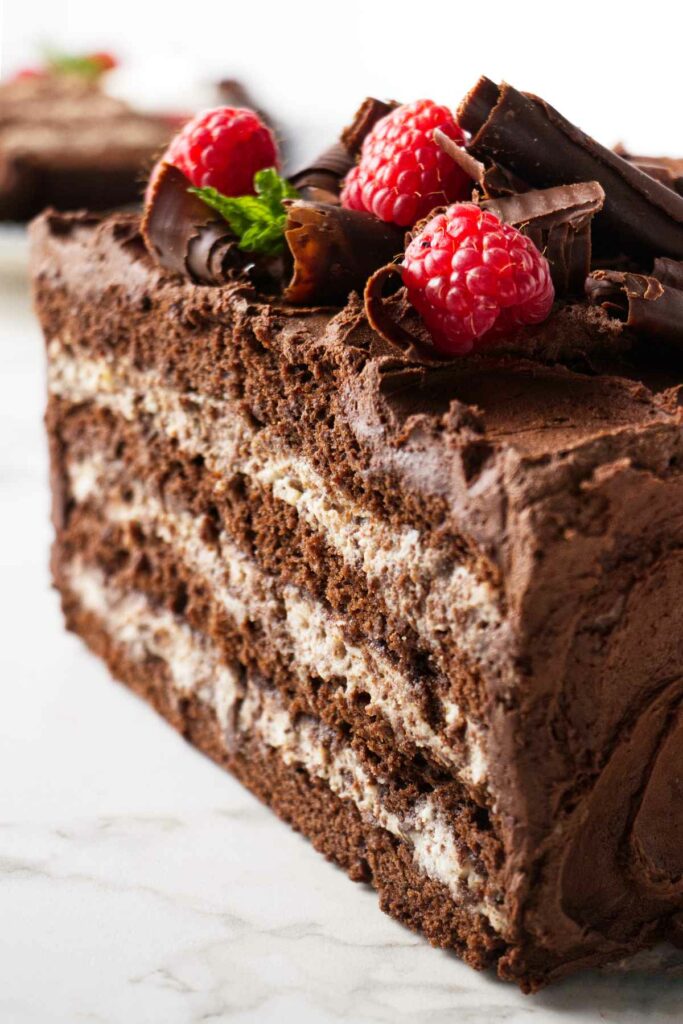
How to Make Our Chocolate Cassata
Here is a brief overview to get an idea of what to expect with the recipe. Scroll down to the printable recipe card for all the details.
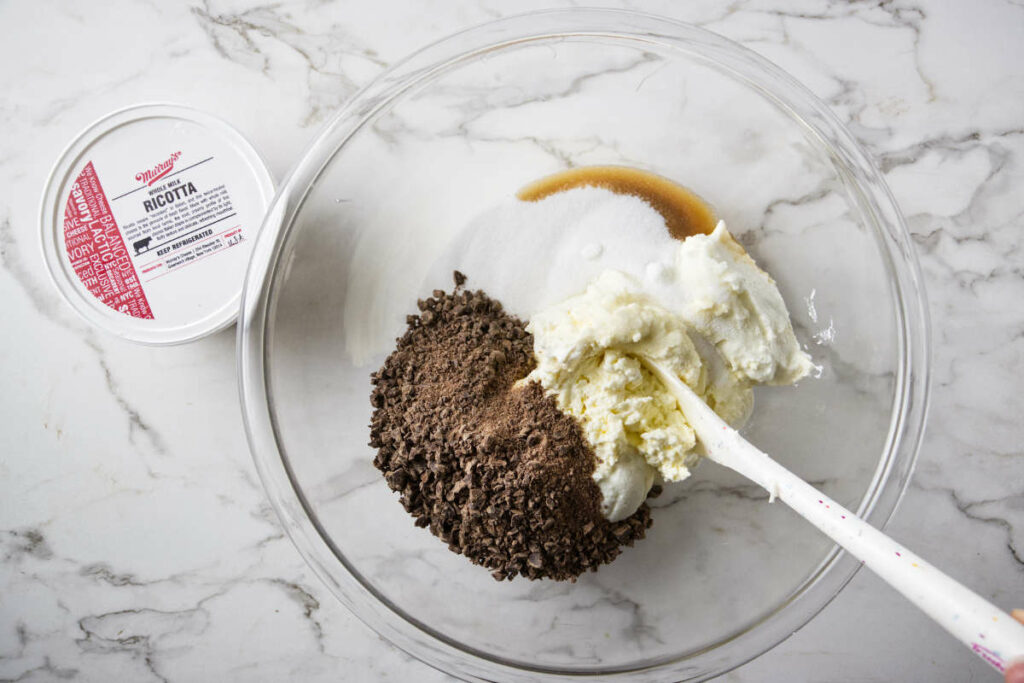
Make the ricotta filling and let it chill in the fridge while you make the cake.
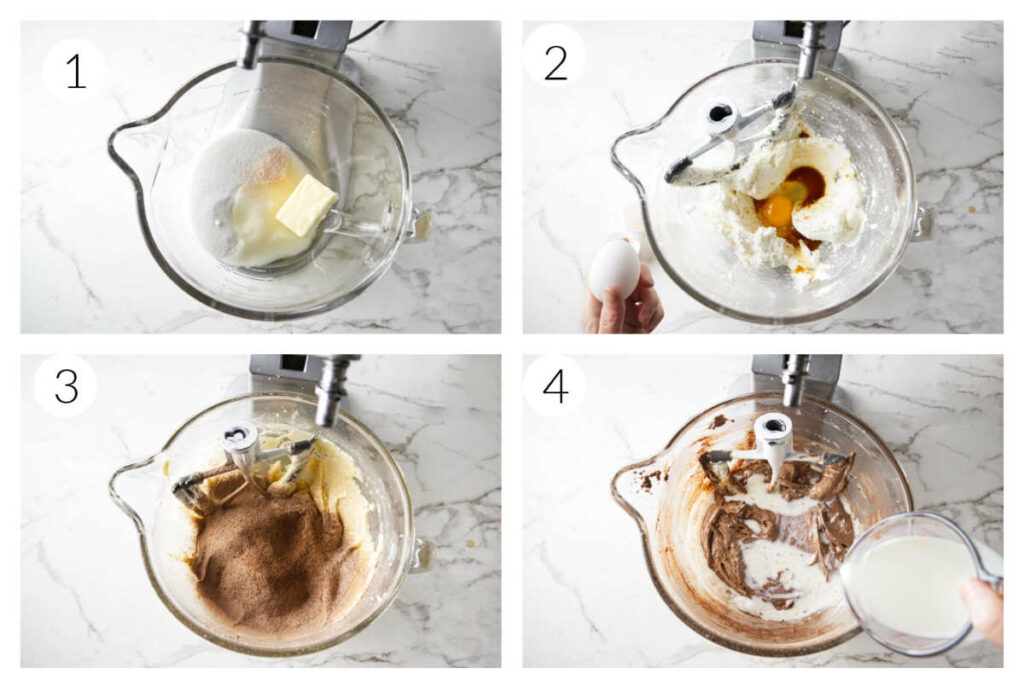
- Cream together the sugar, butter, oil, and vanilla.
- Add the eggs, one at a time.
- Mix in half of the dry ingredients.
- Add the milk then blend in the rest of the dry ingredients.
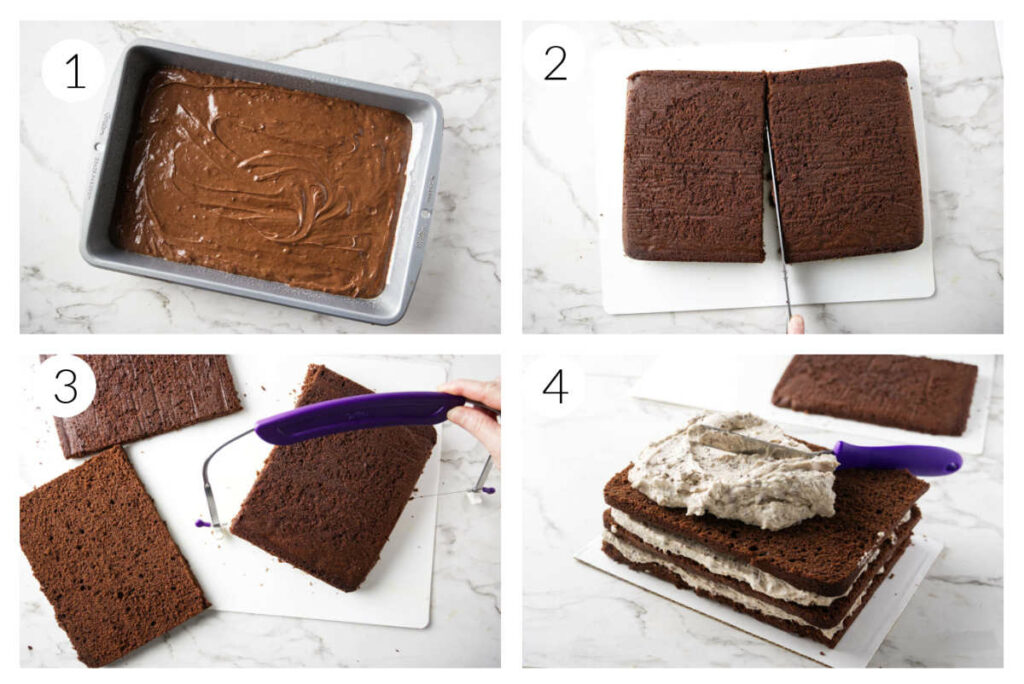
- Spread the batter in the cake pan and bake until a toothpick comes out clean.
- Slice the cake in half.
- Torte each half so you have four thin cake layers.
- Spread the ricotta filling between the layers.
- Make the frosting and cover the cake.
Variations for This Cassata Cake
- Fruit-Filled: Add layers of fresh raspberries or strawberries between the cake layers for a fruity twist.
- Mocha Infusion: Enhance the frosting with a shot of cooled espresso or coffee liqueur for a mocha flavor.
- Nutty Delight: Sprinkle crushed toasted hazelnuts or almonds between the layers for added crunch and flavor.
Tips for Success
Here are a few tips for this Italian cassata recipe.
- Ensure all ingredients, especially eggs and dairy, are at room temperature to achieve a smooth batter.
- If the ricotta is too watery, strain it before use to maintain the filling’s consistency.
- For even layers, use a serrated knife or cake leveler and keep the knife level as you cut.
Storage
Keep the cake stored in the refrigerator for 3-5 days. Allow it to come to room temperature before serving for the best flavor and texture.
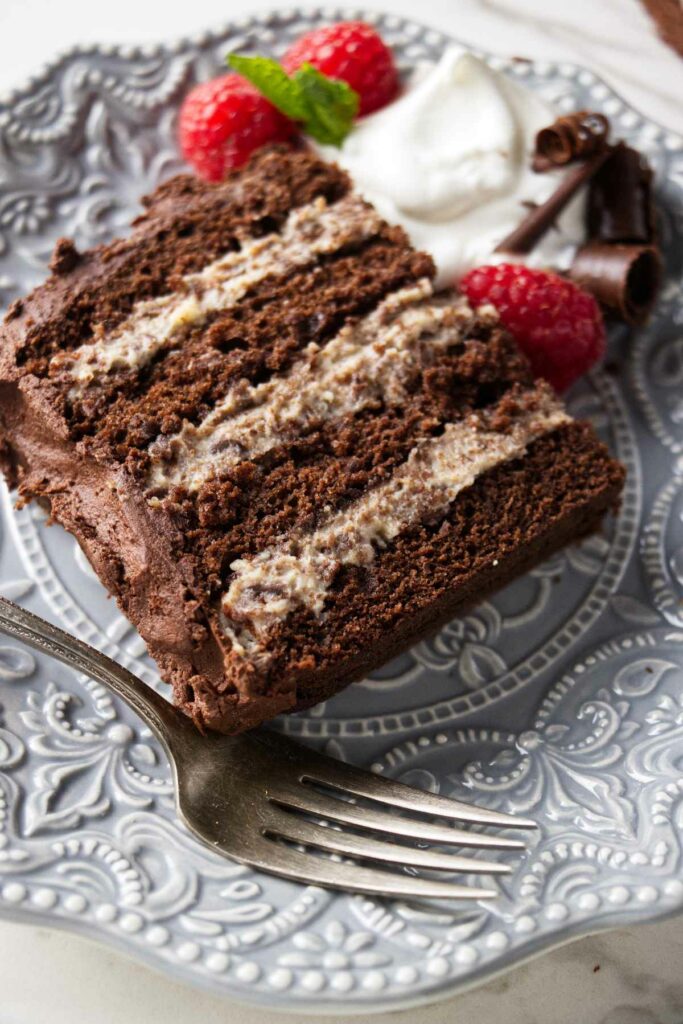
If you thought cake couldn’t get any better, think again. This ricotta cassata is here to school you in the art of dessert perfection. The ricotta filling? It’s not just along for the ride; it’s the co-star, delivering a performance that complements the chocolate cake so well, you’ll wonder if they’ve been secret besties behind your back. So, slice it up, dig in, and enjoy. Cheers to the unsung hero of cake fillings!
Pin this now to find it later!
Pin It
Chocolate Cassata Cake
If you make this recipe, please leave a star rating and comment.
Ingredients
For the Cake
- 1½ cups all-purpose flour, 180 grams
- ⅔ cup Dutch processed cocoa powder, 57 grams
- 1½ teaspoons baking powder
- 1 teaspoon espresso powder, optional
- 1⅔ cups granulated sugar, 333 grams
- ⅓ cup vegetable oil, 72 grams
- 4 tablespoons butter, softened, 57 grams
- 2 teaspoons vanilla extract
- ¾ teaspoon salt
- 3 large eggs, room temperature
- ¾ cup milk, 170 grams
For the Ricotta Filling
- 2 cups ricotta cheese, 450 grams
- ⅓ cup powdered sugar, 39 grams
- ¾ cup finely chopped chocolate , or mini chocolate chips 170 grams
- 1 tablespoon orange zest
- 2 teaspoons vanilla extract , or rum
- ⅓ cup candied orange rind , or dried fruit, Optional
For the Cocoa Frosting
- ½ cup heavy cream, 113 grams
- 1 cup unsweetened cocoa powder, 85 grams
- ½ teaspoon espresso powder, optional
- 8 tablespoons butter, 113 grams
- 1¾ cups powdered sugar, 200 grams
- ¼ teaspoon salt
- 1 teaspoon vanilla extract
Instructions
For the Cake
- Preheat the oven to 350°F. Grease and flour a 13 x 9 inch baking pan or line it with parchment paper.
- In a medium bowl, sift the flour, cocoa powder, baking powder, and espresso powder (if using). Set aside.
- Add the sugar, oil, butter, vanilla, and salt to a mixing bowl. Beat on medium speed for several minutes until creamed.
- Beat in the eggs one at a time and scrape down the bowl between additions.
- Add half of the flour mixture and beat until well combined. Add the milk, and beat on low speed until well incorporated. Blend in the remaining flour.
- Spread the batter into the 13 x 9 inch pan and bake for 22 to 28 minutes or until a toothpick comes out clean. Cool in the pan for 10 minutes then loosen the edges with a knife and invert the cake onto a cooling rack. Let it cool completely.
For the Ricotta Filling
- Combine all the ingredients for the ricotta filling in a mixing bowl. Cover the filling and refrigerate until you are ready to layer and fill the cake.
For the Frosting
- Heat the cream in the microwave or on the stove top until it comes to a simmer.
- Stir the cocoa and espresso powder into the hot cream. Stir until smooth then set aside.
- Place the butter in a mixing bowl and beat on high speed until smooth and creamy. Add the powdered sugar, salt, and vanilla. Beat on medium high speed until smooth.
- Reduce the mixer to medium low speed and add the cocoa mixture a spoonful at a time, mixing well between additions. Scrape down the sides of the bowl and beat for 1 to 2 minutes until fluffy. If you want a thinner consistency, drizzle in some cream until you get the desired consistency.
To Assemble the Cake
- Slice the cake in half widthwise so you have two smaller rectangular cakes.
- Using a cake leveler or a serrated knife, tort each cake by slicing them horizontally so you have four thin cake layers. If you use knife to do this, make sure to keep the knife parallel to the work surface to keep the layers even.
- Place one of the layers on a serving platter and spread it with ⅓ of the ricotta mixture. Repeat with the remaining layers of cake and ricotta filling.
- Cover the cake with the frosting.
Notes
- Bring the eggs and milk to room temperature before starting. This helps to create a smoother batter and improves the cake's texture.
- While optional, espresso powder enhances the chocolate flavor without making the cake taste like coffee. If you don’t have it on hand, you can omit it.
- Oven temperatures can vary, so start checking the cake a few minutes before the recommended baking time. A toothpick inserted into the center should come out clean.
- Ensure the cake is completely cool before assembling to prevent the fillings from melting.
- If your ricotta cheese is very wet, consider straining it before use. Excess moisture can affect the filling's consistency.
- This cake tastes best when served at room temperature. If refrigerated, let it sit out for a bit before serving to ensure the frosting softens and the flavors meld together.
- Store leftover cake in an airtight container in the refrigerator. It usually keeps well for 3 to 5 days.
Nutrition
Nutrition information is automatically calculated, so should only be used as an approximation.
 Like this recipe? Rate & comment below!
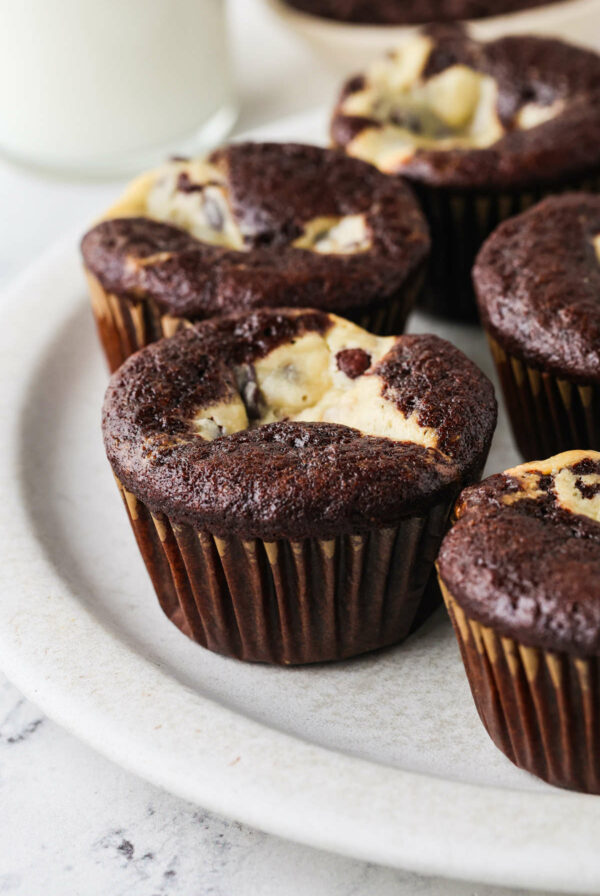


wow the chocolate layered cake looks really impressive!
Thanks Angie!