
This post may contain affiliate links. Please read our disclosure policy. As an Amazon Associate, I earn from qualifying purchases.
This old-fashioned blackberry pie keeps it simple with a flaky buttery crust and a generous blackberry filling that bakes up thick, juicy, and full of flavor. You can use homemade pastry or store-bought dough, whichever works best for you.
If you have extra blackberries, they combine well with other fruits. Try them in my blackberry peach pie, or my mixed berry pie.
Why This Blackberry Pie Recipe Works
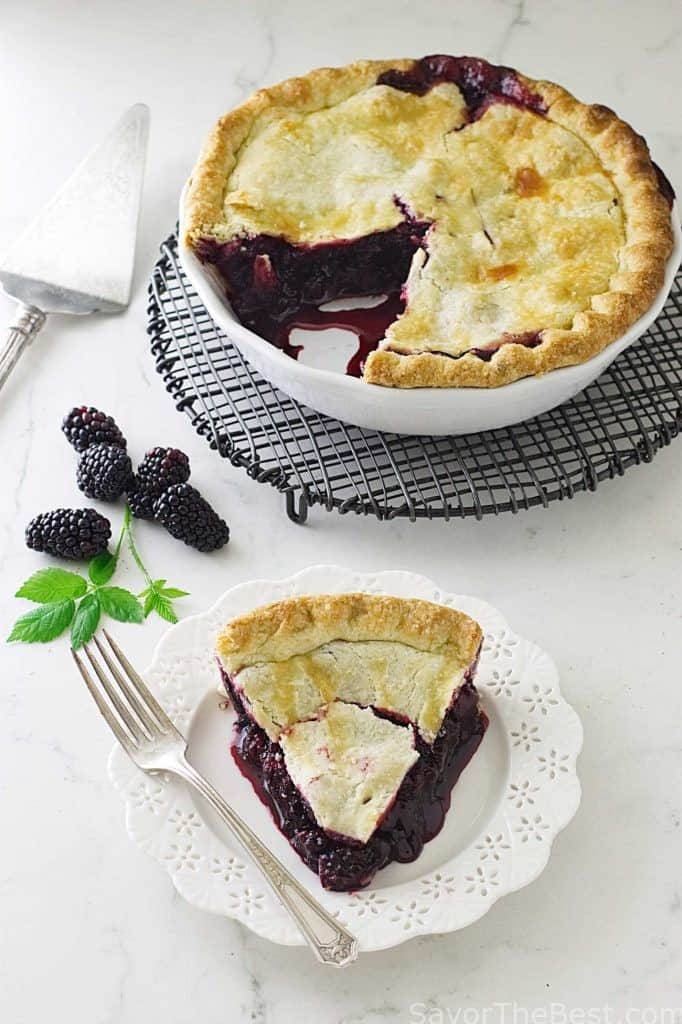
I wanted this pie to taste like real blackberries, not a sugary filling that could pass for any random berry pie. Using eight cups of fresh blackberries gives the filling enough fruit to cook down into something rich, bold, and true to the berries.
Blackberries throw off a lot of juice as they bake, so I used enough thickener to keep the filling thick enough to slice without turning gummy. This recipe works with either cornstarch or tapioca.
The sugar is kept in check on purpose. Blackberries already have a tart, deep flavor, and I didn’t want to bury that under too much sweetness.
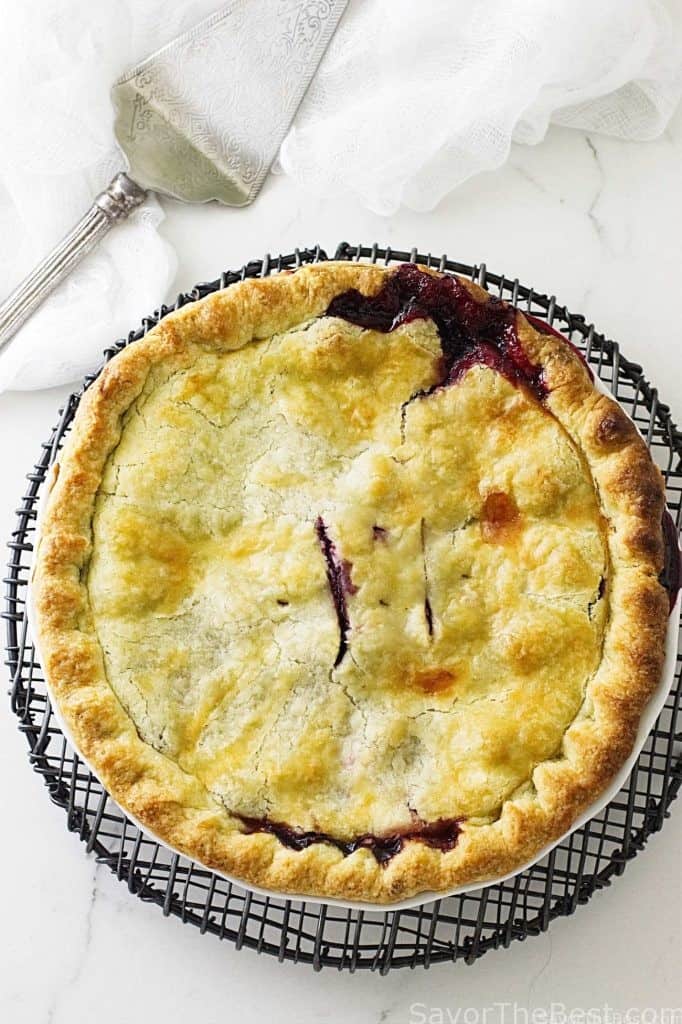
I also like the contrast between the flaky crust, the thick blackberry filling, and the sugared top. That mix of textures gives each slice a little bit of crunch, plenty of juicy fruit, and a crust that holds it all together.
For more blackberry recipes, check out my razzleberry pie, and my blackberry crumble.
Ingredient Notes
Pie crust: You can use a homemade crust or keep things simple with store-bought dough. I usually go with my all-butter pie crust, but a gluten-free pie crust works just as well.
Blackberries: Fresh blackberries give the best flavor and texture here. They break down just enough as they bake while still leaving some whole berries in the filling. If your berries are extra tart or extra sweet, you can adjust the sugar slightly.
Lemon juice: A small amount of lemon juice brightens the flavor of the berries without making the pie taste lemony.
Cornstarch or tapioca: This is what thickens the filling. Both work well, but they behave a little differently. Cornstarch gives a smooth, glossy filling, while tapioca creates a slightly more textured set and holds up better if you plan to freeze the pie.
Sugar: The sugar is kept at a level that balances the natural tartness of the blackberries without overpowering them.
Egg wash and coarse sugar: The egg wash helps the crust turn golden and glossy, and the coarse sugar adds a bit of crunch to the top.
Recipe Tips
Bake until the filling bubbles: You should see the juices bubbling through the vents before taking the pie out of the oven. If it isn’t bubbling, it isn’t done yet.
Give it time to cool: The filling needs time to set before you slice into it. Cut too soon, and it will be loose.
Add more bake time if needed: Some berries are juicier than others, so the pie may need an extra 15 to 20 minutes to fully thicken.
Toss the berries gently: Blackberries are delicate and break down fast. Stir just enough to coat them or you’ll end up with more mashed fruit than whole berries.
Use a deep-dish pie plate: This recipe makes a full pie. A standard plate can overflow, especially once the filling starts bubbling.
Bake on the lower rack first: Starting the pie in the lower third of the oven helps the bottom crust cook through instead of staying pale or soggy.
Don’t skip the drip protection: Place a baking sheet or foil underneath the pie. Blackberry filling has a habit of bubbling over and dripping on the bottom of the oven.
Grandma’s Blackberry Pie
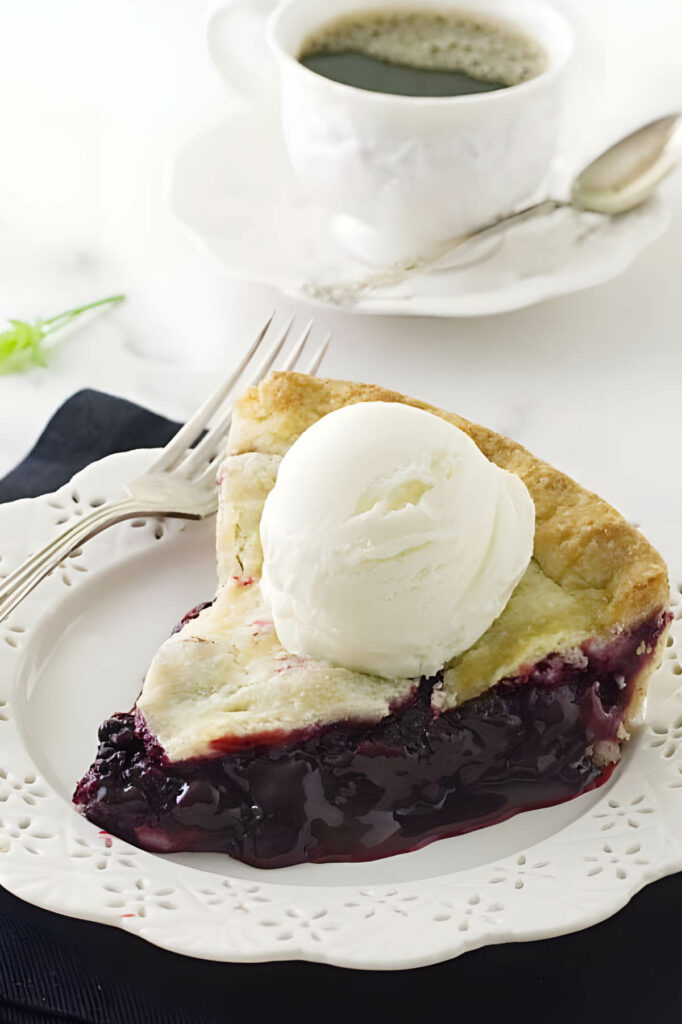
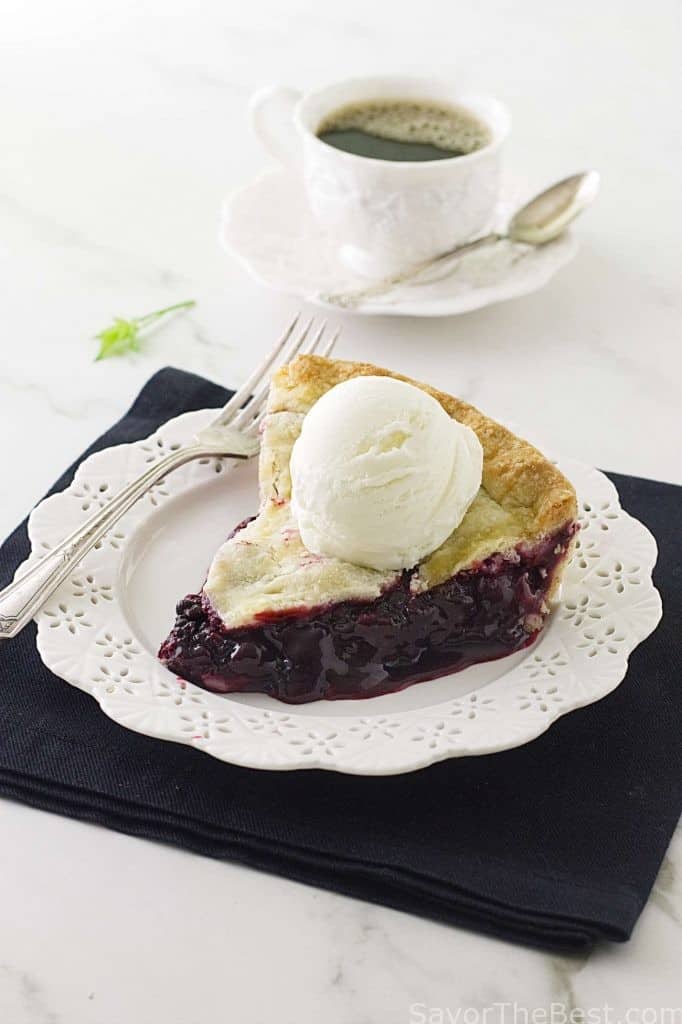
This old-fashioned blackberry pie is as classic as it gets, with a flaky crust and a rich blackberry filling that bakes up thick and full of flavor, just like something you’d expect from Grandma’s kitchen. Serve it warm with a scoop of homemade vanilla ice cream.
Pin this now to find it later!
Pin It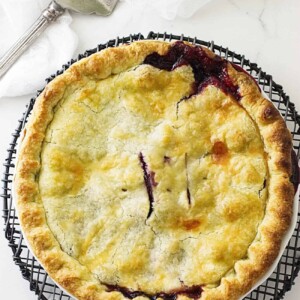
Old Fashioned Blackberry Pie
If you make this recipe, please leave a star rating and comment.
Ingredients
Pie Crust:
- 1 recipe for all-butter pie crust , or store-bought pie dough (or gluten free pie crust)
Blackberry Filling:
- 8 cups fresh blackberries, or frozen blackberries (see notes)
- 2 tablespoons fresh lemon juice
- ½ cup cornstarch, or instant tapioca
- ¼ teaspoon salt
- ¾ cup granulated sugar
- 1 tablespoon unsalted butter, cut into small chunks
- 1 large egg, mixed with 1 tablespoon water
- coarse sugar
Instructions
Prep the Pie Crust
- If you are making a homemade pie crust, make that first, so it has time to chill. Leave store-bought pie crusts in the fridge until you are ready to assemble the pie.
For the Blackberry Pie Filling:
- Place the blackberries in a large bowl and toss with the lemon juice. In a small bowl, mix together the cornstarch or tapioca, salt, and sugar. Sprinkle the mixture over the blackberries. Gently toss the berries to coat them in the thickener.** Set aside while you roll the pie crust.
Assemble the pie:
- Preheat the oven to 425°F Adjust the oven rack to the lower ⅓ position.
- Remove the chilled pastry from the refrigerator and roll the larger disk into a large circle about 13-inches in diameter. Use a bench scraper or firm flat spatula to turn the dough and work flour underneath as you roll it. Transfer the pastry to a 9-inch deep-dish pie plate with about 1-inch draped over the edge of the pie plate.
- Spoon the blackberries into the pie crust. Dot the top with the butter.
- Roll the second disk of pastry for the upper crust to a circle of 11-inches in diameter. Transfer to the top of the blackberries.
- Trim and pinch the crust with your fingers to seal the two edges together, fluting for a decorative edge.
- Brush the top of the pie with the egg wash, cut a few steam vents and sprinkle with sugar.
- Place the pie in the oven with a baking sheet or sheet of foil on the rack underneath to catch any drips.
- Bake the pie for 20 minutes. Reduce the temperature to 375°F. Transfer the pie to the middle position, and cover the crust edge with foil or pastry guard so it doesn’t brown too much. Bake for an additional 30-35 minutes or until the filling begins bubbling out of the pie vents. If you don't see the juices bubble, let the pie continue to bake. Occasionally, blackberry pies need an additional 15 to 20 minutes.
- Check the color of the crust occasionally and cover with foil if necessary to prevent over-browning.
- Transfer the pie to a cooling rack and cool at room temperature for 1 hour then refrigerate until cold before slicing.
- The filling in the pie will not set up until the pie is completely cool, so don't slice into the pie while it is warm.
Notes
Nutrition
Nutrition information is automatically calculated, so should only be used as an approximation.
 Like this recipe? Rate & comment below!
This recipe was originally published on September 15, 2017.


Great recipe and easy to make!
Thanks for the comment. I’m glad you enjoyed the recipe.
Great directions and tips. The pie came out great!
I’m glad you enjoyed it, thanks for the comment.
exactly what i was looking for…super delicious, easy to prepare and takes less time. Thanks for sharing 🙂
Hi, I am so happy this worked for you. It is delicious, isn’t it! 🙂
I’m going to be SO SAD when blackberries leave the grocery store! haha I don’t want the season to end! This pie looks incredible!
Thanks, Liz….you better get right on it, those berries won’t last long 🙂