This post may contain affiliate links. Please read our disclosure policy. As an Amazon Associate, I earn from qualifying purchases.

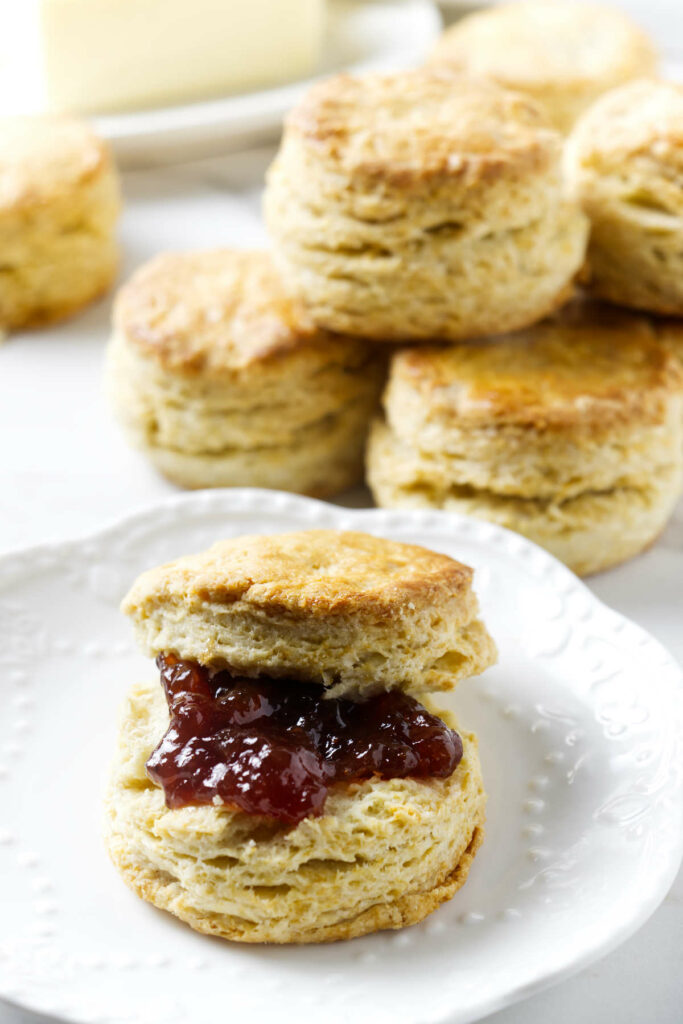
Sourdough discard biscuits with serious flake and rich, buttery flavor, no kneading required. You just mix, stack, and pat the dough into shape. They rise high with crisp tops and tender centers, using the same technique as our buttermilk biscuit recipe, but with a tangy sourdough twist.

Use this recipe for old fashioned biscuits and gravy.
Here’s Why This Flaky Sourdough Biscuit Recipe Works
Cold ingredients = flaky layers: Keeping the butter, discard, and cream cold means steam in the oven, which translates to tall, flaky biscuits.
Sourdough discard adds flavor: The tang from the discard deepens the flavor without making the biscuits overly sour or dense.
No kneading needed: A simple stacking method brings the dough together and builds layers, no tough kneading or folding required.
Flexible fat for topping: You can finish these with cream, butter, or an egg wash depending on what you have. Serve them with cheesy scrambled eggs or a dollop of strawberry jam.

For another way to use your sourdough discard, try my chocolate sourdough strawberry shortcakes.
Recipe Tips
Keep the butter cold: Chill your cubed butter in the fridge while you prep the dry ingredients. Cold butter gives you flaky biscuits.
Mix gently: Stir just until a shaggy dough forms. Don’t try to fully mix every dry bit. The stacking step pulls the dough together and builds layers without overworking it.
Stack to build layers: That cut-and-stack step mimics lamination. It’s what gives these biscuits their beautiful lift and texture.
Avoid twisting the cutter: Press straight down when cutting. Twisting seals the edges and keeps them from rising.
Bake until golden: Pull them when the tops are golden and the bottoms are lightly browned.
Skip the biscuit cutter: Use a sharp knife or bench scraper to cut the dough into squares. It’s the method we use in our sour cream biscuits recipe, and it saves you from reworking scraps that can toughen the dough.
If you enjoy these sourdough biscuits, you might also like our hearty barley biscuits for a different take.
Sourdough Discard Biscuits
These sourdough discard biscuits deliver flaky layers, rich flavor, and zero waste. They’re a perfect match for homemade sausage gravy, or just a smart way to put your starter discard to work. Tangy, tender, and simple to make, this is a biscuit worth keeping in the rotation.
Pin this now to find it later!
Pin It
Homemade Sourdough Biscuits
If you make this recipe, please leave a star rating and comment.
Ingredients
- 2 ⅔ cups all-purpose flour, or pastry flour, 320 grams
- 2 teaspoons granulated sugar, optional
- 2 teaspoons baking powder
- ¾ teaspoon baking soda
- 1 teaspoon salt
- 1 teaspoon ground black pepper, optional
- 12 tablespoons butter, cold and cubed, 170 grams
- ½ cup sourdough discard, cold, 120 grams
- ⅔ cup heavy cream, cold, 160 grams, plus more if needed
For the Top:
- 4 tablespoons heavy cream, melted butter, or an egg wash
Instructions
- Preheat your oven to 425°F. Line a baking sheet with parchment paper or a silicone mat.
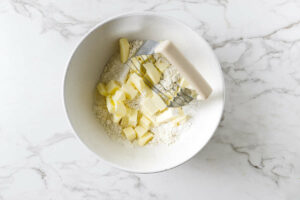
- In a large mixing bowl, whisk together the flour, sugar, baking powder, baking soda, salt, and pepper (if using).
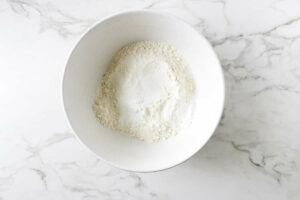
- Add the cold, cubed butter to the flour mixture. Use a pastry cutter or your fingertips to cut the butter in until the mixture looks like coarse crumbs with some larger pea-sized bits. Tip: Keep the butter cold for maximum flakiness. You can even set the butter in the freezer for a few minutes beforehand.
- In a small bowl or measuring cup, combine the cold sourdough discard and the cream. Pour into the flour mixture and gently stir with a fork or spatula until a shaggy dough forms.
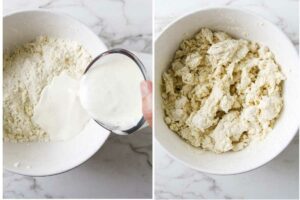
- Add more cream a tablespoon at a time if the dough feels too dry, or a bit of flour if it’s too wet. The dough should be soft and just barely hold together; not sticky like bread dough, and not bone-dry or sandy. It’s okay if a few dry bits remain, they’ll come together in the stacking step below without overworking the dough.
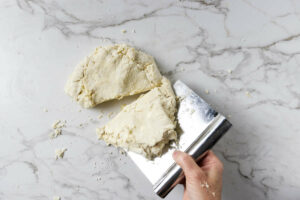
- Turn the dough out onto a lightly floured surface. Gently pat it into a rough rectangle and cut it in half. Stack one half on top of the other and press down gently to help the layers stick together. Repeat this cutting and stacking process 2 to 3 times. It helps the dough come together and creates flaky layers, without kneading or overworking it.
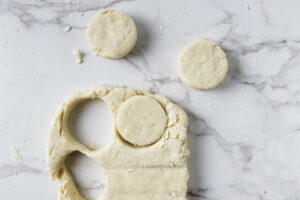
- Pat the dough out with your hands to about 1 inch thick. Flour a 2½ to 3-inch biscuit cutter and press straight down. Don’t twist, or you’ll seal the edges and limit the rise. Gently gather the scraps, press them back together, and cut additional biscuits, handling the dough as little as possible to keep it tender.
- Place the biscuits on the baking sheet. Place them close together for softer sides or space them 1 to 2 inches apart for crispier edges. Brush the tops with heavy cream, melted butter, or an egg wash.

- Bake for 17–22 minutes, or until the tops are golden and the sides look set. Let the biscuits cool on the pan for a few minutes before serving warm. They're best fresh but still tasty the next day if reheated gently.
Notes
Nutrition
Nutrition information is automatically calculated, so should only be used as an approximation.
 Like this recipe? Rate & comment below!