
Our pre-built meal planning template is set up for all seven days of the week, with spots for breakfast, lunch, and dinner each day. It’s a flexible, all-in-one layout that lets you plan as much or as little as you like.
Whether you want to fill in every single meal or just plug in dinners for a few nights, the template makes it easy to start planning right away.
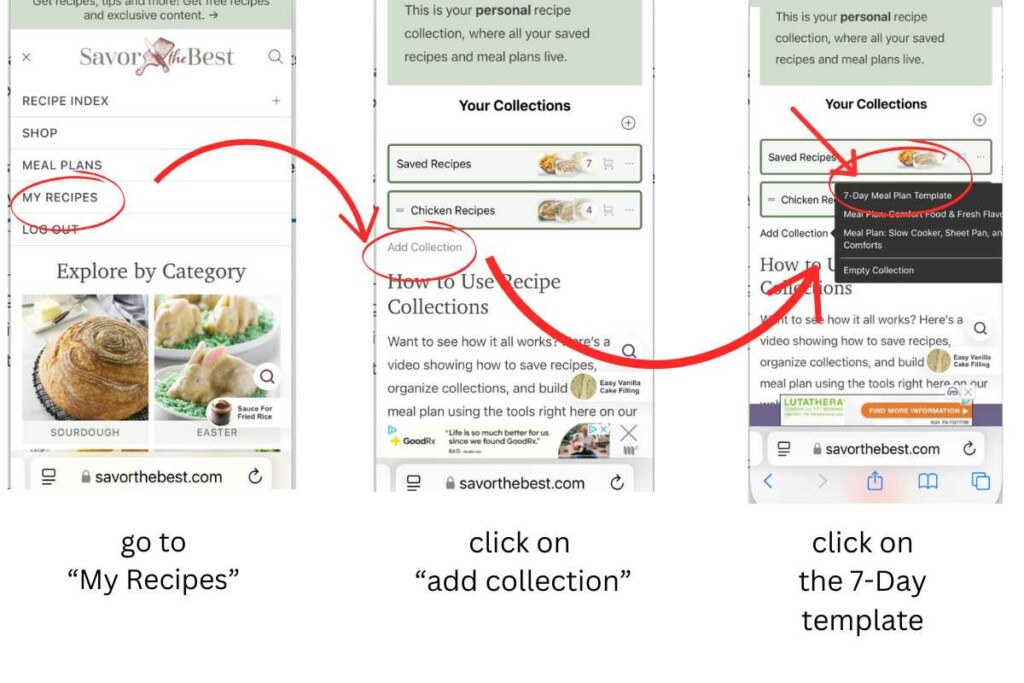
Step 1: Add the Template to Your Collection
- Go to My Recipes (the Recipe Collections page).
- Click “add collection”
- Select “7-Day Meal Plan Template”.
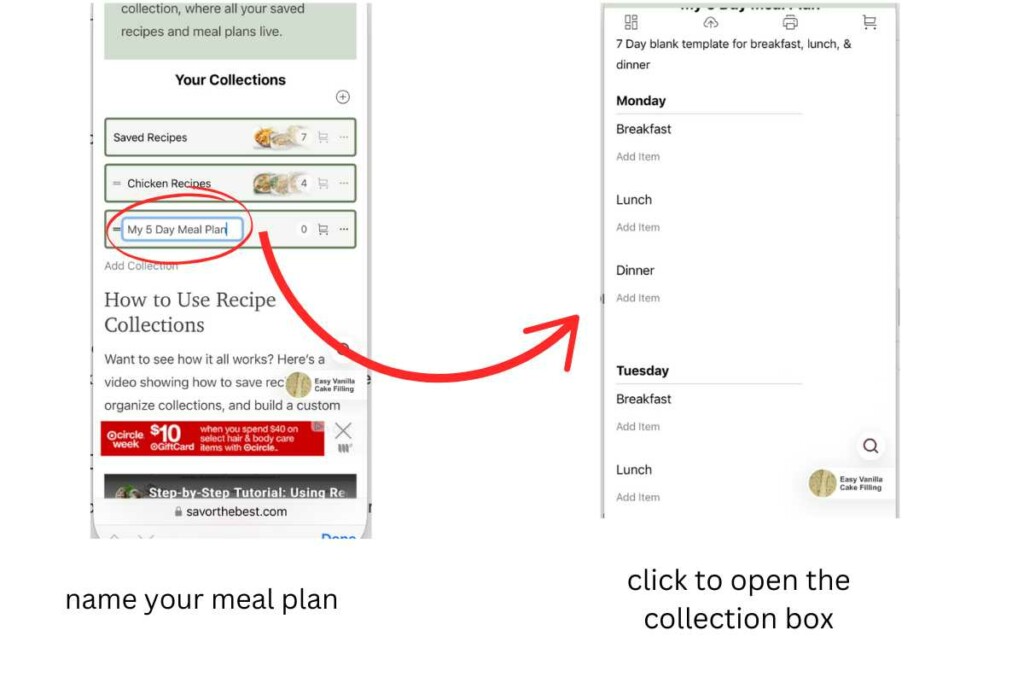
Step 2: Name and Open Your Meal Plan
Before opening the template, you’ll have the option to give your meal plan a custom name. This helps you stay organized and gives your plan a clear purpose.
In my example, I named the meal plan “My 5-Day Meal Plan” even though the template includes all 7 days. The layout is designed to give you room for every day of the week, but you can plan as few or as many meals as you’d like.
Once named, click to open the plan. You’ll see the full 7-day grid with space for:
- Breakfast
- Lunch
- Dinner
(for each day of the week)
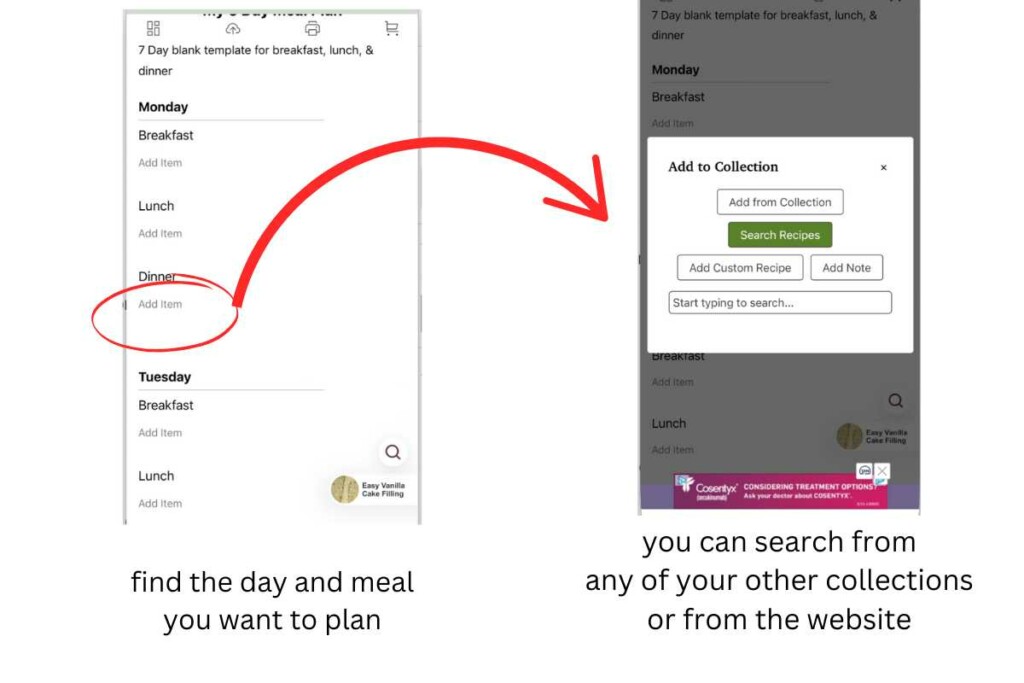
Step 3: Add Recipes to Your Plan
To add a recipe:
- Find the day and meal you want to plan (for example, Monday dinner).
- Click the “Add Item” button in that box.
- A window will pop up where you can either:
- Choose a recipe from your Saved Recipes
- Or use the Search bar to find a recipe from the site
You can add just one recipe to each box, or multiple if you’d like to include sides or desserts.
In our example, we’re planning only dinners from Monday through Friday. You can follow the same approach, skipping any days or meals you don’t need.
Reuse or Duplicate Your Plan
You can duplicate the blank template anytime to start a new plan, or make a copy of a completed plan and tweak it for another week.
Tip
Don’t feel like you have to plan all three meals every day. This template is flexible, use it however it works best for you.


