The Foolproof Way to Make Brown Butter
Learn the foolproof method to get that rich, golden, nutty flavor—without burning it. Browned butter adds deep, toasty flavor to sweet and savory dishes, and this step-by-step guide makes it easy to nail every time.
Servings: 8 tablespoons
Ingredients
- 8 tablespoons Unsalted butter or use any amount; just know it reduces slightly as it browns
Instructions
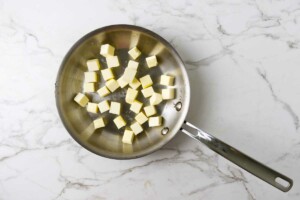
- Cut the butter into chunks and toss it into a light-colored skillet or saucepan. The smaller pieces will help it melt more evenly.
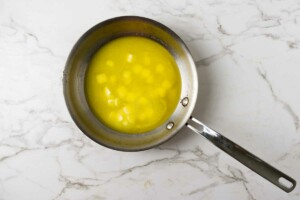
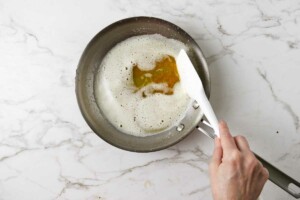
- Turn the heat to medium and let the butter melt completely, stirring occasionally to help it along. It’ll look pale yellow and glossy at this stage.
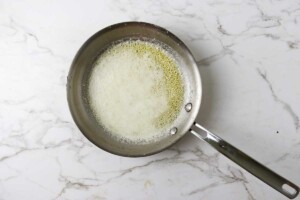
- Once the butter is melted, it will start to foam on top. This is normal, the water content is evaporating. Keep cooking and gently stirring.
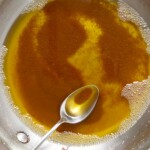
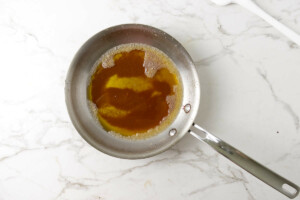
- The foam will begin to subside, and you’ll see little golden flecks forming at the bottom of the pan. That’s your brown butter magic happening. Stir constantly and don’t walk away, it can go from browned to burnt fast.
- As soon as the butter turns golden brown and smells nutty and toasty, remove it from the heat. Pour it into a heatproof bowl to stop the cooking process. Make sure to scrape in all the browned bits at the bottom. That’s where the flavor lives.
Notes
- Salted vs. unsalted: Stick with unsalted so you’re in control of the seasoning. Salted butter gets even saltier as it browns, since the water cooks off and the flavor concentrates.
- Measuring after browning: If your recipe needs a specific amount, brown a little extra and measure it after it browns since it reduces as it cooks.
- Using it in baking: Let it cool slightly before using it in recipes that call for softened or melted butter. If it’s hot, it can scramble eggs or mess with dough texture.
- Store in the fridge for up to 2 weeks, or freeze in an airtight container for up to 3 months.
- Reheat: Gently warm on the stove or in the microwave until just melted. No need to bring it to a boil, just loosen it up enough to use.
- Storing: I like to portion it into tablespoons in an ice cube tray so I can grab what I need.
Nutrition
Serving: 1tablespoon | Calories: 100kcal | Carbohydrates: 0.01g | Protein: 0.1g | Fat: 11g | Saturated Fat: 7g | Polyunsaturated Fat: 0.4g | Monounsaturated Fat: 3g | Trans Fat: 0.5g | Cholesterol: 30mg | Sodium: 2mg | Potassium: 3mg | Sugar: 0.01g | Vitamin A: 350IU | Calcium: 3mg | Iron: 0.003mg
