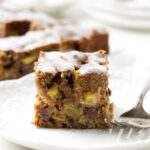
Apple Date Cake
Moist, spiced, and loaded with fruit, this apple date cake comes together with simmered dates, fresh apples, and a buttery brown sugar base. No purée needed; a quick simmer breaks the dates down into a caramel-like mix that melts into the batter. A simple powdered sugar glaze adds sweet contrast. Perfect as a coffee cake, brunch treat, or everyday snack.
Servings: 16 Servings
Ingredients
For the cake:
- 2 cups dates pitted and chopped, 280 grams
- 1 ½ cups apple juice or water, 360 grams
- 1 teaspoon baking soda
- 1 ¾ cups all-purpose flour 210 grams
- 1 teaspoon baking powder
- ½ teaspoon salt
- 1 teaspoon ground cinnamon
- ½ teaspoon ground nutmeg
- 12 tablespoons butter softened, ¾ cup; 170 grams
- ¾ cup brown sugar 150 grams
- 2 large eggs
- 2 teaspoons vanilla extract
- 2 to 3 apples peeled and diced, 2 ½ cups
Topping:
- ¾ cup powdered sugar 90 grams
- 1 ½ to 2 ½ tablespoons milk
- ½ teaspoon vanilla extract
Instructions
- Pre-heat the oven to 350°F. Grease a 9-inch square pan (or a 10-inch round pan) and line it with parchment paper.
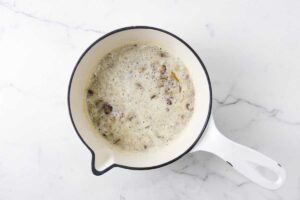
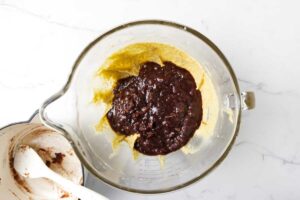
- Prep the dates: Place the chopped dates, apple juice (or water), and baking soda in a saucepan. The mixture will foam as the baking soda reacts and the dates begin to break down. Bring it to a boil, then turn off the heat and let it sit for 20 to 30 minutes to cool and fully soften.
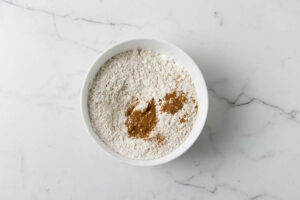
- Mix the dry ingredients: In a medium bowl, whisk together the flour, baking powder, salt, cinnamon, and nutmeg.
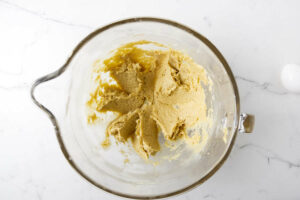
- Cream the butter and sugar: Beat the softened butter and brown sugar until creamy. Add the eggs one at a time, then mix in the vanilla.
- Add the date mixture: Pour the softened dates (along with all the liquid) into the batter and mix until combined.
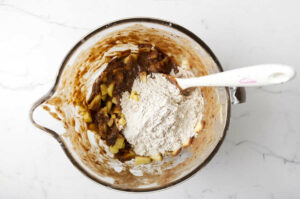
- Add the apples and dry ingredients: Stir in the apples then fold in the dry ingredients just until incorporated.
- Bake: Spread the batter into the pan and bake at 350°F for 40–48 minutes, or until a toothpick inserted in the center comes out clean.

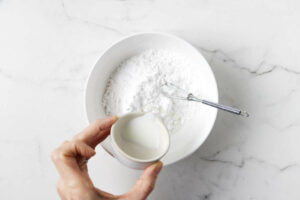
- Glaze the cake: In a small bowl, whisk together the powdered sugar, 1 tablespoon of milk, and the vanilla until smooth. Add additional milk until the glaze reaches a thick but pourable consistency.
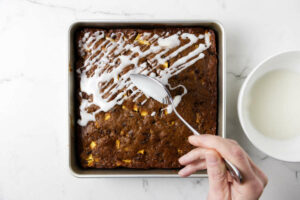
- Drizzle the glaze over the cooled cake, or use a spoon to spread it lightly over the top. Allow the glaze to set before slicing.
Notes
Use soft dates like Medjool for best texture; if they’re dry and firm, soak them longer in the hot liquid.
Let the date mixture cool completely before adding to the batter. This prevents scrambling the eggs.
Dice apples small (about ¼ inch) so they cook through.
Check doneness with a toothpick in the center; the edges will set faster.
Let the cake cool fully before glazing so the icing sets properly.
Nutrition
Serving: 1serving | Calories: 271kcal | Carbohydrates: 46g | Protein: 3g | Fat: 9g | Saturated Fat: 6g | Polyunsaturated Fat: 1g | Monounsaturated Fat: 2g | Trans Fat: 0.3g | Cholesterol: 43mg | Sodium: 248mg | Potassium: 210mg | Fiber: 3g | Sugar: 32g | Vitamin A: 308IU | Vitamin C: 1mg | Calcium: 44mg | Iron: 1mg
