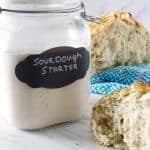
Wild Yeast Sourdough Starter
A sourdough starter is the first step to making authentic sourdough bread. Creating your own sourdough starter is easy, and with proper care, it can last for years. This recipe uses pineapple juice to help give the initial growth of wild yeast a headstart.
Servings: 1 cup of starter
Ingredients
- Flour see notes
- Unsweetened Pineapple Juice
- Non-Chlorinated Water
Instructions
Day 1
- 2 tablespoons flour (15 grams)
- 2 tablespoons pineapple juice (30 grams)
- Mix the flour and pineapple juice in a small jar or bowl. Stir the mixture 2 or 3 times throughout the day to mix air into it. Stirring the starter several times a day for the first few days will help get air to the yeast which will help the yeast grow better. Keep it covered with a paper towel or coffee filter. Keeping it covered loosely with a paper towel will allow the starter to breath in the yeast that is in the air but will prevent dust or possible flying critters from entering.
Day 2
- 2 tablespoons flour (15 grams)
- 2 tablespoons pineapple juice (30 grams)
- Add the flour and pineapple juice to the existing starter and give it a good stir.
- Stir the starter 2 or 3 times throughout the day to get it aerated. Keep the starter covered with a paper towel or coffee filter. You probably wont notice any activity at this point but have faith that the invisible microbes are doing their work.
- Day 3 (you wont need to discard any starter yet, just feed it, stir it, and wait)
- ¼ cup flour (30 grams)
- ¼ cup pineapple juice (60 grams)
- Add the flour and pineapple juice to the existing starter and give it a good stir. By this time you might be seeing a bit of activity in the form of bubbles. Starters in some kitchens might need a day or two (or three or four) longer before seeing activity. Don’t worry if yours isn’t active yet.
- Day 4 (by the 4th day you will start to discard part of your starter during the feeding)
- ¼ cup of the original starter (approx. 60 grams)
- ¼ cup water (60 grams)
- ½ cup flour (60 grams)
- Discard all but ¼ cup of the original starter and add the ¼ cup water and ½ cup flour. The process is much easier if you have a measuring scale but it works just fine if you only have measuring cups.
- At this point you will want to keep the starter in a quart jar or any container that holds at least 4 cups. This will give the starter room to rise without spilling out of the jar.
Day 5 and Day 6
- Continue the same feeding regimen as on day 4. It is likely that you will need to increase the feeding regimen twice a day but only if the starter is really active.
- If it doubles in size within 12 hours then feed it twice per day.
- If your starter doesn't seem to be doing anything by this point, don't worry. Sometimes it takes twice as long. It seems to vary from kitchen to kitchen and there are a lot of variables that can affect how rapidly the yeast grows.
Day 7
- If your starter has been doubling in size then it is ready to use in your baking.
- Take out the amount that is called for in your recipe and feed what is remaining in the container based on a 1:1:1 ratio, based on weight. (for example, 20 grams of starter: 20 grams of water: 20 grams of flour)
- Sometimes it may take another week (or even two additional weeks) of feeding so just be patient if it isn't making fast progress.
Storing and using your sourdough starter:
- If you will not be baking for a while then stick the sourdough starter in the fridge and feed it once per week at a 1:1:1 ratio. by dumping out all but about 1/4 cup of sourdough starter (about 60 grams) and feeding with 1/2 cup flour (60 gram) and 1/4 cup water (60 grams).
- Once you are ready to bake bread, take the starter out of the fridge 1 to 3 days before baking and feed it twice a day, giving it time to come out of hibernation.
- Do not seal the container with an airtight lid. If you have a screw-top lid, keep it loose so air can escape as gasses get released in the container.
Notes
- In some cases, it may take longer than 7 days to get your starter ready for baking. Don't worry if it takes longer, just keep feeding it the same regimen that is outlined for Day 4. If it seems to stop making any activity then it may be in a dormant stage. If that happens, let the starter sit for a day or two without feeding it but don't give up.
- For best results, we recommend starting with a whole grain flour for the first and second day. Whole grain flour has more nutrients and microorganisms than white flour and will give your starter an extra ‘boost’. If you start with white flour it will still work but might take a few days longer to see activity brewing in the starter. Just make sure you use UN-bleached flour (bleached flour is treated with chemicals that can retard the growth of your yeast).
- We also recommend using non-chlorinated water because chlorine can kill the wanted yeast and bacteria, thwarting your results.
- Do not store your starter at temperatures over 78°F or you could encourage bad bacteria to breed in the starter.
- Do not feed your starter pineapple juice or any other acid after the first three days. An established starter does not need the acidic environment and the extra acidity could kill the starter.
- The longer you keep your sourdough starter, the more flavor it will develop. Usually, after you have been maintaining it for a month or two you will notice a distinct difference in flavor so give it some time.
Nutrition
Serving: 1tablespoon of starter | Calories: 14kcal | Carbohydrates: 3g
