Yield: 4 Tarts
Cherry Tarts

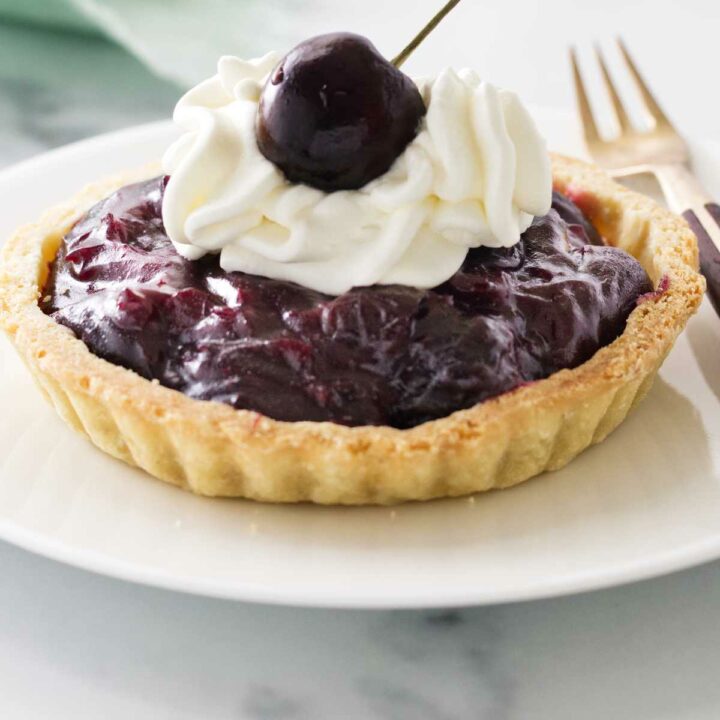
Our mini cherry tarts have flaky buttery pastry crusts then get filled with a sweet, dark cherry pie filling made with fresh or frozen cherries. Top the tarts with a dollop of whipped cream for an incredible dessert.
Prep Time
30 minutes
Cook Time
30 minutes
Additional Time
15 minutes
Total Time
1 hour 15 minutes
Ingredients
Pastry Crust: (or use store-bought)
- 1-½ cups all-purpose flour
- 10 tablespoons cold butter, cut into bits
- 1/2 teaspoon salt
- 1 egg yolk
- 4-6 tablespoons ice water
Cherry Filling:
- 2 packages (10 oz. each) frozen pitted cherries, thawed (or 5 cups fresh cherries, pitted)
- 1 cup granulated sugar
- ¼ cup cornstarch
- 2 tablespoons fresh lemon juice
- 1 teaspoon vanilla
- 1 teaspoon almond extract
- 2 tablespoons butter
- Whipped topping for garnish
Instructions
For the Pastry:
- In a food processor, add the flour, salt and butter. Pulse the mixture until small pebble-size pieces of butter are visible. Whisk the egg yolk and the cold water together and pulse quickly until the mixture just begins to come together in a ball.
- Transfer the mixture to a lightly floured surface and press into a ball with your hands. Do not knead the pastry dough. Flatten the ball into a smooth disk about 1-1/2 inches thick and wrap it in plastic wrap. Refrigerate for 20-30 minutes
Roll the Dough:
- Return the chilled disk to the flour-dusted work surface and roll lightly with a rolling pin. If necessary, lift the edges of the dough as you roll using a pastry scraper and re-dust with flour. Roll the dough into a large circle about 1/4-inch thick.
- Using a 6-inch ring mold or saucer, cut 6 pastry rounds and fit inside six, 4-inch mini tart pans (we only made four in the photos and piled the filling extra high). Dock the pastry shells with a fork, set the tarts on a baking sheet, and place them in the freezer for 15 minutes.
Heat the oven to 400°F.
- Remove the tarts from the freezer and line them with parchment paper then fill with pie weights or beans/rice. Transfer to the oven and bake the tart shells for 20 minutes, transfer from the oven and carefully remove the parchment paper and pie weights.
- Return the tart shells to the oven and bake an additional 12-15 minutes until golden brown. Transfer to a wire rack and allow to cool before filling.
For the Cherry Filling:
- Strain the juice from the thawed cherries through a mesh sieve set over a bowl. Measure the juice and add enough water to equal 1 cup.
- Tip the cherries, and the juice/water mixture into a medium saucepan set over medium heat and bring to a boil stirring occasionally and cook for 5 minutes.
- Combine the sugar with the cornstarch and stir into the hot cherry mixture. Cook, stirring frequently until the sugar dissolves and the mixture thickens. Remove from the heat and add the vanilla, almond extract and the butter. Stir to combine and the mixture becomes glossy.
- Once the tart crusts are completely cool, spoon the cherry filling equally, into the crusts and place on a wire rack to cool then transfer to the refrigerator.
- When ready to serve, top with a dollop of whipped cream and a fresh cherry if available.
Notes
- Option: Use your favorite single crust pastry recipe.
- For a faster version of the pastry crust use a pre-made, refrigerator roll-out crust.
- The pastry crusts can be made in advance and stored in an airtight container then filled the next day.
- Our 4 tarts have been generously filled with the cherry mixture. The cherry filling will fill six 4-inch tart pans to the top of the crust.
Nutrition Information:
Yield:
6Serving Size:
1Amount Per Serving: Calories: 411Total Fat: 24gSaturated Fat: 15gTrans Fat: 1gUnsaturated Fat: 7gCholesterol: 92mgSodium: 362mgCarbohydrates: 48gFiber: 0gSugar: 34gProtein: 2g
Nutrition information is a guideline only. It is calculated automatically by third-party software, and absolute accuracy is not guaranteed.